Updating Refund Resolutions
Overview
Refund resolutions control which refund options customers see in the Return Portal and how refunds are recorded from the RMA page.
Objectives
By the end of this guide, you will be able to:
Update refund resolutions in Settings > Resolutions.
Update bank refund fields customers complete in the Return Portal.
Verify refunds and recordkeeping from the RMA page.
Link resolutions to your return policy rules.
Prerequisites
Access to the Administrator dashboard with permission to edit Settings.
Updating Refunds to a Payment Method
Updating the Refund to Payment method refers to refunds made to the original payment method. Use this resolution to refund customers back to the payment method used for the order (for example, credit card or PayPal).
Navigate to Settings > Resolutions.
In Return Resolutions, click REFUND TO PAYMENT METHOD.
In the Details section, update the following:
Internal name
Display name
Description
Click the save icon.
Updating Refunds to a Bank Account
Updating the Refund to Bank Account feature is relevant to Cash on Delivery (COD) or off-platform payments. Use this resolution when you issue refunds outside of your platform (for example, COD refunds via bank transfer).
Navigate to Settings > Resolutions.
In Return Resolutions, click REFUND TO BANK (or create a new resolution).
Update the resolution details:
Edit the internal name (customers do not see this name).
Edit the display name (shown to customers in the Return Portal).
Edit the description (shown to customers in the Return Portal).
Do one of the following:
If you create a custom resolution, set Refund Type to Bank Refund.
If you do not create a custom resolution, continue to Step 5 below.
Click the save icon.
Verifying Bank Refund Works
In the Return Portal, confirm the refund option appears for the relevant orders, based on your policy rules.
In the Administrator dashboard, open an RMA and confirm you can view the customer’s bank details under Refund to Bank Account on the RMA page.
Transfer funds using the customer-provided details, then record the refund action from the RMA.
Updating Bank Refund Fields Shown in the Return Portal
Updating bank refund fields shown in the Return Portal refers to customizing which fields customers must complete when they request a bank refund.
Navigate to Settings > General.
Open the Refunds section.
Configure which fields appear in the Return Portal and whether each field is mandatory or optional.
Click the save icon.
Note
Your setup can include IBAN collection. Field labels can vary by store configuration. Confirm the exact field names in your dashboard.
Verifying and Documenting Refunds
From the RMA page you can record the refunded amount and complete the refund workflow in the Administrator dashboard.
Navigate to Returns & Exchanges.
Open the relevant RMA.
Review the customer’s bank details under Refund to Bank Account.
[Screenshot 9: RMA page showing “Refund to Bank Account” section with customer details]
Click REFUND/CREDIT to open the refund calculator.
[Screenshot 10: RMA page showing the “REFUND/CREDIT” button]
Click APPLY to apply the suggested refund amount.
Select the bank refund method (label can vary by configuration).
Click SUBMIT to record the refund action.
[Screenshot 11: Refund calculator showing method selection, APPLY, and SUBMIT]
Verification:
The RMA status shows Done in the RMA card header after you submit the refund action.
[Screenshot 12: RMA card header showing status “Done”]
Caption: Highlight the status location in the header.
Note
A refund action can be unavailable if there is no refund amount available. In that case, the refund button can appear disabled.
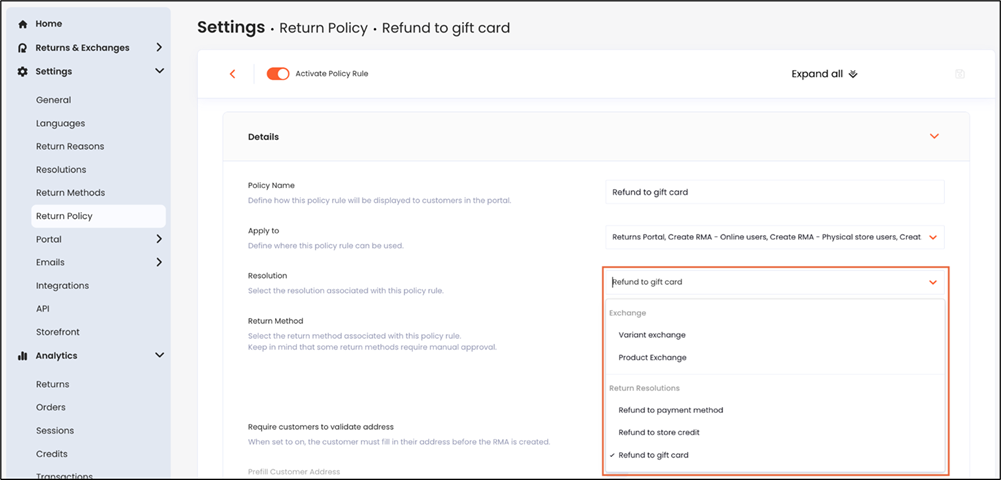
Linking Resolutions to Your Return Policy
After updating a resolution, verify that it is offered under the right conditions in your policy rules.
Navigate to Settings > Return Policy.
Update your policy rules to offer the relevant resolutions.
An example of the above is a bank refund for COD orders: