Creating Return Reasons
Overview
You can create return reasons to track why customers return items, spot patterns, and reduce future returns. You can customize which reasons customers see in the New Return Portal, and add follow-up questions to collect the details your team needs for validation and analysis.
The following video describes creating return reasons:
What You’ll Accomplish
Add, edit, and display return reasons in the Admin dashboard
Add follow-up questions (including mandatory questions and media requests)
Reorder reasons to control how they appear in the new return portal
Find return reasons on an RMA and analyze return reason trends in Analytics or exports
Requirements
Admin-level permissions in the admin dashboard (to manage return reasons and follow-up questions)
Prerequisites
Global-e recommends the following prerequisites:
Decide which reasons should be customer-facing (vs. internal-only).
Provide details (e.g., Damaged > request photo).
Keep reason names short and customer-friendly; use follow-up questions for specifics.
Adding Return Reasons
This procedure describes how to add return reasons.
To add return reasons
Navigate to Settings > Return Reasons.
Do one of the following:
Create a return reason - click ADD REASON.
Edit a return reason - click the pencil icon next to an existing reason to edit it.
Enable Display reason to make the reason visible to customers in the new return portal.
Edit the reason’s display name.
Set a return reason category.
Click the save icon in the top right hand corner of the page.
Adding Follow-up Questions to a Return Reason
Follow-up questions appear in the new return portal after a customer selects a return reason (for that item). They help you collect context for validation, analytics, and processing.
Click the edit icon corresponding to a return reason.
In the Return Reasons editor, click ADD QUESTION.
Click the pencil icon next to the follow-up question to configure it.
Toggle Display question so customers see it in the new return portal.
(Optional) Toggle Mandatory question to require an answer.
Edit the Internal name (for internal reference/reporting).
Choose an Answer type:
Free text
Media text
Multiple choice
Numerical stepper
Yes/No
Additional fields are displayed based on your Answer type selection. For example, if you select Multiple choice – select one, fields for optional answers are displayed on the page.
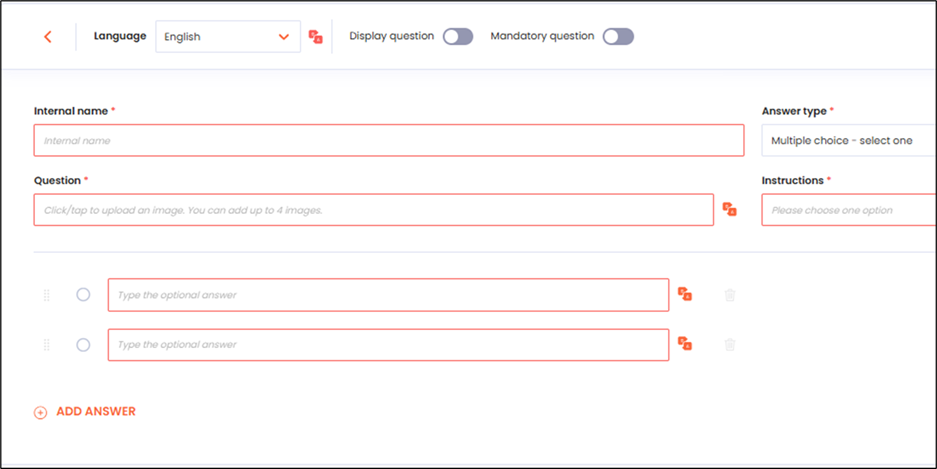
Enter or edit the customer-facing Question text.
Enter instructions in the Instructions field using the plus and minus buttons to set the quantity.
These numbers set what the Customer should provide.
Configure any additional settings required by the selected answer type, such as media type or multiple-choice options.
Note
The following limits apply to the Media Request:
Customers can upload up to four images or videos at a time
Supported image types: JPG, JPEG, PNG, HEIF
Click the save icon in the top right corner of the page.
Sorting Return Reasons and Questions
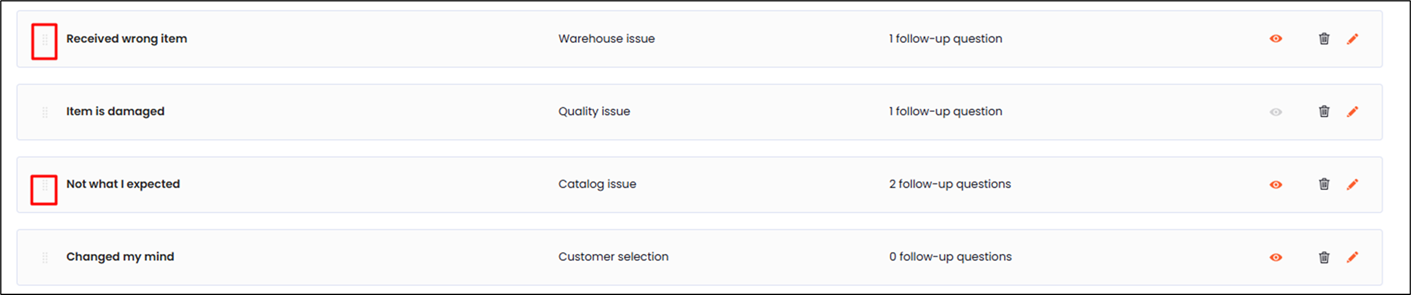
Sorting return reasons and questions lets you determine the order they are displayed in the portal.
To sort return reasons and questions
Navigate to Settings > Return Reasons.
Drag and drop return reasons into your preferred order.
Tip
Place the most common reasons near the top to reduce customer friction.
Verifying Created Returns
This procedure describes to customers using the New Returns Portal how to verify that their returns have been created and can be seen in the platform.
Verify the return in the New Returns Portal:
Start a return for an order in the new return portal.
Select an item to return.
Confirm the customer sees your enabled reasons (those with Display reason turned on).
Select a reason that has follow-up questions and confirm:
Questions appear after selecting the reason
Mandatory questions must be completed before continuing
Media requests allow uploads (and video uploads only if the add-on is enabled)

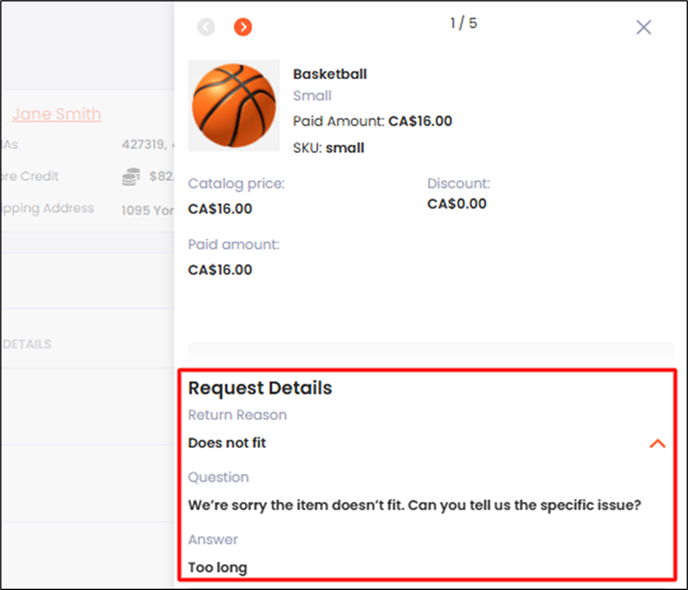
Verify on the RMA in the admin dashboard
Navigate to Manage Returns and open an RMA.
In the item Details area, check the Details section (right side) to see the selected return reason next to each returned item.
Troubleshooting Common Issues
This section describes how to troubleshoot some commonly occurring issues:
Question | Answer |
|---|---|
Reason doesn’t appear in the new return portal | Confirm Display reason is ON and you clicked the save icon. |
Follow-up question not showing | Confirm Display question is ON and saved. |
Customer can skip an answer you need. | Toggle Mandatory question ON. |
Customers can’t upload videos. | Video uploads require enabling the Video Upload add-on (images still work without it). |
Reason order in the portal isn’t what you expect. | Reorder reasons via drag-and-drop in Settings > Return Reasons. |
Frequently Asked Questions
The following table shows some common frequently asked questions and their answers:
Question | Answer |
|---|---|
What are the default return reasons? | The platform includes a built-in set of commonly used default return reasons you can use as-is or customize. |
How many return reasons can I add? | There is no limit. |
How many follow-up questions can I add per reason? | There is no limit. |
How do I change the order shown in the new return portal? | Reorder items in Settings > Return Reasons (drag-and-drop). The portal follows that order for reasons (and follow-up questions). |
What’s the upload limit for media requests? | Up to 4 files at a time, 140MB per file. Supported images: JPG, JPEG, PNG, HEIF. Videos require the Video Upload add-on. |
Do return reasons appear on order notes in Shopify? | Return reasons are included in the order’s notes once the item has been restocked, provided Restock by is set to Refund $0 and restock. |