Enforced Policy Eligibility Mode
Enforced Policy Eligibility mode requires you to select a policy rule when internally creating an RMA. When doing so you cannot select any combination of resolution, return method, etc., but are limited by set policy rules.
The system checks the order for eligibility, and when you create an RMA through the Dashboard you can choose from a list of eligible rules todetermine the return method, resolution, automations, fees, and more.
Evaluating Eligiblity
When you create an RMA from the Dashboard, the system evaluates eligibility in multiple stages.
When you open the order that you want to return in the Dashboard, the system checks the following:
Order-level eligibility rules
Customer-level eligibility rules
Item-level eligibility rules
After you select the return reason and the specific items, the system checks the following:
RMA-level eligibility rules
Remaining item-level eligibility rules
If the RMA does not meet the eligibility criteria at this stage, it will be marked as Out of Policy. The system performs a final eligibility check before you submit the RMA. If the selected combination of policy rules does not meet the required conditions, the system prevents the RMA from being created and displays the corresponding error message.
Creating an RMA in Enforced Policy Eligibility Mode
From your Returns Dashboard, navigate to the Manage Returns page.
Click CREATE RMA.
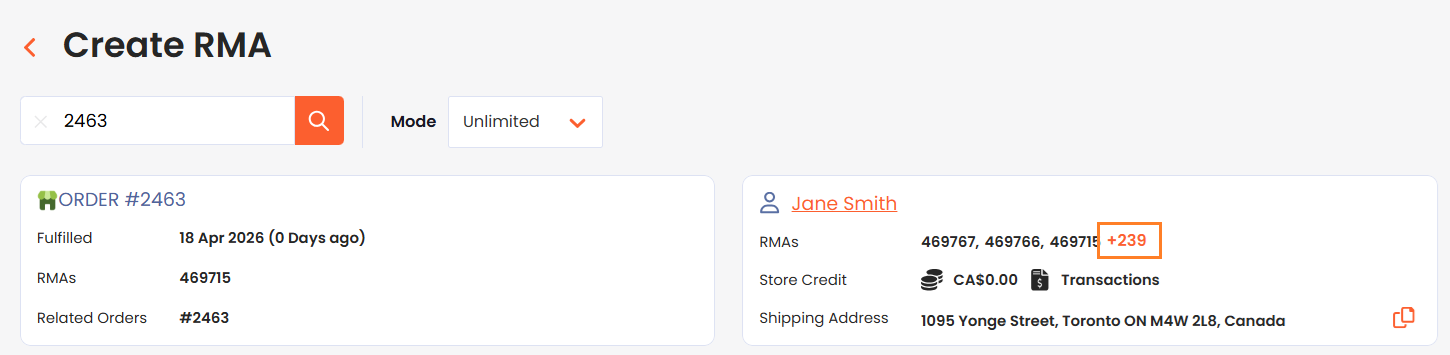
Search for the order by the order number.
At the top of the page, review all the order details and customer information.
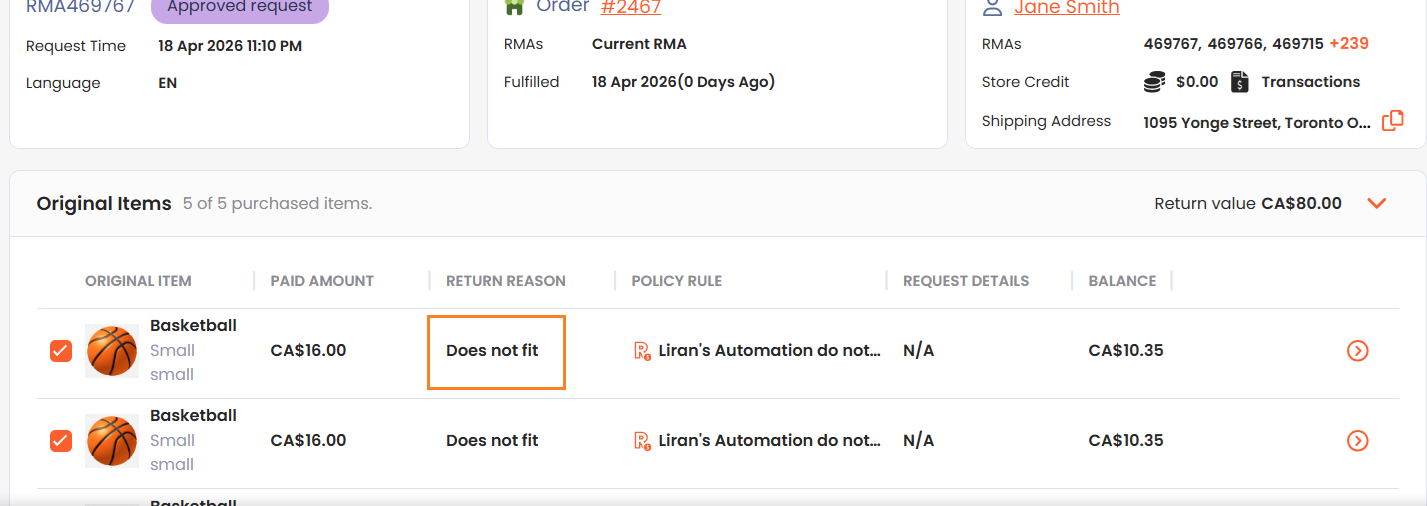
Select an item you want to add to the RMA by clicking on the plus (+) symbol:
In the ORIGINAL ITEM region, select the return reason:
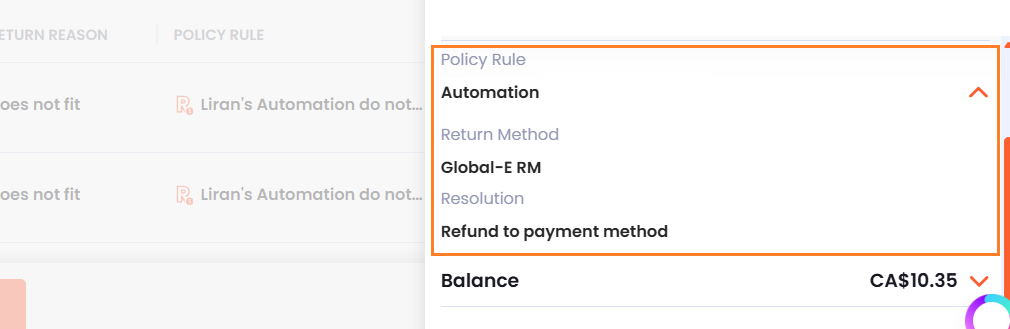
In the Policy Rule region, select the return method and resolution:
In the Add Items to RMA section, click the plus sign at the far-right end of the row corresponding to the item that you want to add to the RMA.
The Return Details section shows all the items added to the RMA. You can edit or remove them by clicking on the pencil and trash icons.
Note
Label fees are calculated only after an RMA is created.
Review the RMA summary showing the total refund amount, including any fees and adjustments.
Optional: Add an internal note that will appear on the RMA.
Choose whether to send automated customer emails:
Enabling Send Customer Emails sends emails as normal according to your email settings.
If you want to refund the customer on the spot, Global-e does not recommend sending the customer all the return emails, in which case you can disable the email. You can also always send specific emails later through the RMA page if you want to send a notification during a manual process.
Submit the RMA.
The RMA is created and you will be redirected to the relevant RMA, which includes an internal note identifying that it was manually created from the Dashboard. The Timeline section also shows which user created the RMA, and store location (if done from a physical store user).
Note
When creating an RMA internally using a custom policy, connected 3PL, WMS, or helpdesk will only be notified if the selected policy rule is set to notify the integrations.