Unlimited Mode
Unlimited mode lets you create RMAs unrestricted by policy rules. While this gives you full control, it can also be risky and must be handled responsibly.
Caution: Global-e recommends employees to receive proper training and clear instructions before creating RMAs through the Dashboard in this mode.
Creating RMAs in Unlimited mode is useful for issuing refunds outside of your normal return policy rules, or when you need to create multiple RMAs on behalf of your customers.
Common use cases include:
Issuing a return after the standard return window
Issuing a specific type of refund for normally ineligible items
Processing a return in-store
Handling an exception case by customer support
Returning items from an order that doesn't have customer information
This can be especially useful for customer support teams, return managers, and in-store staff.
Navigate to Manage Returns.
Click CREATE RMA.
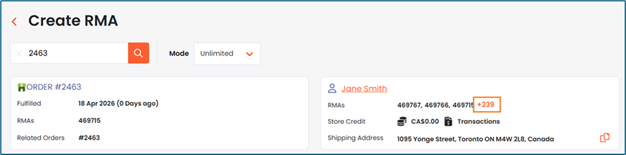
Search for an order using an order number.
At the top of the page, review all the order details and customer information.
Select an item you want to add to the RMA by clicking on the plus (+) symbol:
In the ORIGINAL ITEM region, select the return reason:
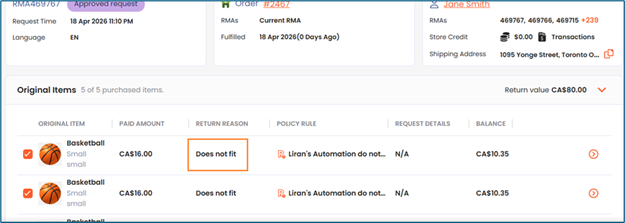
In the item panel that is displayed, answer follow-up questions in the Request Details region:

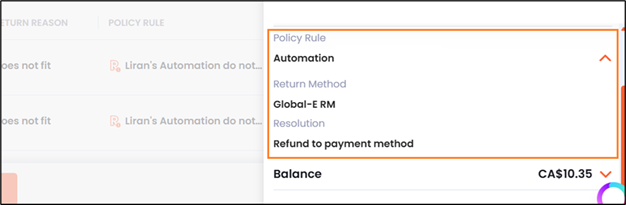
In the Policy Rule region, select the return method and resolution:
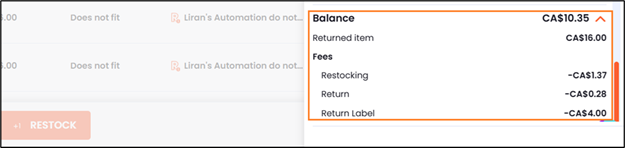
In the Balance region, add any relevant fees, and add any adjustments to manually give a reduced refund or add a bonus to the refund:
Note
Adjustments defined within a resolution will update this field when selected.
Click ADD to add the item to the RMA.
The Return Details section shows all the items added to the RMA. You can edit or remove them by clicking on the pencil and trash icons.
Under the Automations section, set your automations for this RMA.
Note
Global-e recommends setting default automations to remember setting one that that is commonly used, such as auto-refund. Review the RMA summary showing the total refund amount, including any fees and adjustments.
Optional: Add an internal note that will appear on the RMA.
Choose whether to send automated customer emails:
Enabling Send Customer Emails sends emails as normal according to your email settings.
If you want to refund the customer on the spot, Global-e does not recommend sending the customer all the return emails — in which case you can disable the email. You can also always send specific emails later through the RMA page if you want to send a notification during a manual process.
Submit the RMA as Pending or as Approved.
The RMA is created and you will be redirected to the relevant RMA, which includes an internal note identifying that it was manually created from the Dashboard. The Timeline section also shows which user created the RMA, and store location (if done from a physical store user).
Note
When an RMA is created manually in Unlimited mode using a unique combination of resolution, return method, and return reason, its policy rule will appear as Custom Policy Rule.