
The ShipStation page describes the following:

Overview

ShipStation is an all-in-one platform that streamlines your warehouse, inventory and shipping workflows. The ShipStation and Global-e Integration helps merchants with the fulfilment and shipping of Global-e orders. This article will explain how the integration works, who can use it, setup steps, and common questions.

How it Works

ShipStation has built an integration using Global-e API’s that enable users to easily print all shipping documents required for an order. It also allows users to mark orders as fulfilled and dispatched within Global-e’s platform.

Setting Up ShipStation

Merchants wanting to take advantage of the ShipStation and Global-e integration must have an existing Global-e account. Please talk to the Global-e sales team if you would like to setup an account. Pre-requisites
  1. Orders are imported into ShipStation directly using the ShipStation native app installed in your Shopify instance. This is the standard route. If you import orders from the Cin7 ERP or through middleware, see Third Party Systems.
  2. Express service orders via Global-e, shipping them directly from your warehouse or store to customers. No crossdock via Global-e hub involved.
Global-e Configuration Label format for shipping labels is configured as PDF. The Shopify order number is used as the order identifier and the SKU is used as the product identifier. Printer Requirements Global-e international orders require two printers:
  • Label printer (4x6 labels)
  • Laser printer Commercial invoices (8.5x11 / A4) - only for orders/markets that do not support electronic invoices
Setting Up a Global-e Carrier To set up a Global-e carrier:
  1. Navigate to your ShipStation account (Shipping > Carriers).
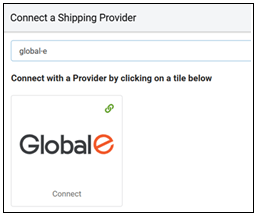
  2. Add a Carrier Account and search for Global-e:
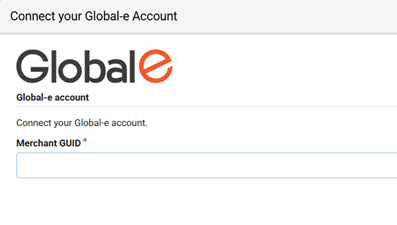
  3. Enter a production Merchant GUID in the window:
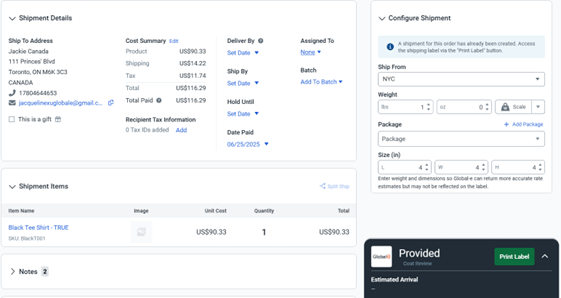
Processing Orders Once configured as described above, Global-e orders are automatically assigned to the Global-e carrier service. No additional service or package selection is required, and labels can be printed directly using the Print Label button.
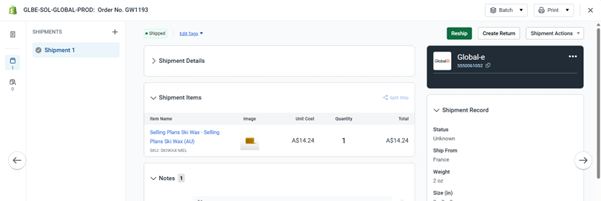
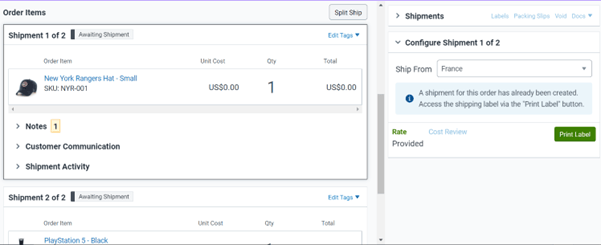
When an order is processed, the Shipments tab shows the order associated with a Global-e service:
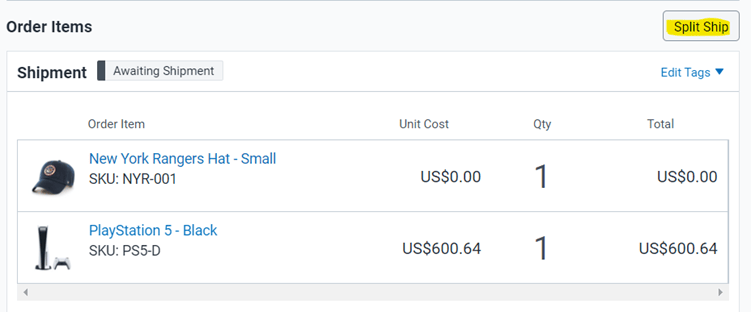
Creating Split Parcels in ShipStation Creating a split parcel via ShipStation is a simple process. When you view an order in a ShipStation environment that has multiple items, the Split Ship button is displayed:
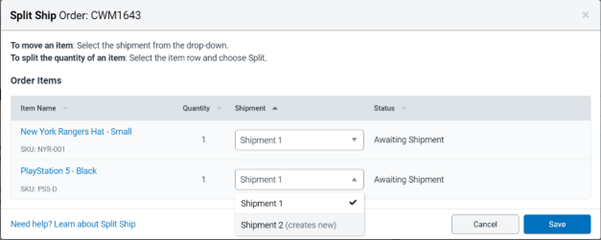
Then you can select a shipment to associate the item with:
When the new shipment is created, they are displayed on the original order screen. At this point you can print the labels for each shipment when ready. The Print Label button in the right side of the screen is enabled, indicating that a shipment is selected. The title of this section (Configure Shipment 1 of 2, for example), increases in number corresponding to the amount of shipments you select:
In the case of this split shipment example, two parcels would be created in the Global-e Admin portal. Shipping Documents The general rule for shipping documents is that you must print all documents provided through the Global-e service. In most cases, shipping and customs documentation is generated electronically and no printing is required. However, depending on the carrier and destination, certain documents, such as shipping labels or commercial invoices, may need to be printed. The following table describes the supported document types and their purpose.
Document TypePurpose
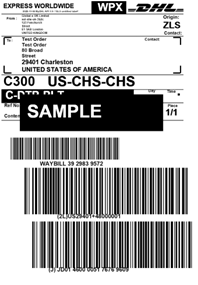
Final mile shipping labelCarrier final mile label. In the illustration here this is DHL Express. Note: for DHL Express, the “PLT” indication on the label means paperless-trade, in other words the commercial invoice for this shipment is electronic and no customs form is needed to print.
Global-e Commercial Invoice / Customs DocumentFor most orders (at least 95%) it is electronically generated and there is nothing needed to print. However, the carrier may require a physical paperwork for your order/destination, in this case ShipStation will generate the Commercial Invoice to print. Two copies are provided for in such case and are required by carriers, one affixed to the box, and one handed to the carrier driver at pickup.
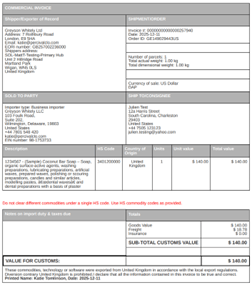
The Global-e Commercial Invoice is also reachable in ShipStation via Print > Customs Form. Verifying an Order is Marked as Fulfilled in Shopify You must check your order in Shopify to ensure that it has been fulfilled by ShipStation, and the shipment confirmation email was triggered from Shopify. This can be found in the Shopify order timeline. Processing the End of Day Manifest Global-e requires merchants to generate an End of Day (EOD) manifest once per day before the carrier collects the outgoing shipments. The EOD manifest is not processed from within ShipStation: log in to the Global-e Admin portal and process the EOD action there. See EOD Manifest. Configurations The following table shows the configurations:

Third Party Systems

For merchants using the ERP Cin7, ShipStation includes a built-in connector for importing order data from Cin7. When importing orders into ShipStation, merchants can map the Global-e carrier to a shipping service within Cin7. In the screenshot below, ‘Express Courier (Air)’ is mapped to the shipping service ‘Global-e Package’. This mapping is used to identify Global-e orders within ShipStation.
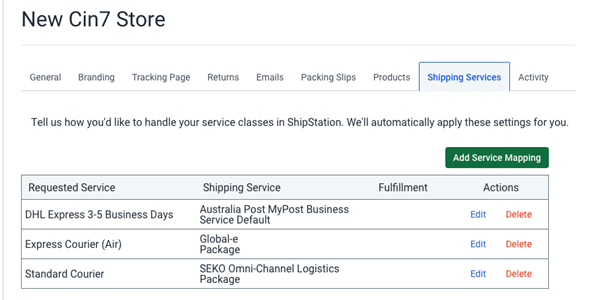
For merchants using a middleware solution, the ShipStation to Global-e connector can still be reused. However, orders will be imported from Shopify into ShipStation as a custom store integration rather than through the native Shopify integration.

Frequently Asked Questions

Where can I get my Merchant GUID to connect to Global-e? All Global-e merchants are given a unique ID which identifies them on our system. Once you setup an account with Global-e, your dedicated Customer Service Manager (CSM) will send you your Merchant GUID. Please reach out to your CSM if you have an account but don’t know your GUID. I would like to print my labels in ZPL format? We will need to configure your account in our system in order to print labels in ZPL format. Please reach out to your Customer Service Manager in order to set this up.