Configuration
Configure Global‑e
This is the only section that you are required to configure on the Configure screen. All other sections are optional.

In the Global‑e API Settings area:
Enable JS/CSS Include: Select Yes to enable price conversion.
Enter your Merchant ID (provided to you by Global‑e).
Enter your Merchant GUID (provided to you by Global‑e). Note that the GUID is not the same for staging and production environments.
Select the suitable Global‑e environment.
Click Save.
The Configure screen also features the following Global‑e settings. These settings are available depending on your configuration. Refer to your Account Manager for more information.
Installed Global‑e Functionality
After the installation, the following functionality is installed.
Scripts
The following Global‑e scripts are installed.
Global‑e CSS Include
Global‑e Include JavaScript code installed on all site pages as well as on the Checkout Page.
Global-e Orders
View Orders
To view Global-e Orders:
From the PrestaShop Admin left menu, select Orders.
The Orders screen opens, showing the lists of Merchant orders, including Global orders.
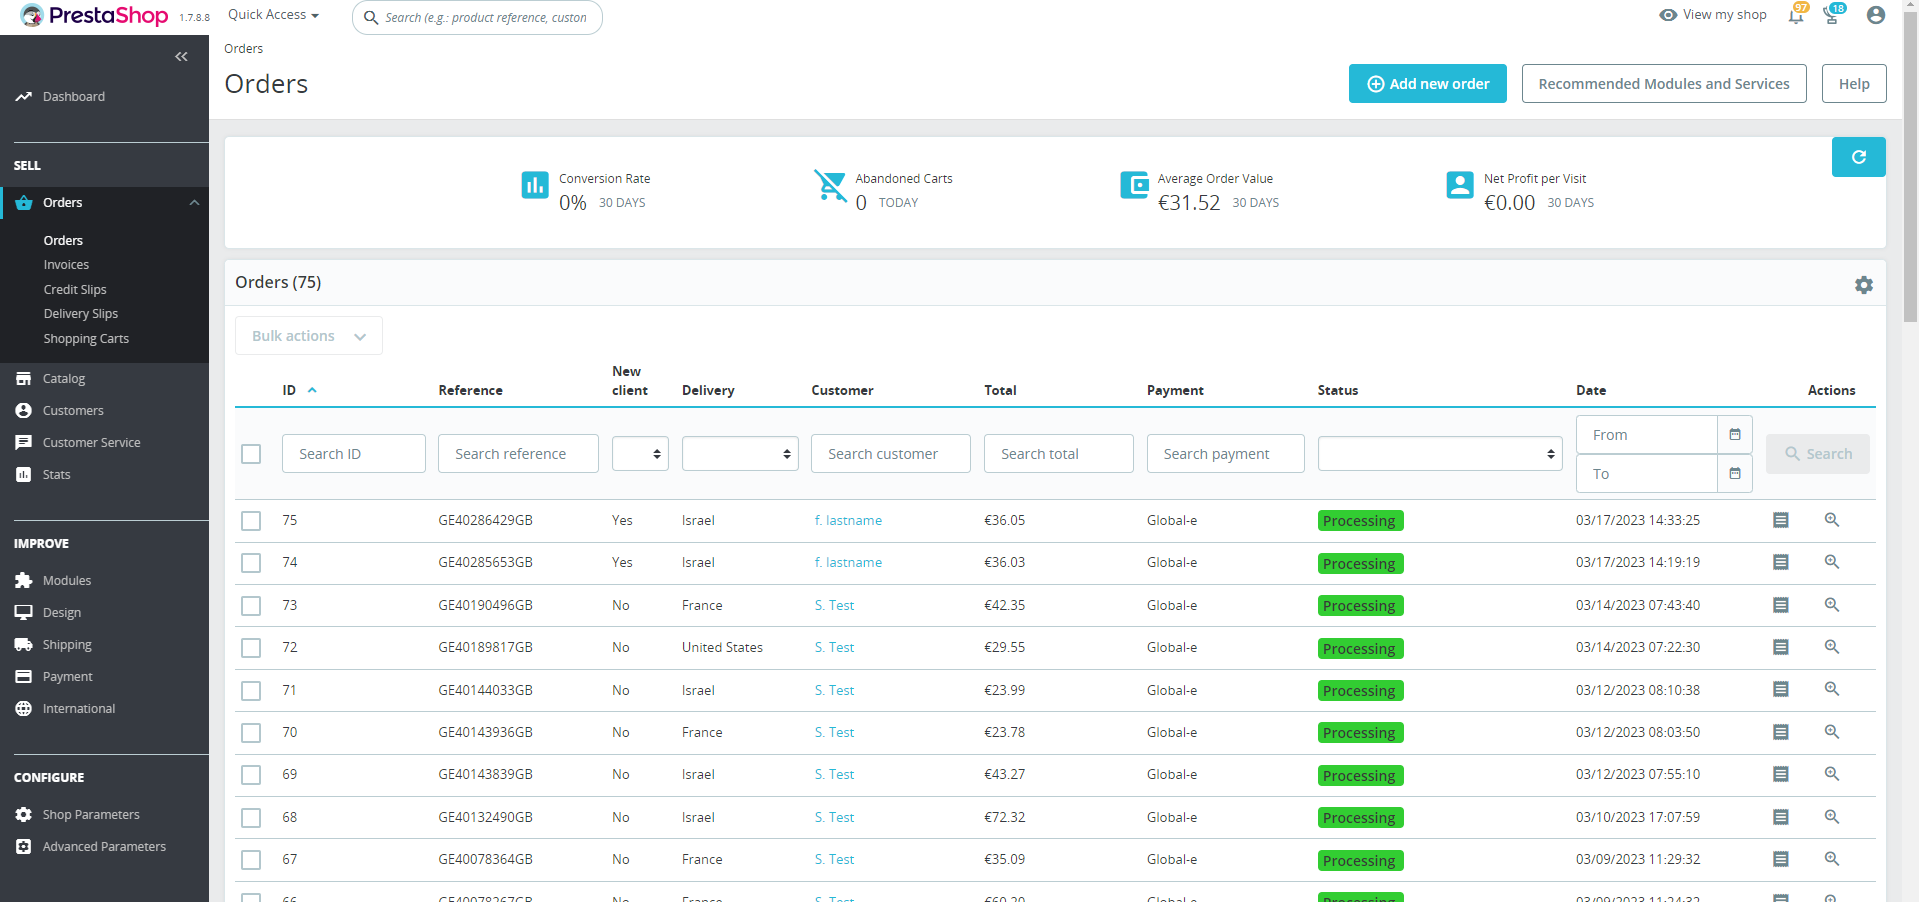 |
Global‑e orders are saved in the native PrestaShop Orders structure. The Global‑e order number is displayed in the Reference column.
The Payment column shows that the order was placed by Global-e and the payment is done through Global-e.
The Status column shows the Global-e order status.
The Total column shows the reconciliation price in Merchant currency.
Order Details
This section details the Order Details screen areas that apply to Global-e.
To view all order details:
In the Orders screen, select an order.
The order row expands.
Click Order details.
The details of the order are displayed.
Note
The following order screen sections apply to the PrestaShop Native functionality. To configure these features, use the Global‑e Merchant Portal.
Documents (Invoice, shipping documentation, and more.)
Carrier
Returns
Payments
The Global‑e Order ID
Before the order is injected into the Platform, it is created in the Global‑e system and given a Global‑e Order ID. Example: GE1234567GB
The Global‑e Order ID is preceded by GE and ends with the merchant country code initials.
Customer Details and Shipping Information
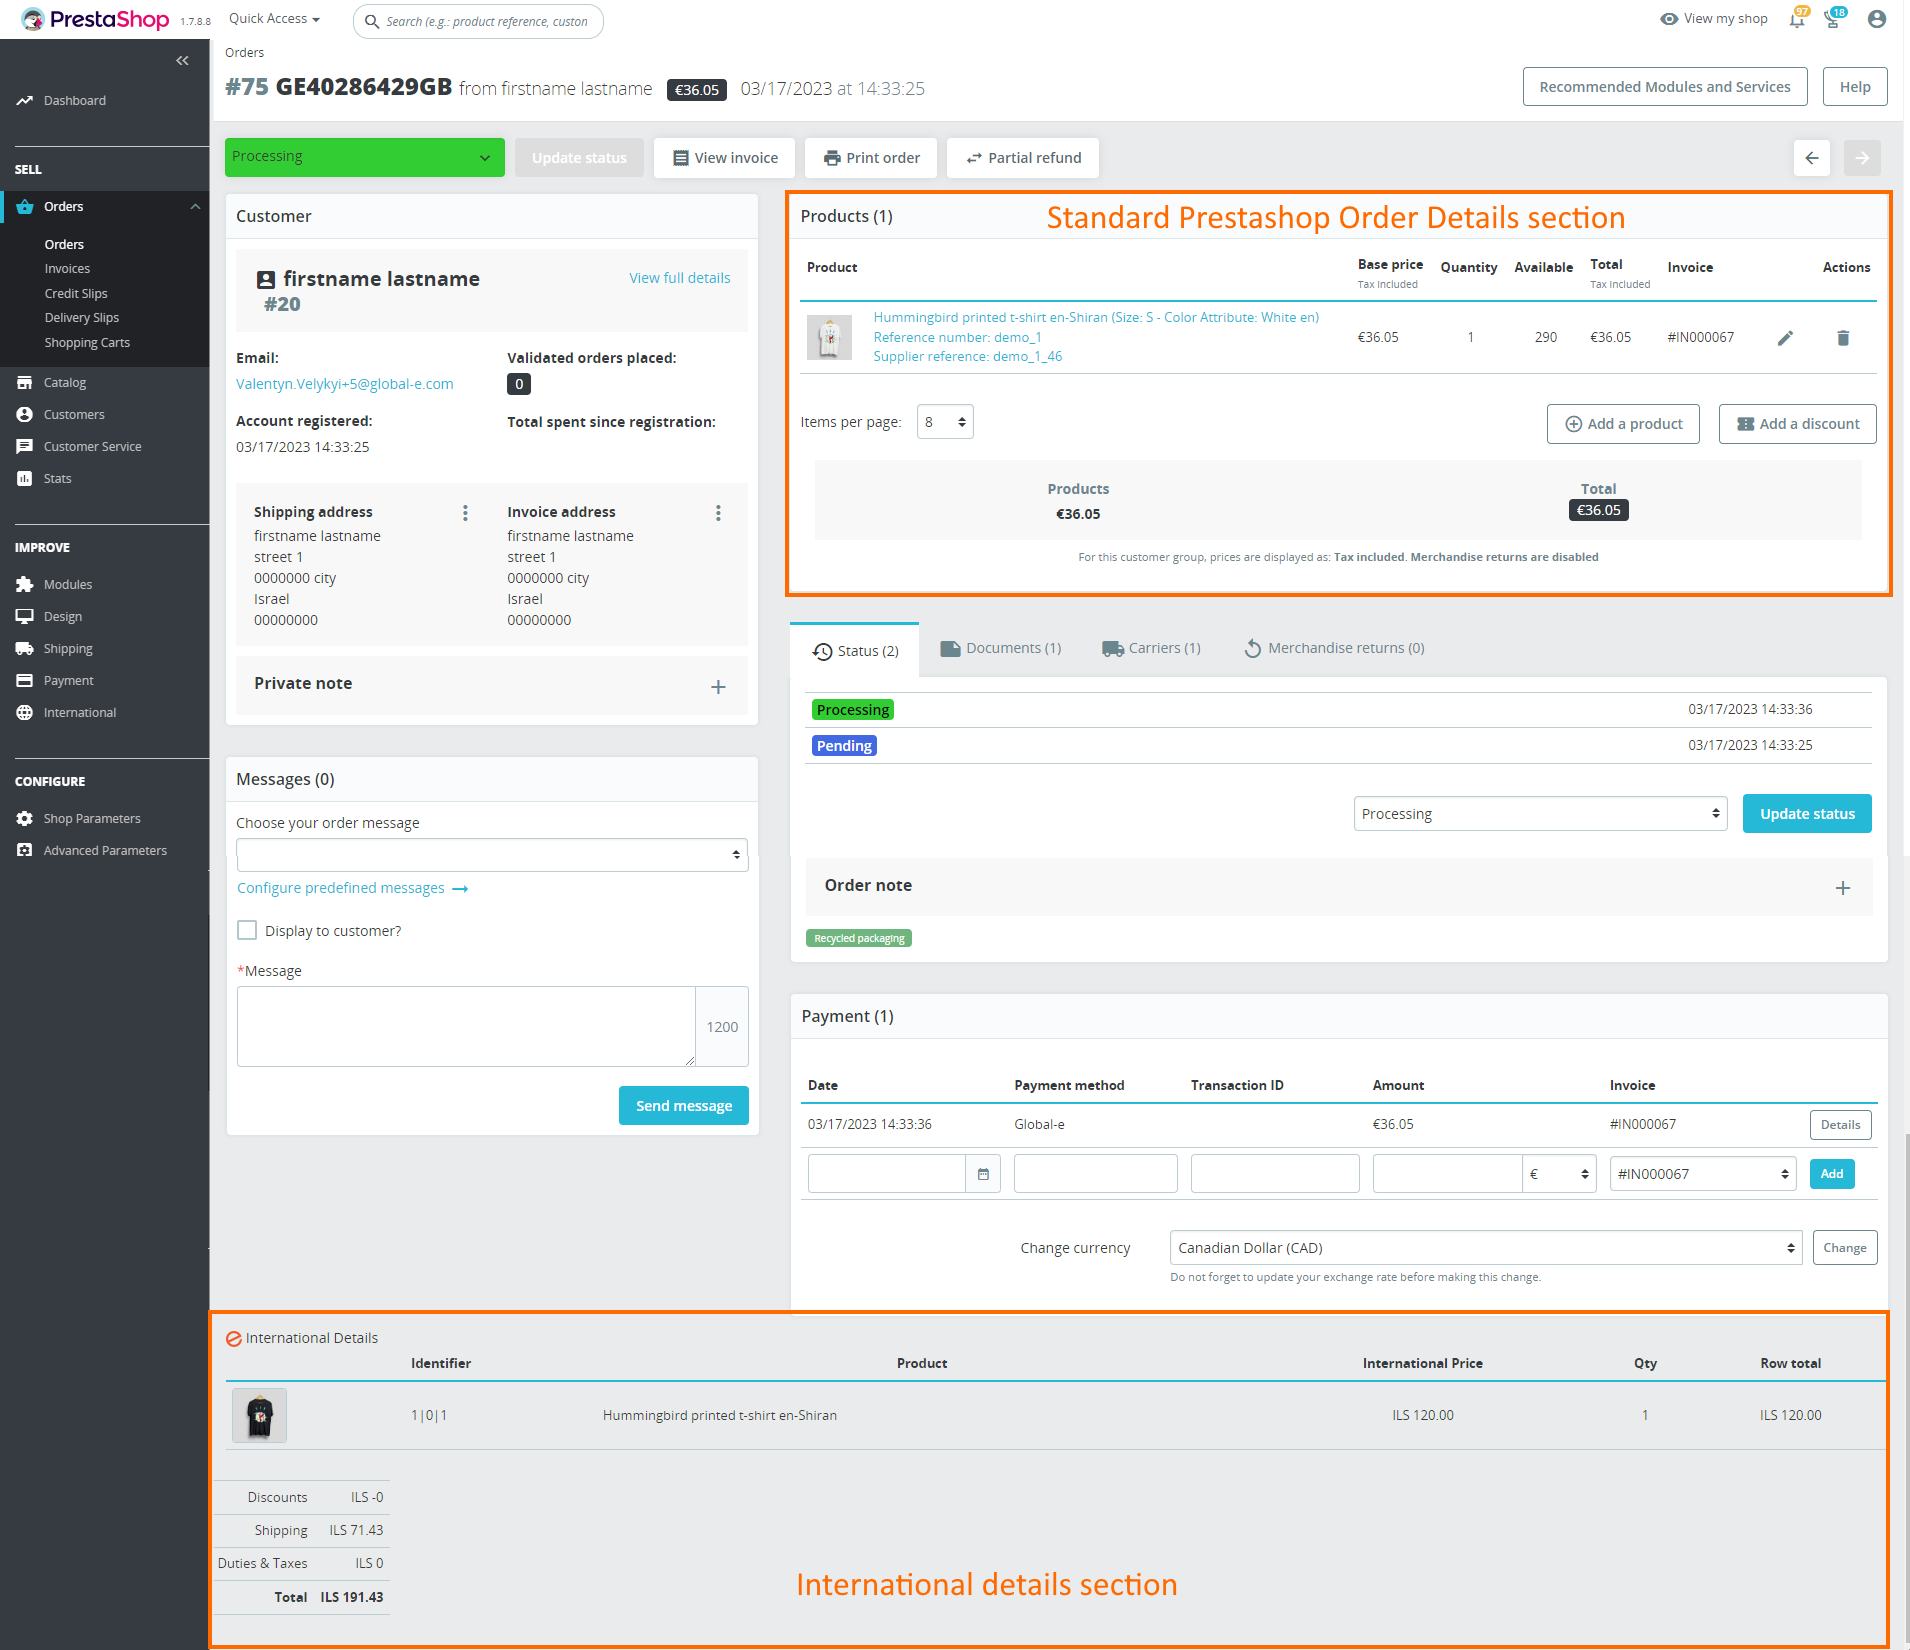
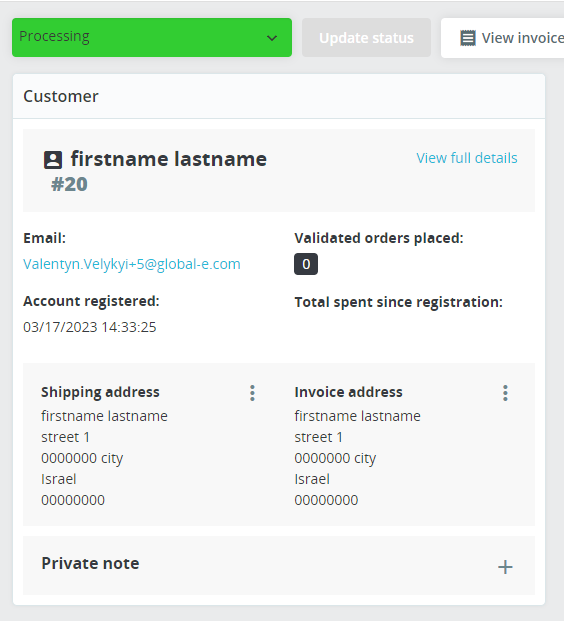
The Order Details screen's Customer area shows the Customer Details and Shipping and Invoice (billing) information.
Global-e copies the customer details from the Global-e Checkout page to the Order's Shipping and Billing information (Invoice), ensuring a secured transfer of customer data.
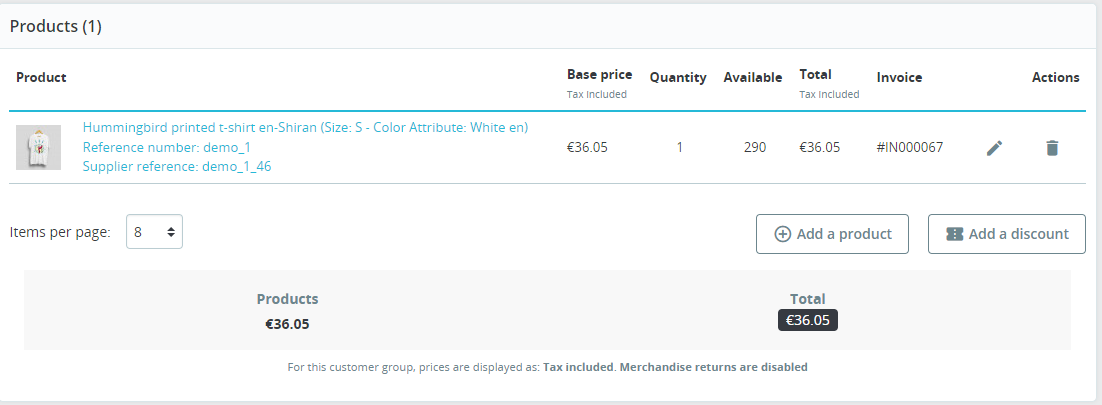
Standard PrestaShop Order Details
The Standard PrestaShop Order Details area shows the products included in the order and the reconciliation price in merchant currency.
International Details
The International details area shows the products included in the order and the total value that the customer paid for the order in customer currency.

Order Status
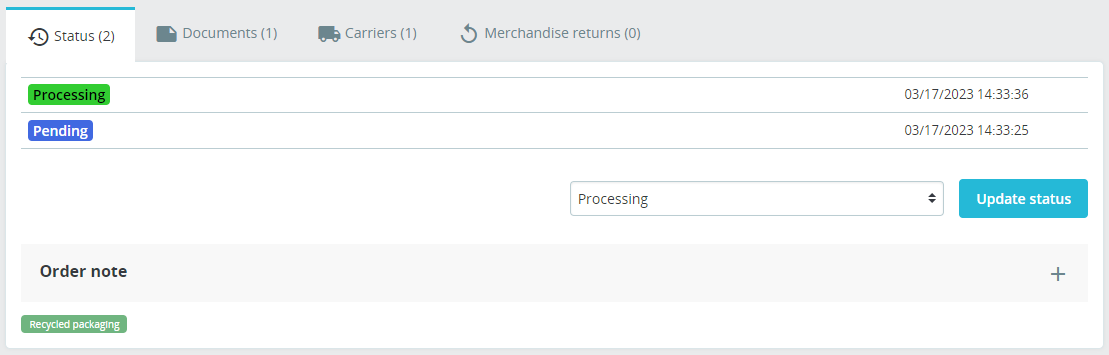
By default, PrestaShop does not have a strict order status flow. This means that the order status flow may be different on different systems.
Global‑e uses a strict order status flow. These settings allow mapping the Global‑e order statuses to your internal order statuses.
Basic Global‑e Statuses:
To configure statuses on PrestaShop, see Configure Orders. |
Discounts
Global‑e supports standard discounts via the PrestaShop platform. Contact your Account Manager for more information.
Cancel Orders
Global‑e supports canceling orders through the Global‑e Merchant Portal.
Currently, if you cancel an order on your platform, it is not updated on the Global‑e side. You must cancel the order on the Global‑e Merchant Portal to enable customer notification and customer refund.
See the Merchant Portal documentation for more information on canceling orders and refunds.
Order Returns and Refunds
Global‑e supports Returns and Refunds through the Global‑e Merchant Portal.
When a return is triggered, the order fulfillment stops.
PrestaShop lets you create refunds for product prices only. To refund additional order components (shipping, duties &taxes, service gesture), use the Global‑e Merchant Portal.
Based on your configuration, PrestaShop allows you to restock refunded items to maintain stock consistency.
Global-e-to-Platform Order Updates
Canceling an Order
When Global-e cancels an order, an API request is sent by the Global-e platform to the Global-e plug-in to change the order status in PrestaShop to Cancelled.
Currently, if you cancel an order on your platform, it is not updated on the Global‑e side. You must cancel the order on the Global‑e Merchant Portal to enable customer notification and customer refund.
Order Refunds
Based on your configuration, PrestaShop allows you to restock refunded items to maintain stock consistency.
Amending Orders
When you update orders on the Global-e Merchant Portal, the changes are updated in PrestaShop.
However, when orders are updated in PrestaShop, they are not updated in Global‑e.
Payment and Shipping Notifications
The payment and shipping notifications are sent out from Global-e when triggered by the relevant event.
Checkout Page
The Global-e plug-in implements a Global-e API method that uses the PrestaShop API to load the contents of the user’s cart and pass it securely to the Global-e checkout through a server-to-server API call.
Discounts
The discounts applied on the cart page are reflected on the Global-e checkout page, on your Platform.
Configure Orders
This section provides an overview of the Order's configurable features in PrestaShop.
To configure Orders:
From the PrestaShop Admin, go to Modules > Module Manager >
The Module Manager screen opens.
Scroll down to Global‑e (at the bottom of the Module Manager Screen) and click Configure.
The Configure screen opens.
Go to the Order section.
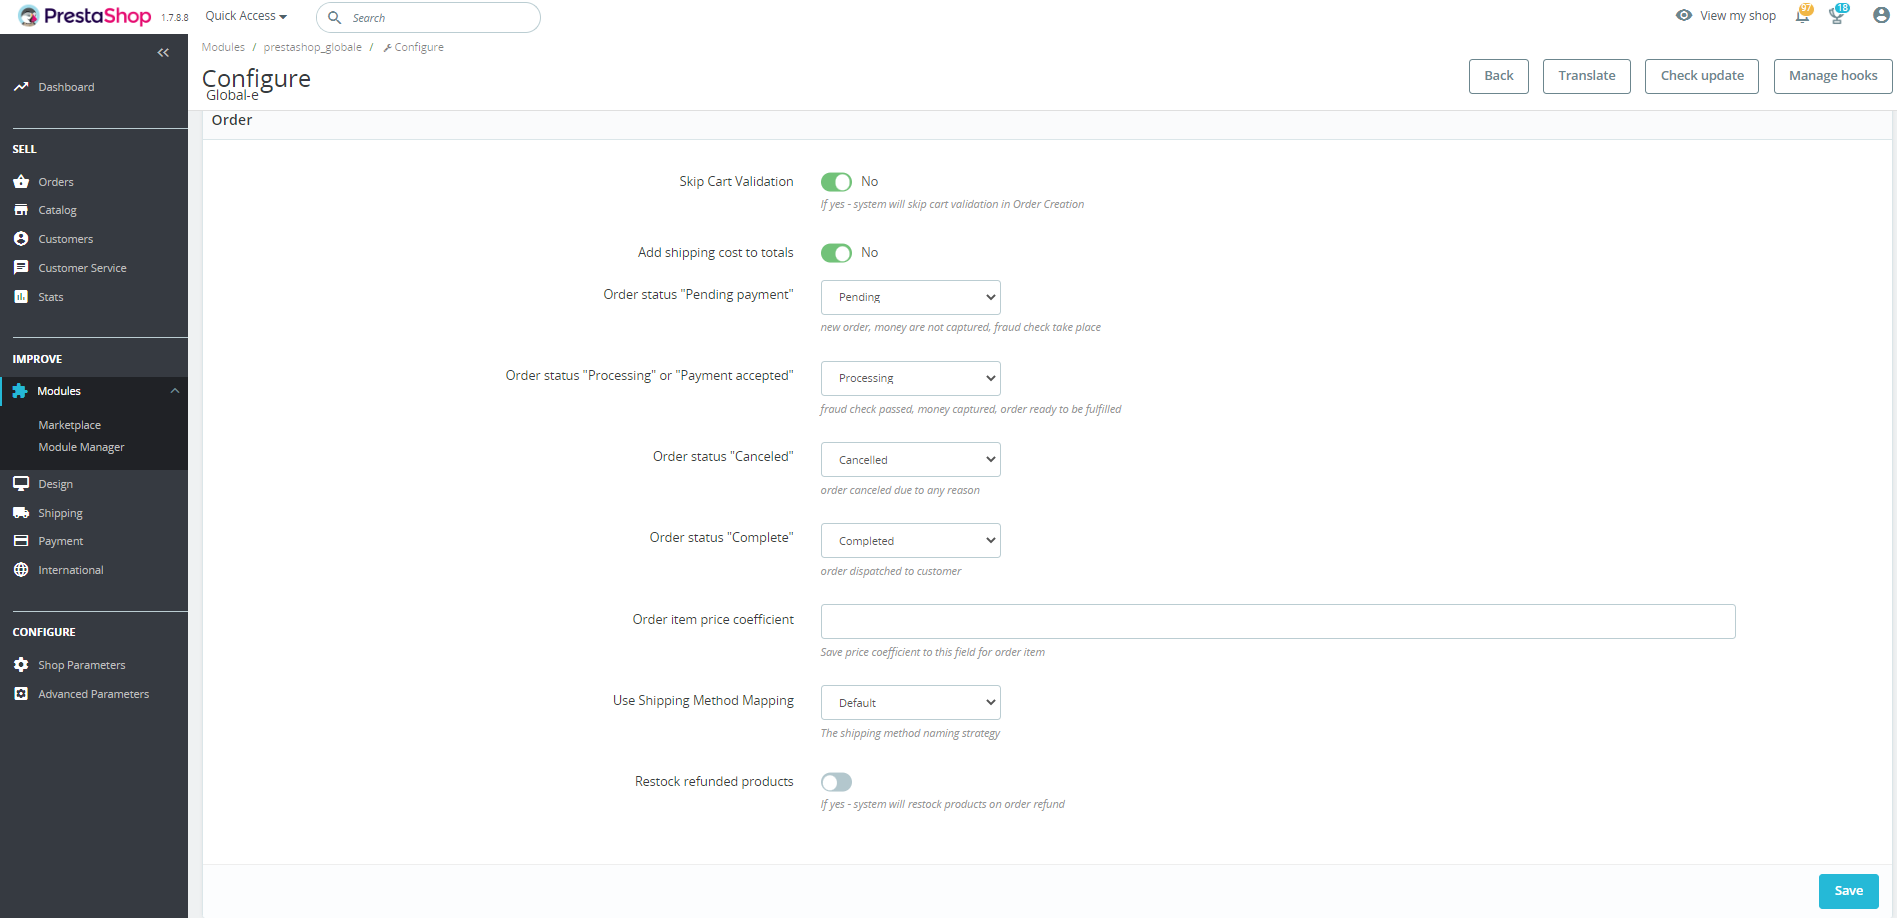
Set the following values, as required:
Skip Cart Validation: Avoids cart validation when creating the order (Order Create).
Add shipping costs totals: Creates orders in the platform including the shipping costs in the total value.
Order Statuses: Use the following statuses to map the Global‑e Order status to the PrestaShop status.
Pending Payment: The order is reserved but the fraud check is not done yet, and the money has not been captured from the customer.
Processing or Payment accepted: The order is confirmed. The fraud check passed. The money has been captured from the customer. The order is ready to be fulfilled.
Canceled: Something went wrong. The order was canceled.
Complete: The order has been fulfilled by Global‑e.
Order Item Price Coefficient: Adds a specific coefficient to all new Global‑e orders.
Use Shipping Method Mapping: Sets the preferred display for the shipping method on the order page in the platform.
Restock Refunded Product: Restocks the refunded items in Global‑e.
Products
Merchant defines their product catalog in the Products Screen. This screen shows the Merchant Price in default Merchant currency.
International Product Prices
With the Global-e solution, international prices are automatically displayed in your Store (front-end).
Global-e identifies and processes international orders dynamically or processes the fixed prices you defined.
Global-e International Price Conversion (Dynamic)
With the Global-e solution, international prices are automatically displayed in your Store (front-end). Global-e identifies and processes international orders dynamically or processes the fixed prices you defined. Global-e identifies and processes international orders dynamically or processes your fixed prices, as you defined them (see Fixed Prices Overview).
Global-e uses the default price (product price in merchant currency) and converts it dynamically to the currency selected by the customer. The conversion is based on daily rates and business pricing rules set by Merchant, including country-specific pricing coefficients and marketing rounding.
The Global-e dynamic conversion is described below.
Merchant Catalog
The merchant sets the product prices in the Platform Admin. (Default shop currency).
Customer Price
Global-e converts the product price dynamically to customer price and customer currency, based on the business rules defined in Global-e. This is the price that the customer pays in customer currency.
Global-e Reconciliation Price
After the purchase is complete, Global-e converts the customer price back to shop currency. This is the reconciliation price. This is the amount that the merchant gets from Global-e during reconciliation. You can view this amount on the Global-e Merchant Portal.
Fixed Prices Overview
Fixed prices may be required if you have resellers or offline shops in specific countries or regions and wish to keep the same prices everywhere.
Global-e implements your fixed prices as defined, without converting them.
Set up Fixed Prices in PrestaShop (Specific Prices)
In PrestaShop Global‑e fixed prices are called “Specific prices”.
The country must support fixed prices in Global‑e.
To set up fixed prices in PrestaShop:
In PrestaShop, enable fixed prices for the countries and currencies for which you wish to support fixed prices.
See the procedure below on how to enable currencies. For more details, see PrestaShop documentation Localization > Currencies.
See the procedure below on how to enable countries. For more details, see PrestaShop documentation Locations > Countries.
Set the fixed product price for each country and currency as detailed in the Example for Canada below and send us the link to each store.
Global‑e gets your fixed prices from PrestaShop and adds them to your Global‑e account settings.
For more information on setting fixed prices, see PrestaShop documentation: Managing Products > Specific Prices.
EXAMPLE FOR CANADA
Your base/native currency is EUR. Create a fixed price for CAD: 150 CAD.
To set up fixed prices for Canada:
For each product in your Store, in the PrestaShop Admin, go to Catalog> Products.
On the Products page, select the desired product.
At the top of the [ProductName] screen, click the Pricing tab.
In the pricing screen, scroll down to the Specific Prices section.
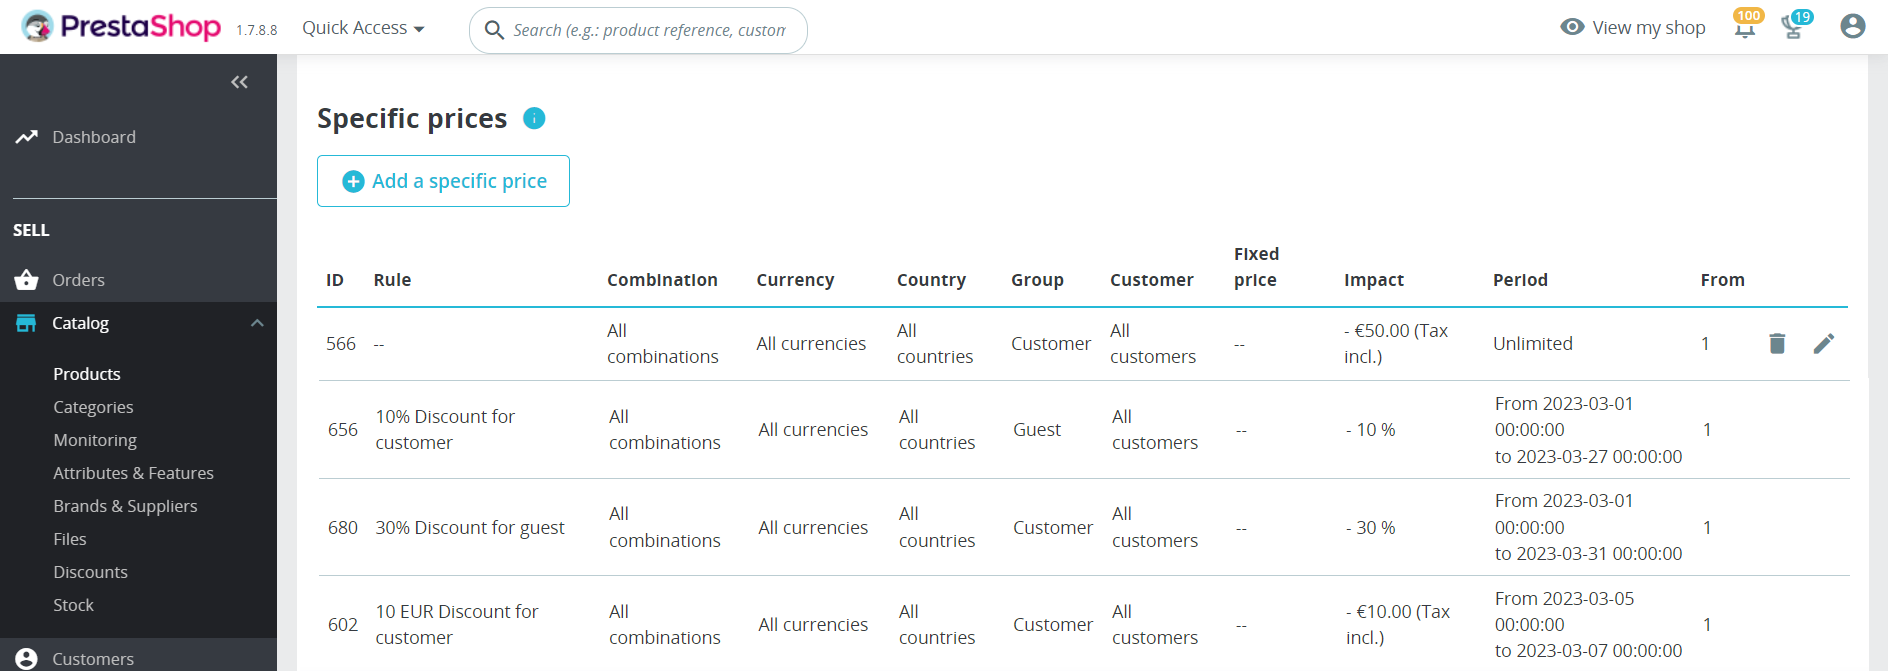
Click Add specific prices.
The Specific price conditions area is displayed.
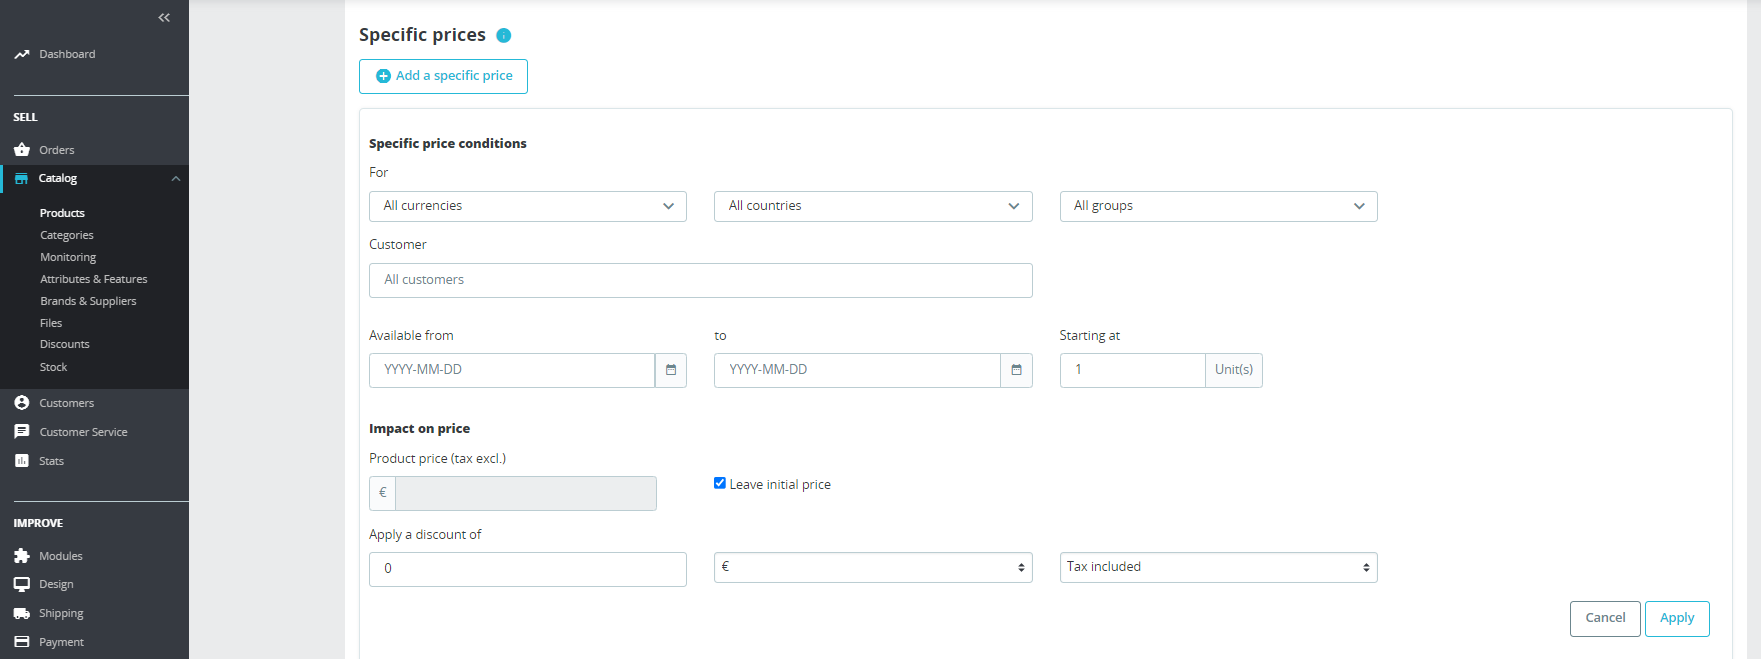
In the Specific Prices (see figure above), under specific price conditions, set:
Currency: Canadian Dollar
Country: Canada
Under Impact on price, set the Product Price: 150 (your fixed price in CAD).
Click Apply.
The fixed price for your product is applied to Canada (under Specific Prices).
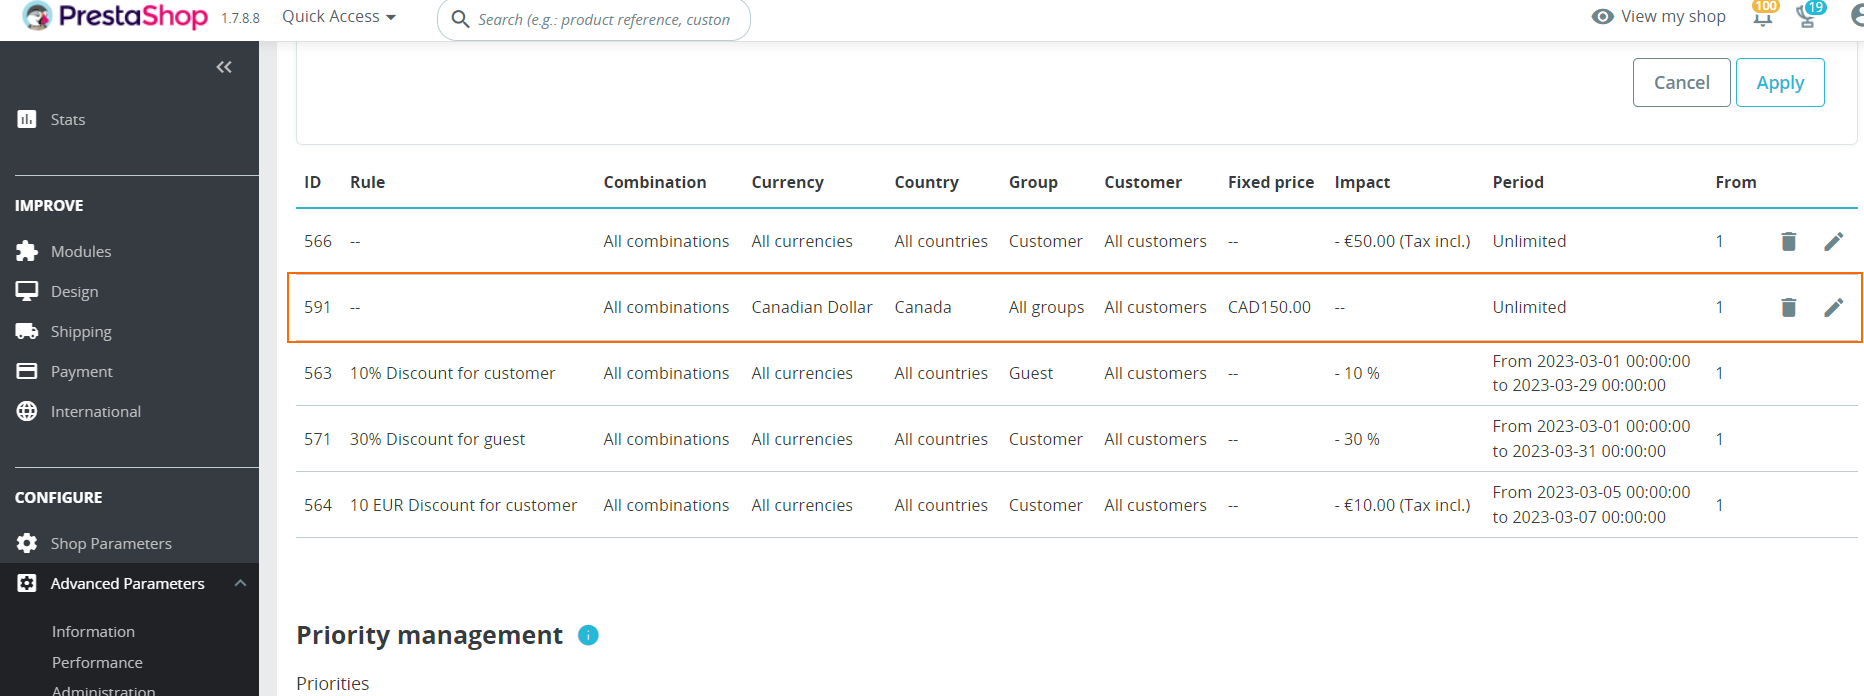
To edit the fixed price, click edit at the end of the product row and make the required changes.
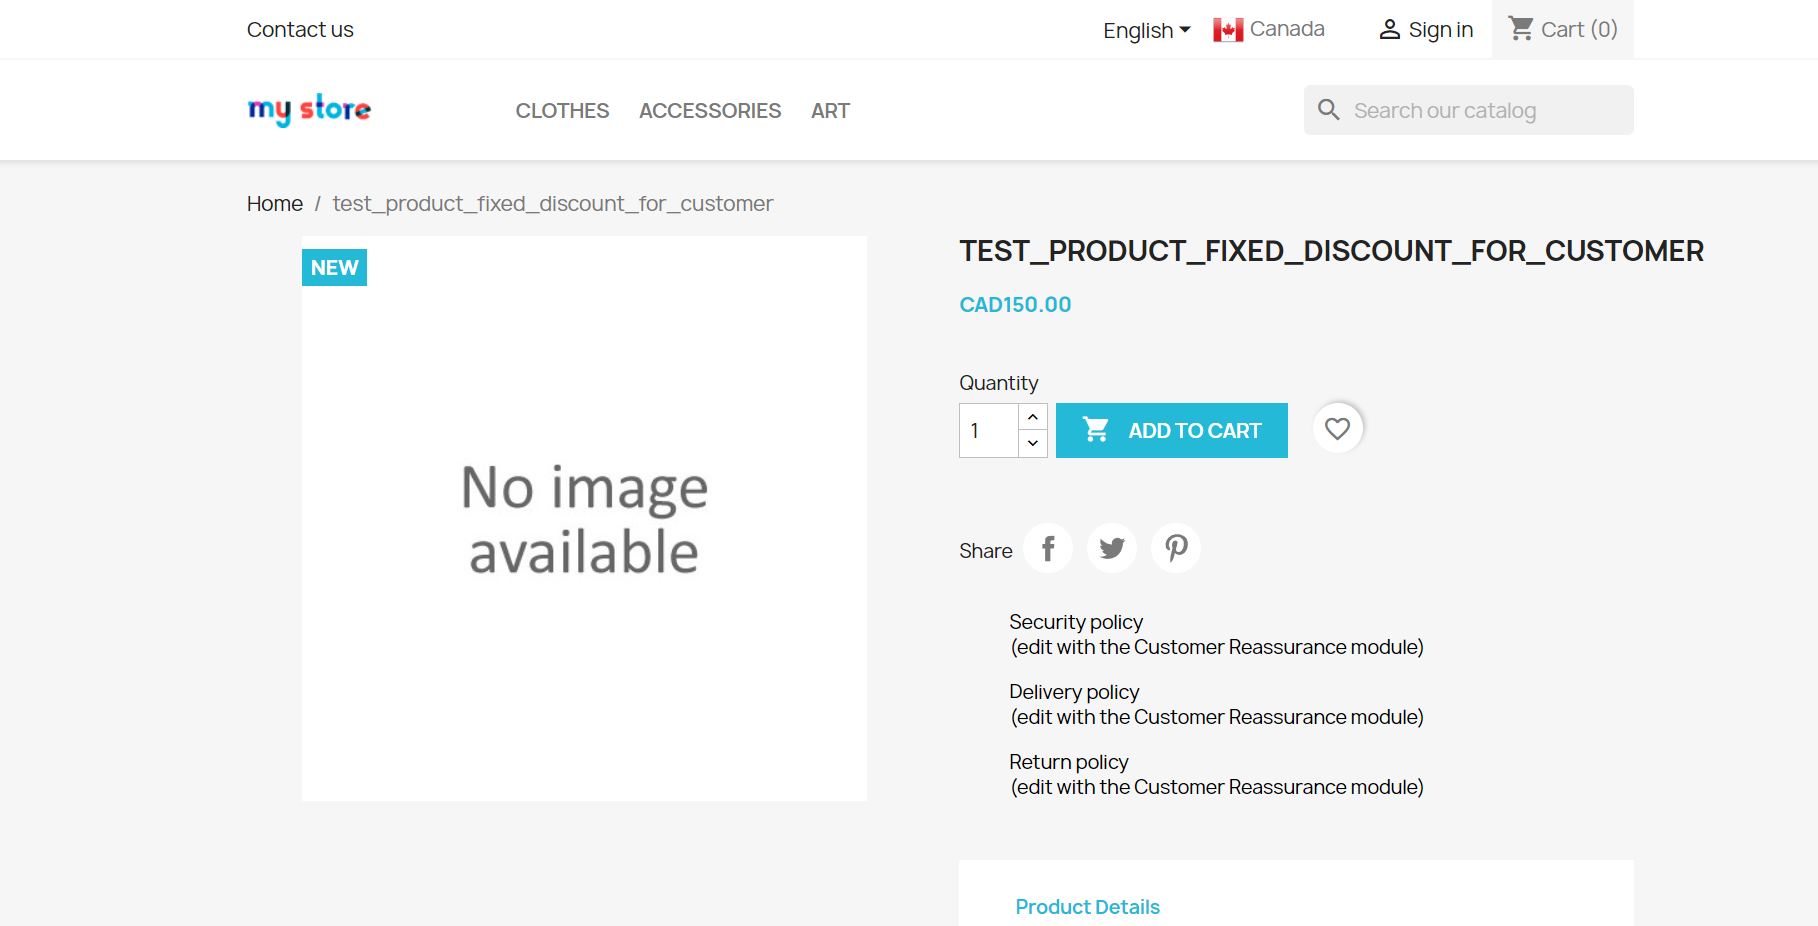
Your product fixed price is reflected on your storefront when the shopper selects Canada.
Global‑e gets your fixed prices from PrestaShop and adds them to your Global‑e account settings.
Product Coefficients
The Global-e plugin uses the product coefficient settings to announce a product feature as ProductClass.
The class is set in MAS to influence the price conversion formula.
To configure Product Coefficients:
Create a specific product feature, that will reflect the
ProductClass, as detailed in the PrestaShop documentation here: Managing Product Features.Set the required values for each product.
Enable the Product Feature as Product Class:
Go to Modules > Module Manager and scroll down to Global-e.
Click Configure.
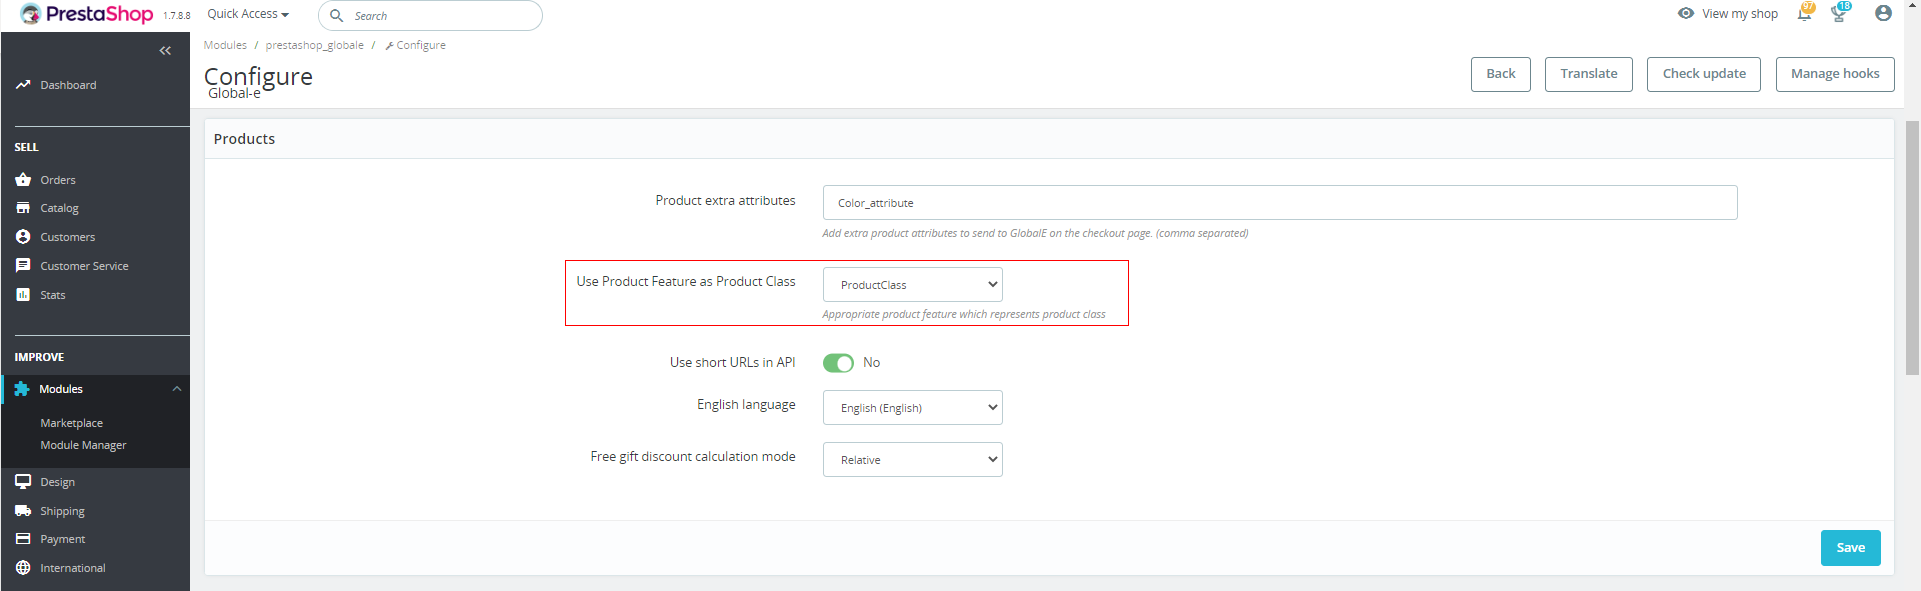
In the Products area, next, to Use Product Feature as Product Class, select
ProductClass.Click Save.
The plug-in adds a hidden
data-pcattribute to the price blockhtml and the GEM scripts can start using it.
Configure Products
This section provides an overview of the Product's configurable features in PrestaShop.
To configure Products:
From the PrestaShop Admin, go to Modules > Module Manager >
The Module Manager screen opens.
Scroll down to Global‑e (at the bottom of the Module Manager Screen) and click Configure.
The Configure screen opens.
Go to the Products section.
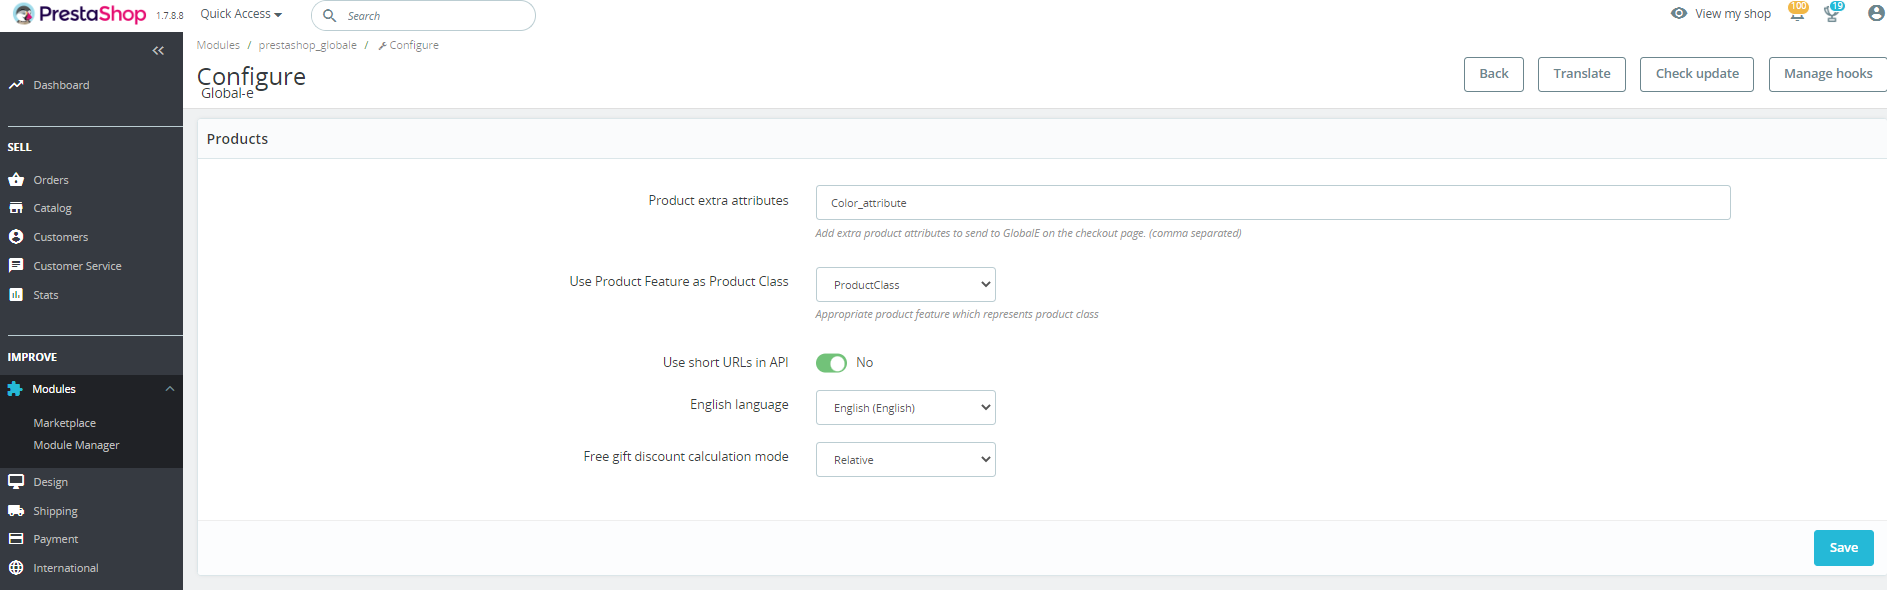
Set the following values, as required:
Product Extra Attribute: This option determines which custom product attributes should be shown in the Global‑e checkout.
Use Product Feature as Product Class: Affects the rates of a group of items in Global-e and adds a specific product class.
Use Short URLs in API: Prevents issues related to the lengths of URLs in the
GetCart.English Language: The default PrestaShop language ISO code is English 'en". For the Global‑e checkout, you can choose a different English ISO code language code such as "en-us", "en-gb", or similar.
Free Gift Discount Calculation Mode: If you offer free gifts, select Relative.
Gift Cards
Overview
This feature lets your customers purchase and use gift cards in Global-e checkout using the third-party module Gift Card.
Global-e supports:
Purchasing Gift Cards as regular products
Using Gift Cards on Global-e checkout
The Gift Card module can be purchased in the PrestaShop Marketplace.
Creating Gift Cards
Once you purchase and install the Gift Card module you can begin creating gift cards.
To create gift cards:
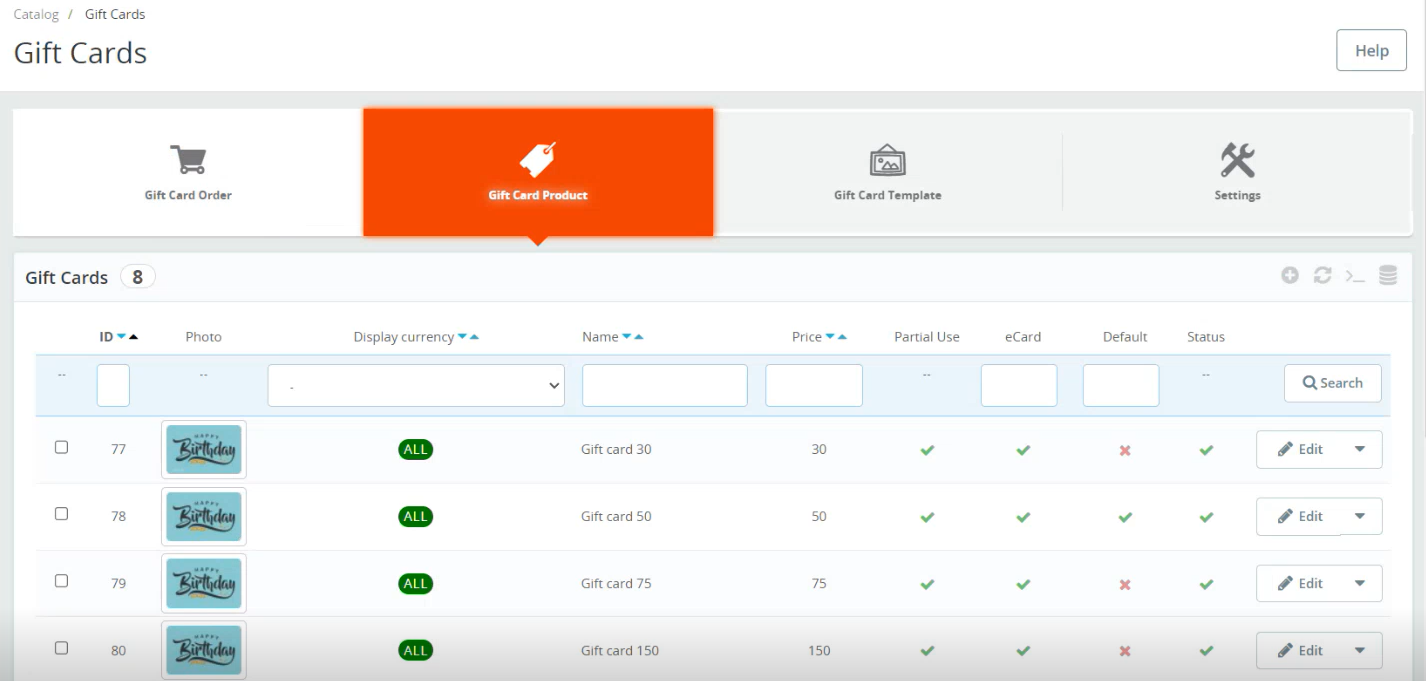
Navigate to your Prestashop admin panel > Catalog >Gift Cards.
The Gift Card Product page opens.
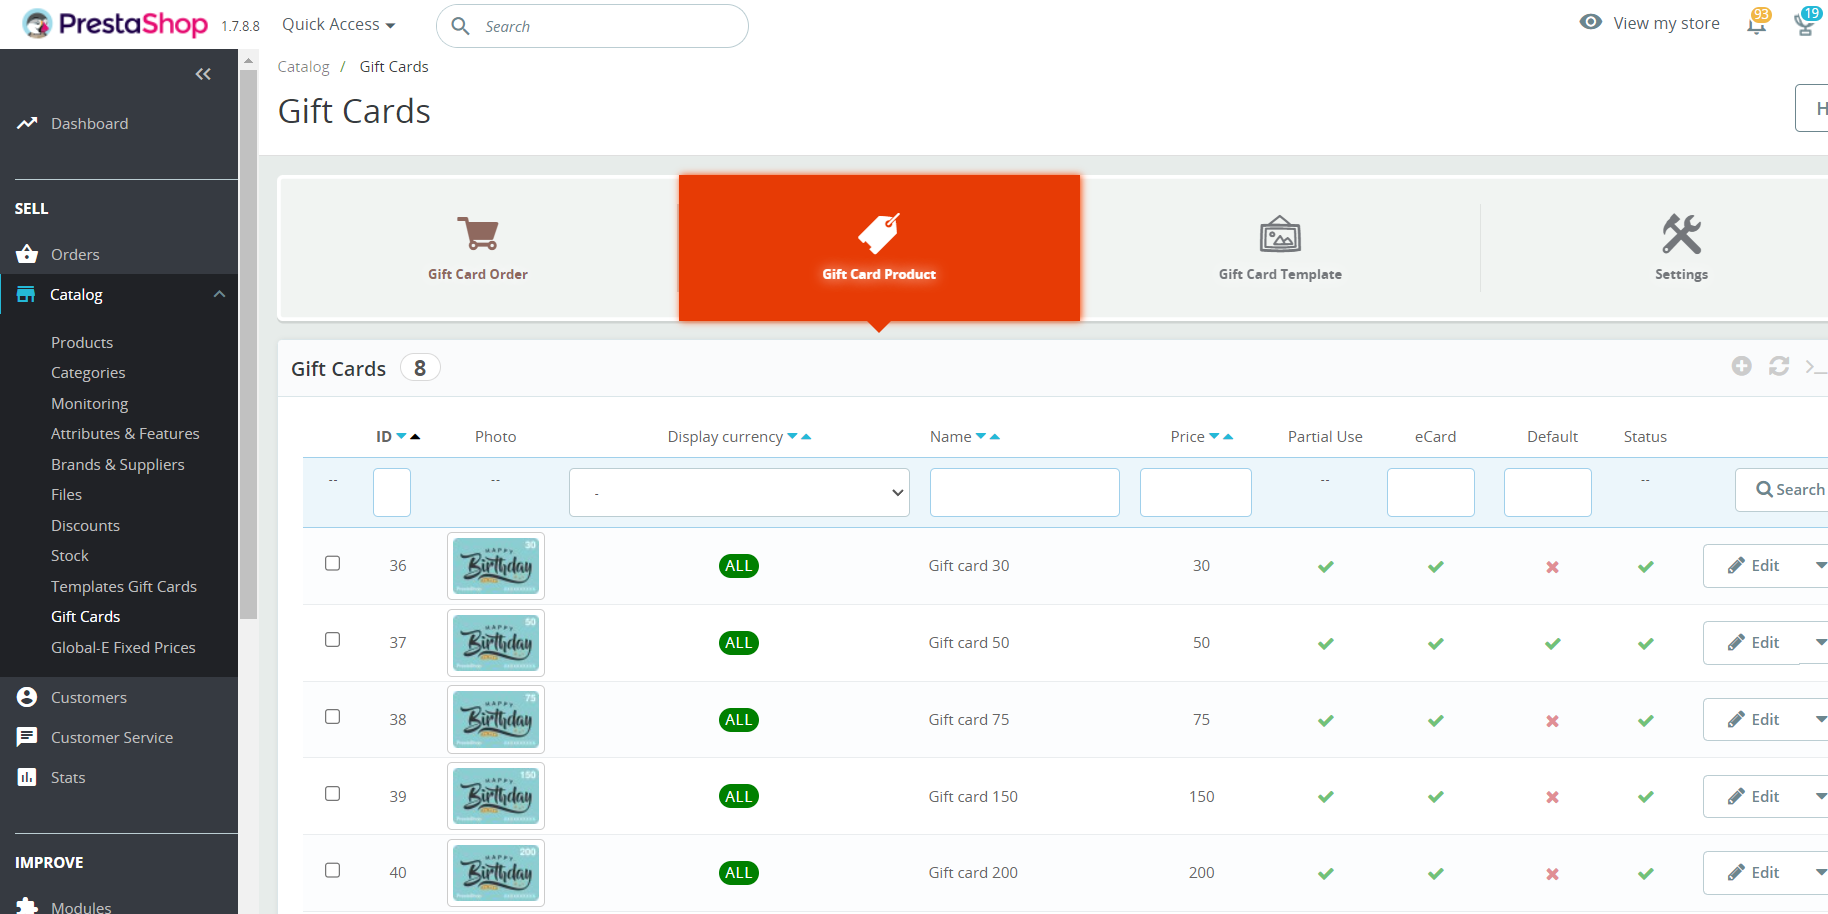
The page is preloaded with gift card templates ranging in values of 10, 30, 50, 100, and 150.
Select a gift card.
The gift card page opens.
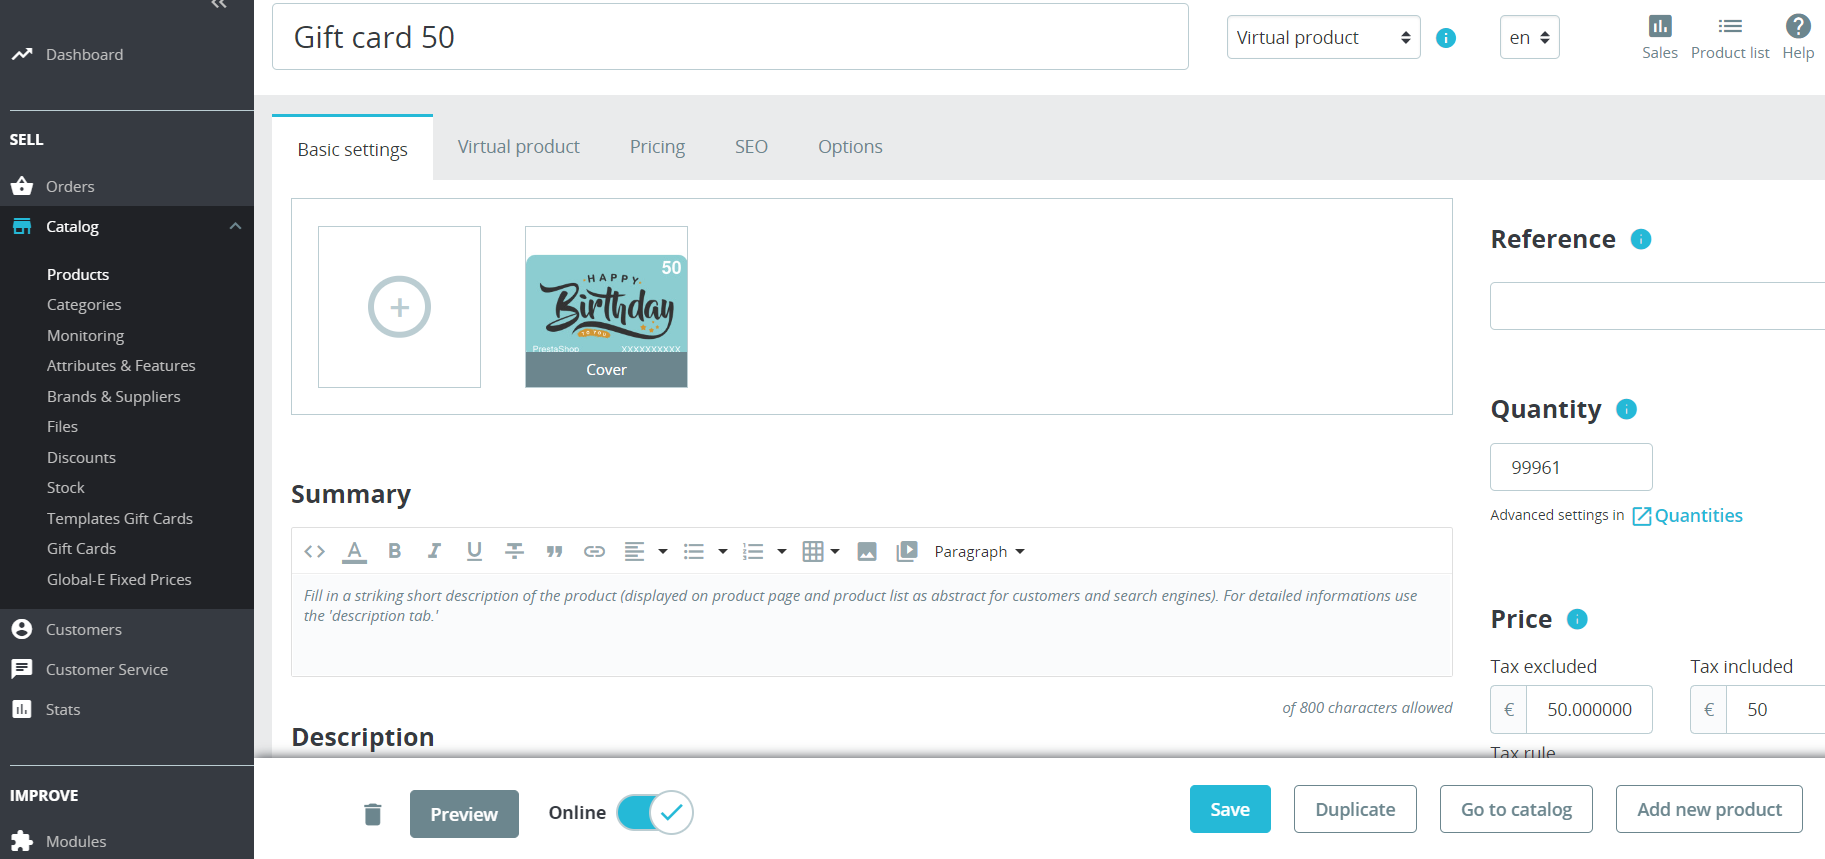
On the gift card page, you can add a cover image, write a description, and insert all the necessary details for your gift card.
In the bottom menu, click Save or select one of the other options: Preview, Duplicate, Go to Catalog , or Add new product.
Purchasing Gift Cards
Customers can purchase virtual gift cards from your PrestaShop in the same way as other products.
To purchase a gift card:
The customer clicks the gift card option on the website

The Gift card page opens.
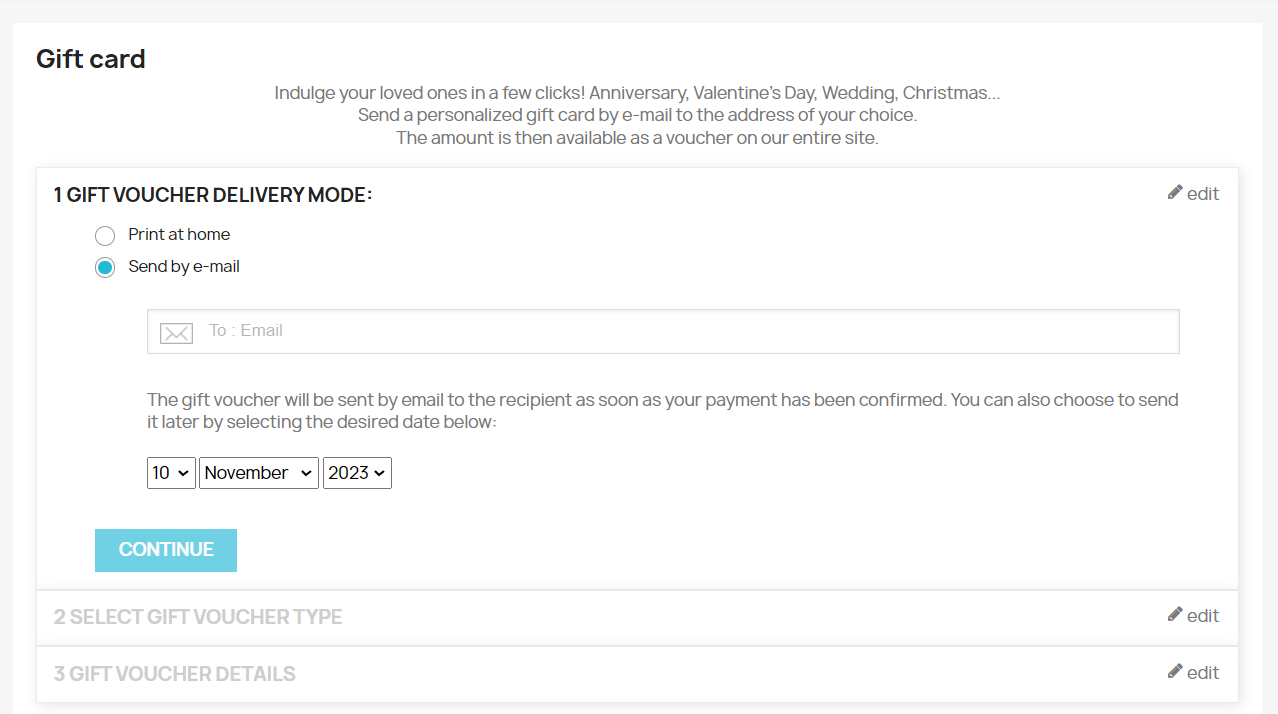
The customer selects a delivery option:
Print at home: Print the gift card and present the recipient with the printout.
Send by email: Email the gift card to the recipient.
Customers can also choose to have the gift card emailed at a later date.
The remaining gift voucher options are filled out.
The customer clicks Add To Cart
The gift card is added to the shopping cart and the customer can continue to shop or proceed to checkout.

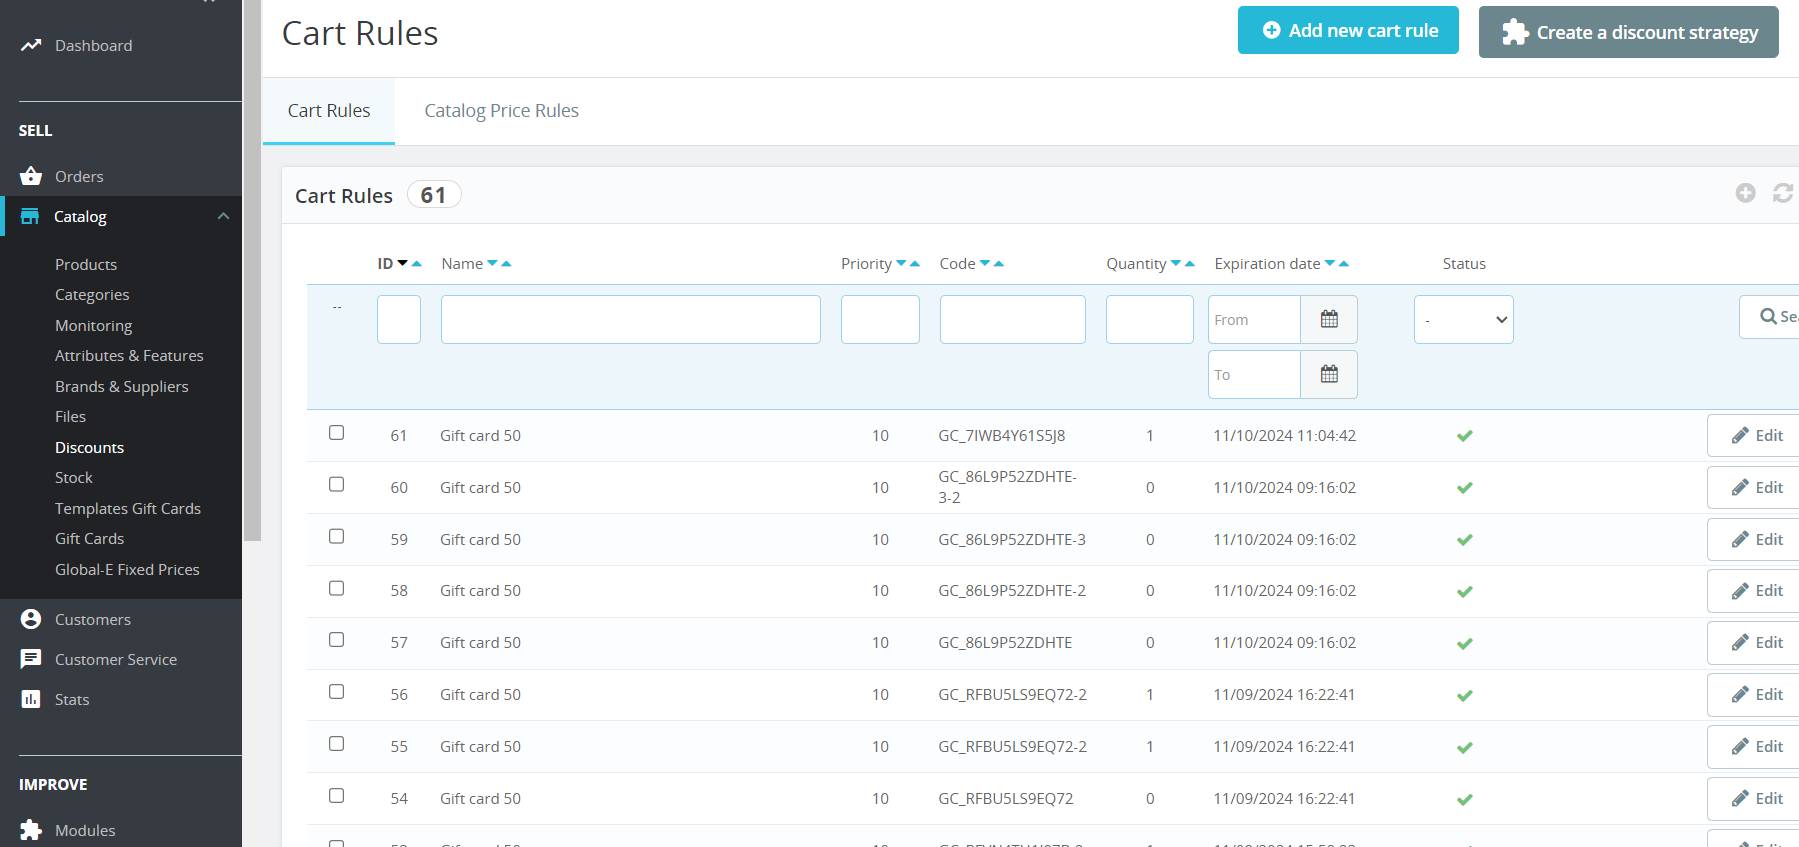
Once the gift card is paid for, a coupon is generated for the recipient to use in their online purchase. The coupon code can be found either in the printout or email, depending on the delivery method.
The new gift card is added to the Cart Rules page, where you can view the gift card's coupon code, status, and expiration date.
Using A Gift Card
Customers can redeem gift cards on the checkout page.
To use a gift card in checkout:
After your customer finishes their online order they proceed to checkout.
In the Billing Summary, the customer enters the coupon code provided with the gift card.
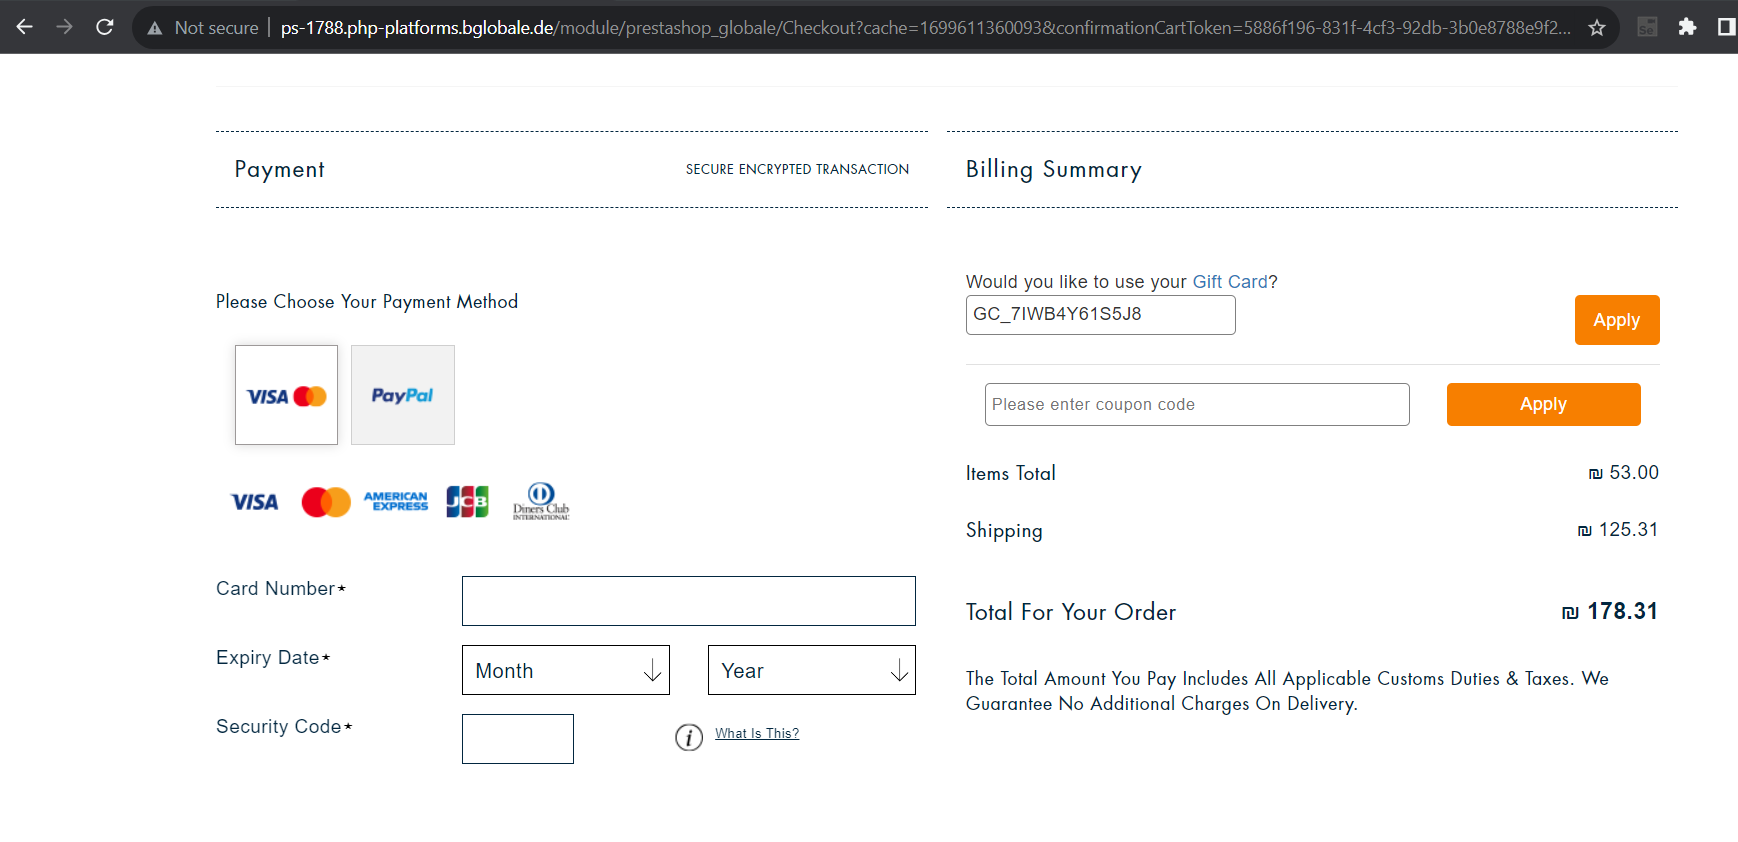
The customer clicks Apply.
The value of the gift card is deducted from the total.
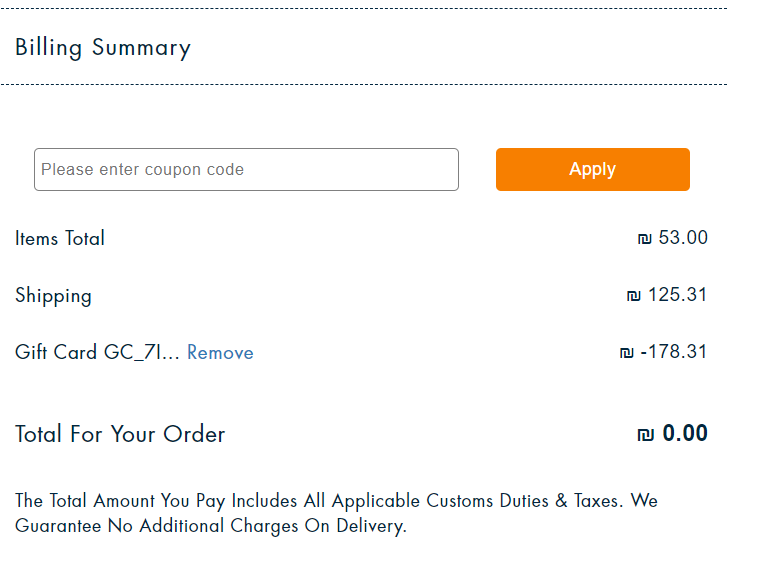
If the cart value is lower than the card’s balance then the amount of the cart is deducted from the card and the balance can be used for future purchases.
If the total exceeds the gift card amount, the customer fills in their payment details, and the remaining balance is charged to their credit card.
The customer clicks Pay and Place Order to complete their order.
View Purchased Gift Cards
You can view a list of all the gift cards purchased in your shop.
At the top of the Gift Cards page select Gift Card Order
The Gift Card Order page opens.
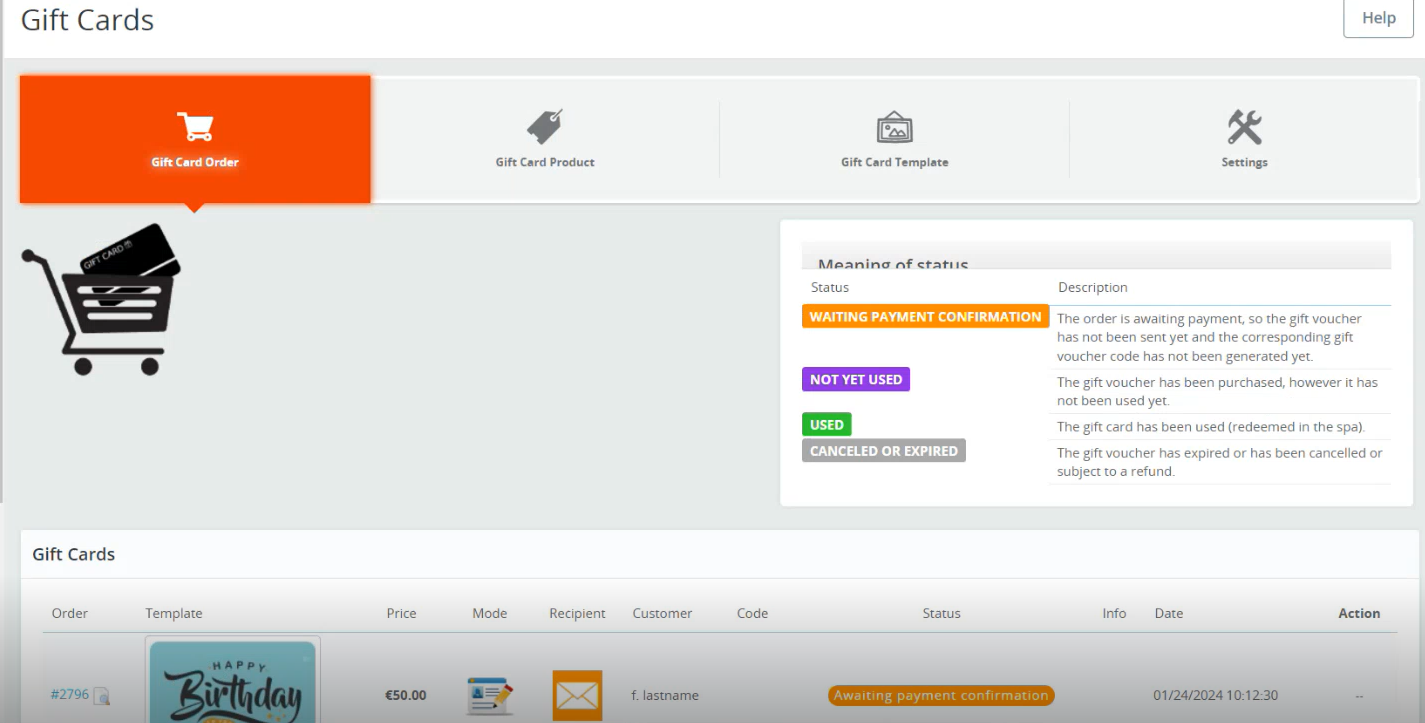
In the Gift Cards section view all of the gift cards purchased on your site and their statuses:
Waiting payment confirmation
Not yet used
Used
Canceled or expired
Configure the Checkout for Analytics
This section provides an overview of the Checkout configurable features for Analytics.
To configure the checkout for Analytics:
From the PrestaShop Admin, go to Modules > Module Manager >
The Module Manager screen opens.
Scroll down to Global‑e (at the bottom of the Module Manager screen) and click Configure.
The Configure screen opens.
Go to the Checkout section.
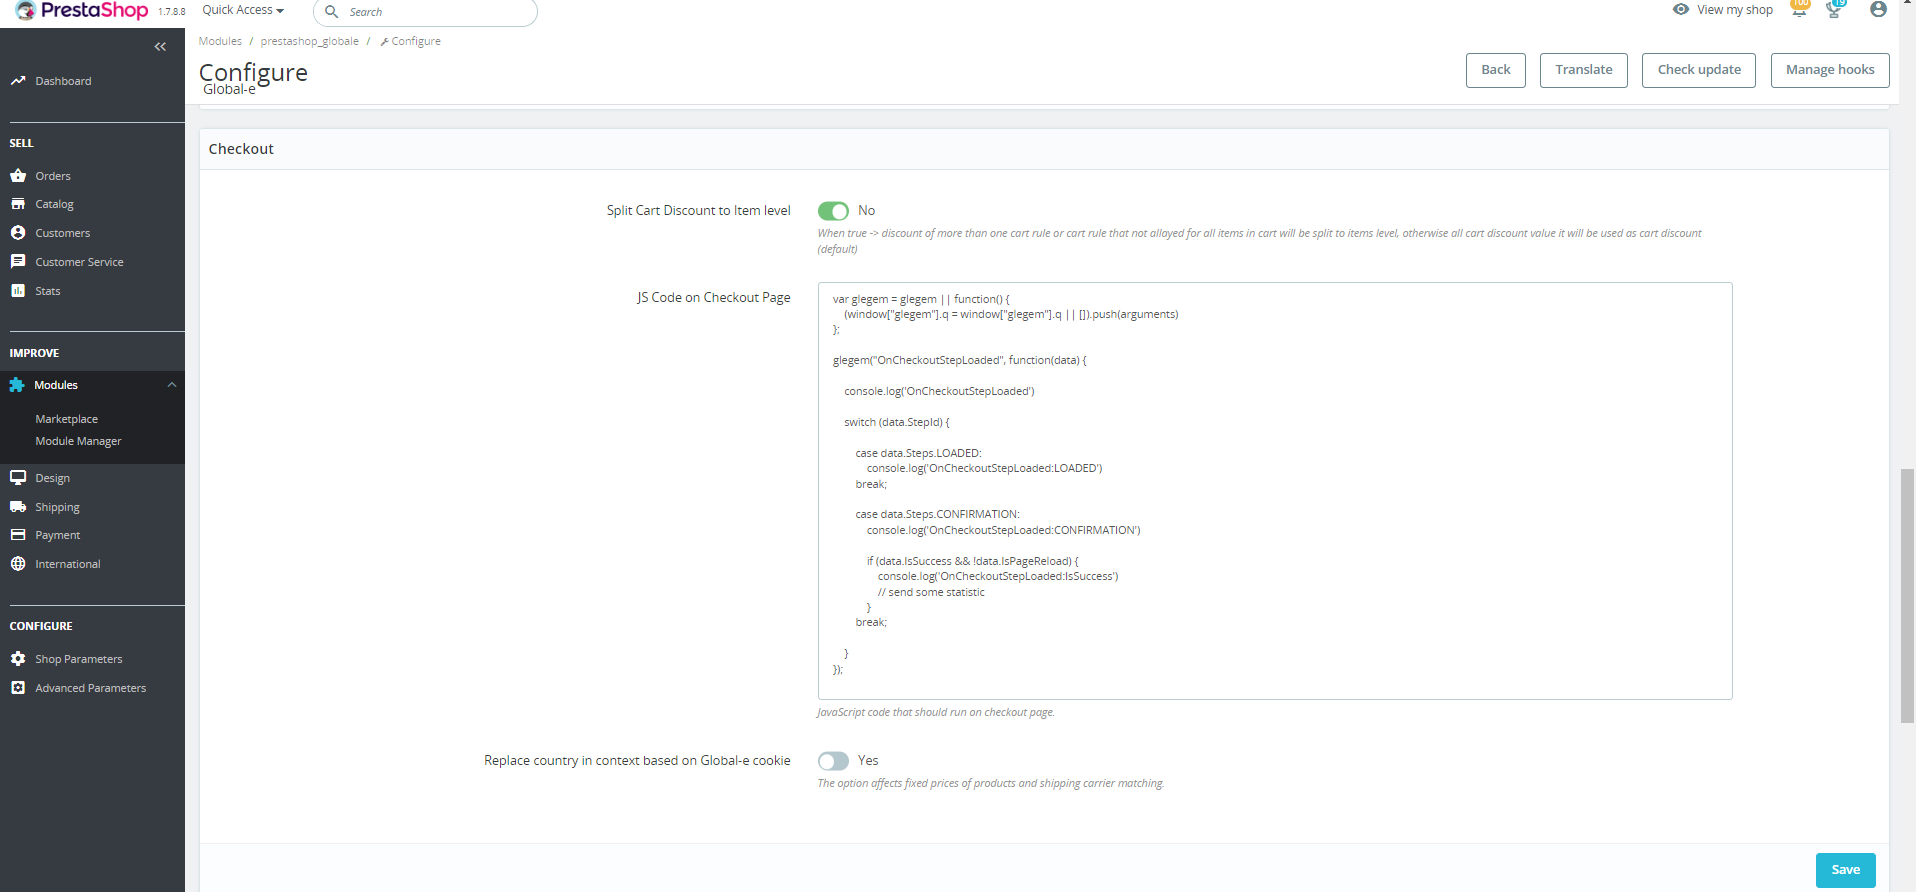
Set the following values, as required:
Split car discount to item level: This option supports different formats of discount lists.
JS Code on the checkout page: By default, Global‑e adds the Global‑e JavaScript code to the checkout page and implements the event fired by the Global‑e checkout at the end of the checkout process.
Then, Global-e passes all order information, enabling merchants to push this information to any analytics system of their choice.
You can modify this snippet and implement your functionality for sending Analytics or other purposes.
For more information, refer to the Client Analytics documentation.
Replace country in context based on the Global‑e cookie: This Cookie contains the country code and currency code. The Global‑e plug-in for PrestaShop reads these values and controls the customer context. This option must always be enabled as it affects many Global‑e features, including fixed prices.