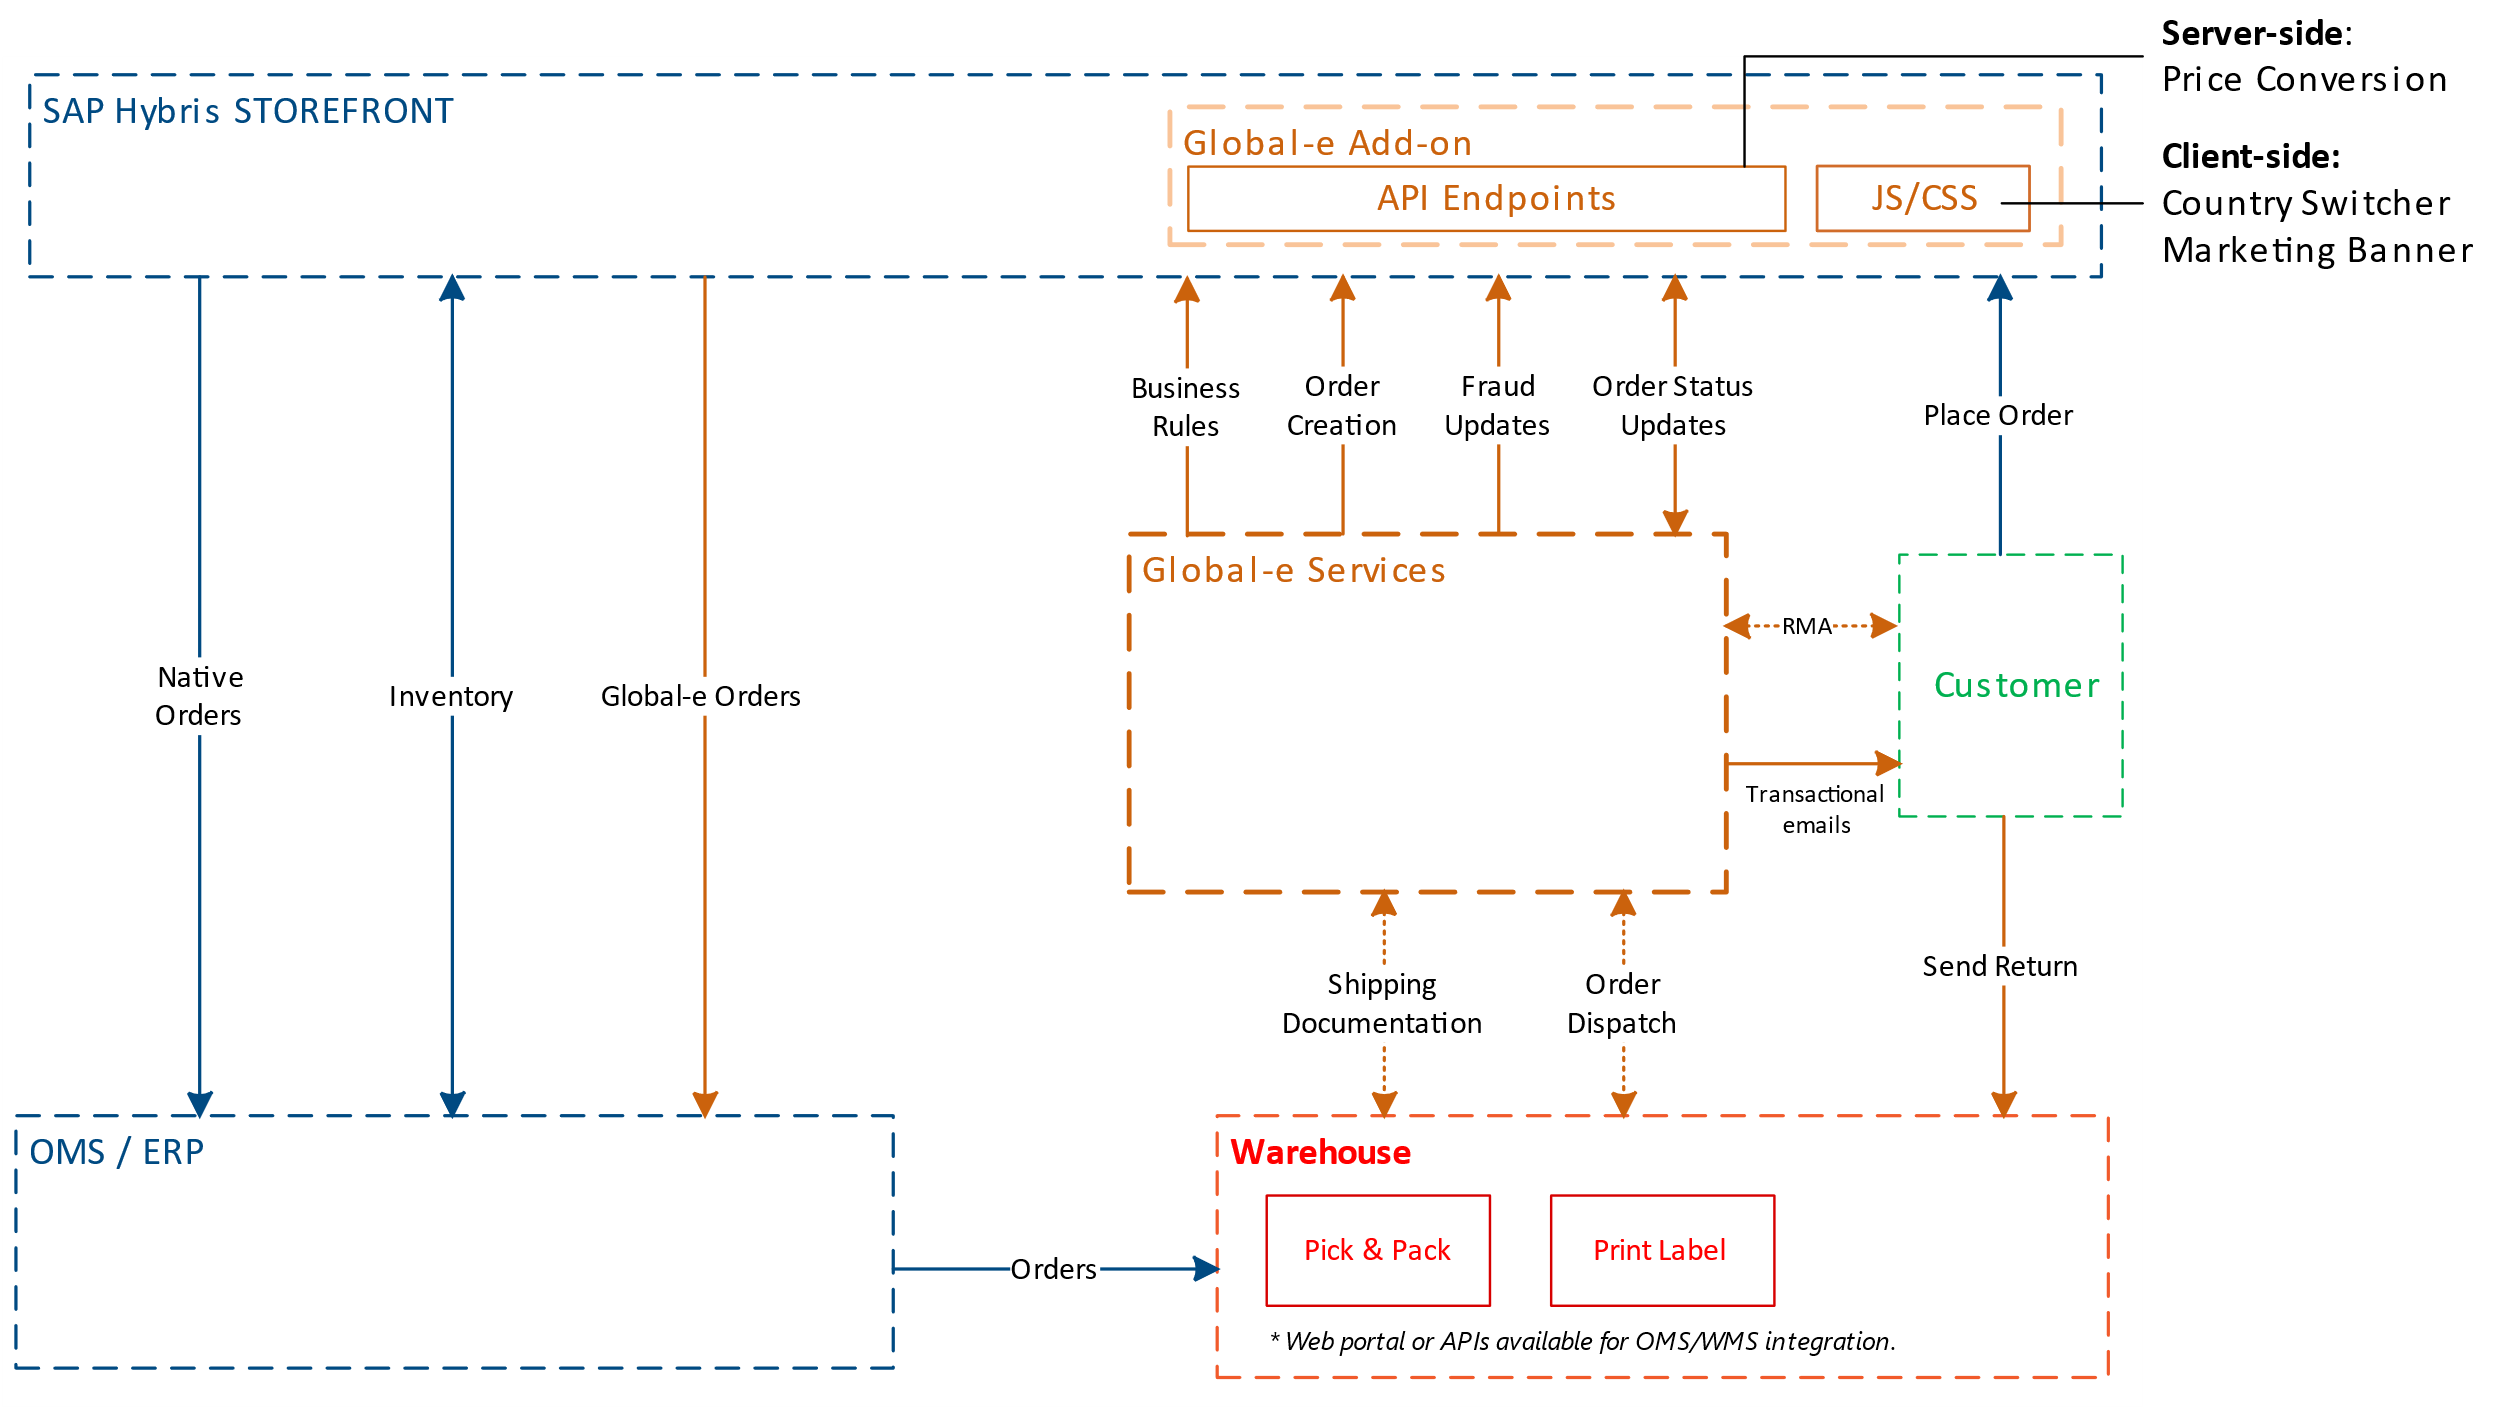
Integration Summary
When you sign up with Global-e, Global-e creates a Merchant account in the Global-e system and sends you your Global-e Merchant credentials.
Global-e Merchant ID: The ID of your Global-e account
Global-e Merchant GUID: A GUID number for your Global-e account. Note that Global-e sends you a different GUID for staging and production. Make sure to use the correct GUID.
In addition, Global-e sends you a URL to download the installation files via Bitbucket.
Before Getting Started
If you have not done so yet, make sure to share the following with Global-e:
Your Merchant Bitbucket account.
The features you want Global-e to support: the list of countries and special features such as Fixed Prices, multiple sites, and more.
Integration Steps
Description | Responsibility | |
|---|---|---|
Step 1 | Sandbox:
Note: You may need to whitelist Global-e IPs. Notifications
| Merchant |
Step 2 | Install and configure the Global-e Add-on:
| Merchant |
Step 3 | Storefront settings: Make sure that the order history (My Account page) displays Global-e’s international prices correctly to customers. See My Account. | Merchant |
Step 4 | Solve possible issues arising after installation. | Global-e and Merchant |
Step 5 | Global-e enables and manages Global-e countries, price conversion, and Global-e checkout. The Add-on runs the following APIs automatically when the relevant action is triggered:
You can create listeners for these events. | Global-e |
What's Next:
Discover the Bespoke Functionality.
Price Settings and Price Conversion
Merchandising: Promotions, Restricted and Forbidden Products.
Managing Orders
Cart and Checkout
In-Depth: Discover the Global-e Add-on extensions and implement custom functionality
Known Limitations
Integration Flows
End-to-end Flows (High-Level)
 |
Global-e Hybris Order and Checkout Flow
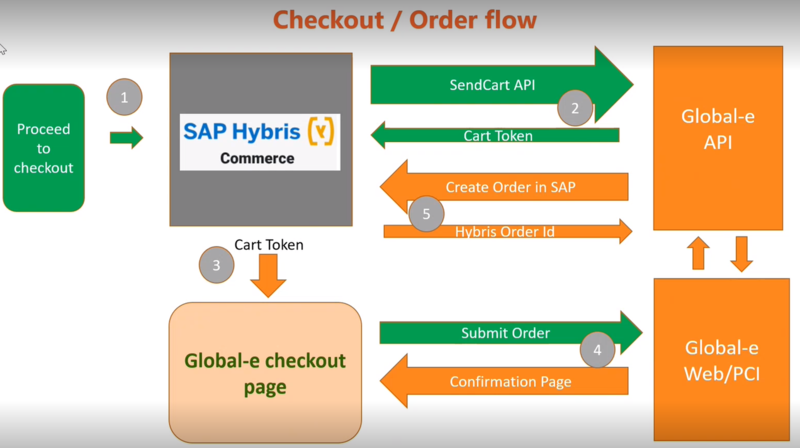 |
When a customer proceeds to checkout (1), Global-e verifies if the selected shipping country is operated by Global-e.
If operated by Global-e, the SentCart API is used to send all relevant information about the products and customer details to Global-e (2).
Subsequently, Global-e creates a cart on the Global-e side and returns the cart token to SAP Commerce (Hybris).
Global-e uses this cart token to initiate the checkout process (3).
Global-e then makes a server-to-server API call to SAP, triggering the creation of an order on the SAP Ecommerce (Hybris) side (4,5).
Scripts
The following Global-e scripts are installed.
Global-e CSS
The JavaScript code is installed on all site pages and the Checkout Page.