Flash Sales
Overview
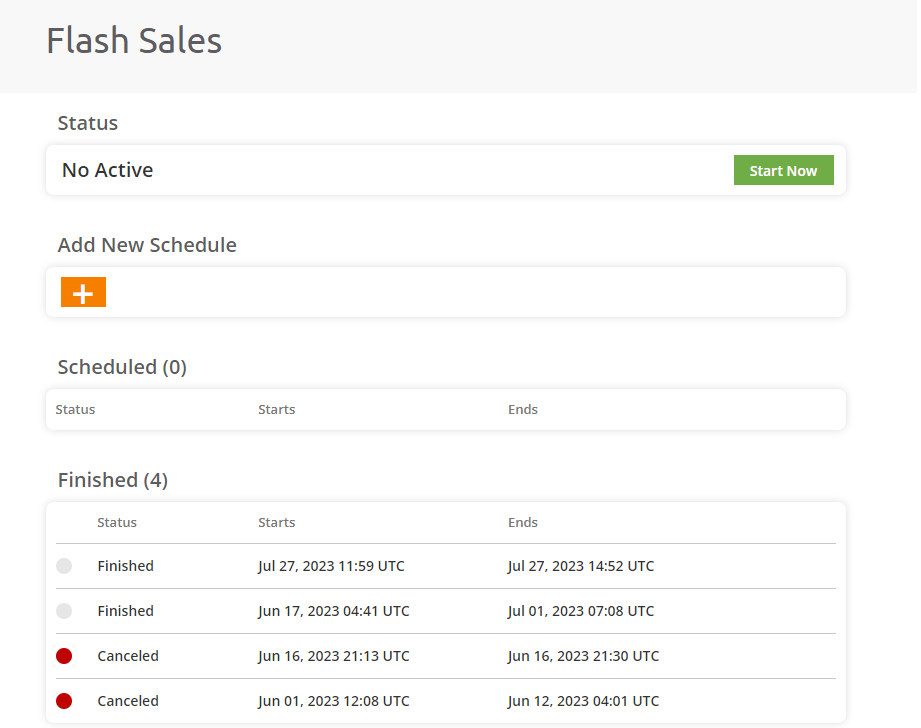
For optimal control, efficiency, and accuracy, Global‑e enables you to schedule and manage your Flash Sales autonomously and review Flash Sales history.
Prerequisites
Note: Global‑e sets up the necessary configuration for this feature on the Global‑e side.
This feature requires Merchant CS permissions.
Contact your Success Manager if you need assistance.
Scheduling a Flash Sale
To schedule a Flash Sale:
From the Global‑e Merchant Portal, go to Merchants > Flash Sales.
The Flash Sales screen opens.
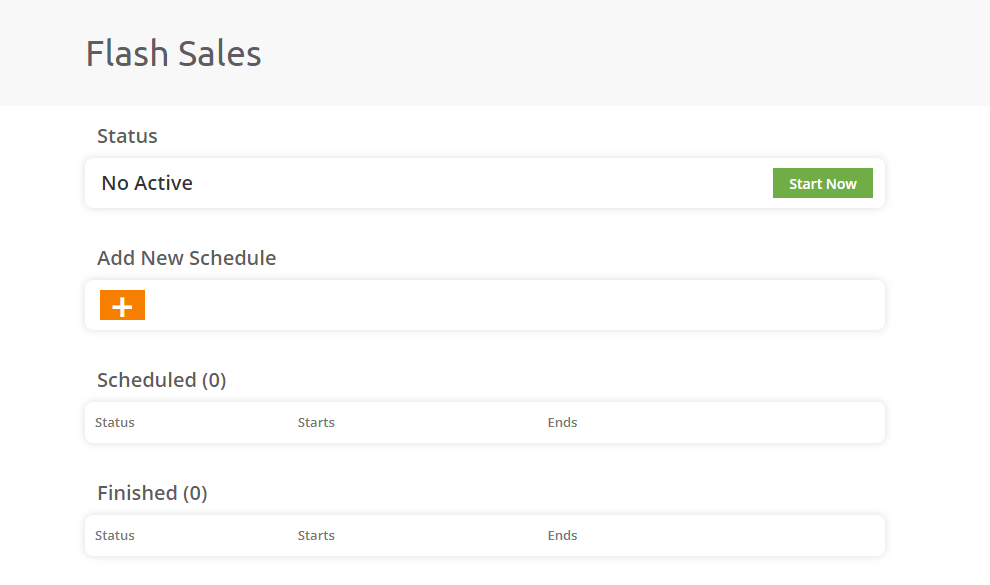
Under Add New Schedule, click on the Plus sign to open the scheduling calendar.
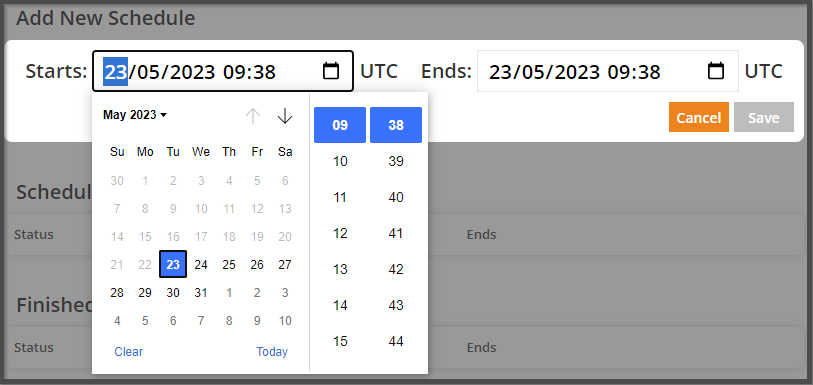
Select a start and end date for your Flash sale, according to the UTC time zone.
In the Starts box click the calendar icon to open the calendar and schedule the start of the sale.
In the calendar, click on the date that you want the sale to start.
On the right of the calendar, select the time you want the sale to start.
In the Ends box, select the date and time you want the sale to end.
At the bottom-left, Click Clear to clear the date and time settings.
At the bottom-right, Click Today to set the schedule to start today.
On the right of the calendar, select the time you want the sale to start.
In the Ends box, select the time you want the sale to end.
Click Save.
Or click Cancel to discard your schedule.
The Flash sale begins at the scheduled time and a notification email is sent to the Merchant. A second notification email is sent when the Flash sale ends.
Start, Stop, or Cancel a Flash Sale
To start, stop, or cancel a Flash sale:
Start a Flash Sale: Start an Inactive or Pending Flash Sale by clicking Start Now.

When you start a pending Flash Sale with an existing schedule, the sale will automatically stop at the scheduled end time.
If you start an inactive Flash Sale, it will run indefinitely until you manually end it.


Stop a Flash Sale: End an active Flash Sale by clicking Stop.

Cancel a Flash Sale: Cancel a pending Flash Sale by clicking Cancel.

After you choose to Start, Stop, or Cancel a Flash Sale, a pop-up prompts you to confirm your choice.
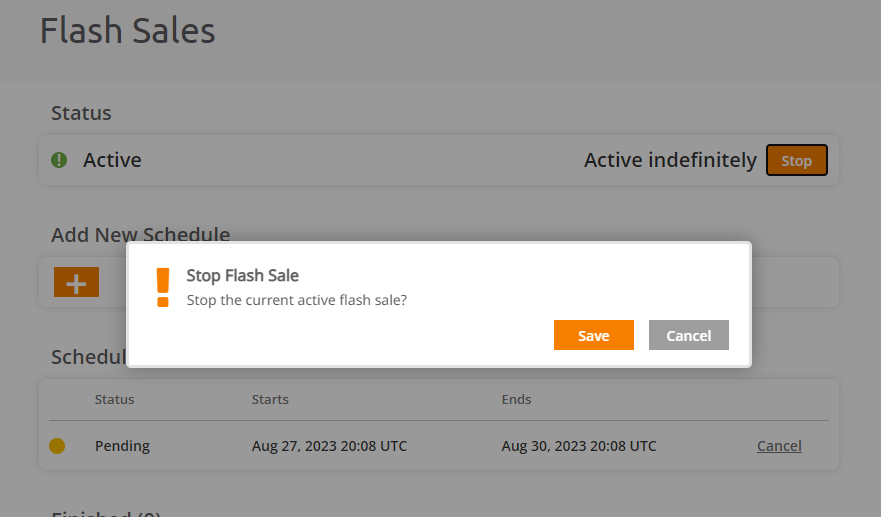 |
Click Save to confirm.
Flash Sales Statuses

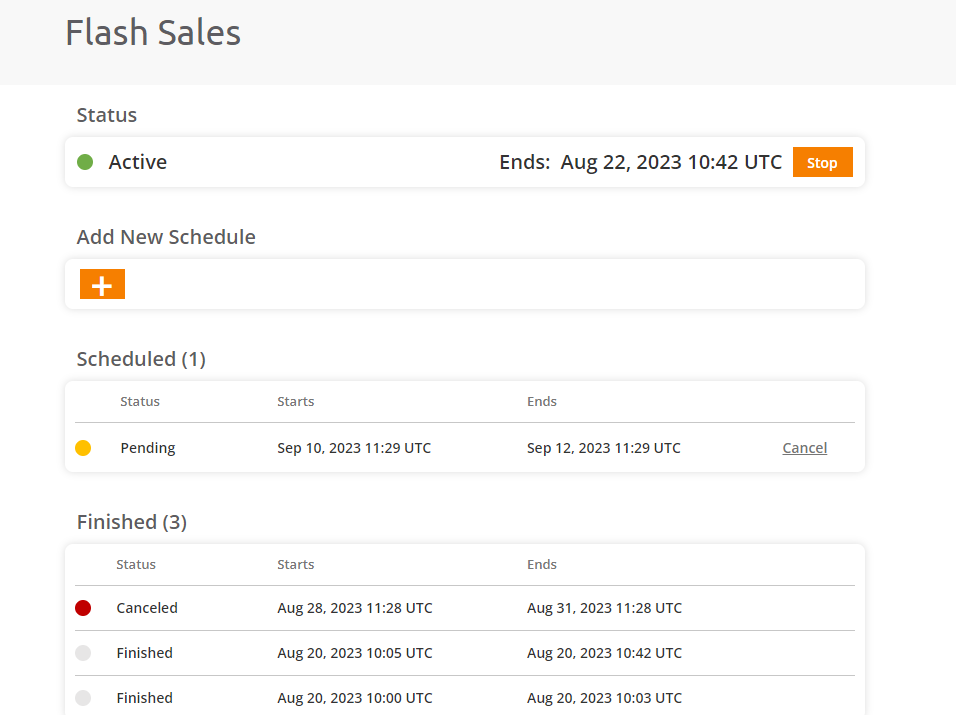
Active: A Flash Sale that is currently running and has a scheduled end date.
Cancelled: A scheduled or Pending Flash Sale that is cancelled.
Finished: A Flash Sale that has ended as scheduled.
Scheduled: A Flash Sale with a scheduled start and end date.
Active Indefinitely: An active Flash Sale that has no scheduled end date.
History and Cancelled Flash Sales
Under the Finished section, view a list of your completed and cancelled Flash Sales along with the start and end date of each sale.
Notifications
By default, any change to the Flash Sale status triggers an email notification sent to the logged-in user (the user who made the change) and to the Global‑e team.