Integration
When you sign up with Global-e, Global-e creates a Merchant account in the Global-e system and sends you your Global-e Merchant credentials.
Global‑e Merchant ID: The ID of your Global‑e account
Global‑e Merchant GUID: A GUID number for your Global‑e account. Note that Global‑e sends you a different GUID for staging and production. Make sure to use the correct GUID.
In addition, Global‑e sends you a URL to download the installation files via Bitbucket.
Before Getting Started
If you have not done so yet, make sure to share the following with Global‑e:
Your Bitbucket account.
The features you want Global‑e to support: the list of countries and special features such as Fixed Prices, multiple sites, and more.
Integration Steps
Description | Responsibility | |
|---|---|---|
Step 1 | Sandbox:
Note: You may need to whitelist Global‑e IPs. Notifications
| Merchant |
Step 2 | Install and configure the Global‑e Add-on:
| Merchant |
Step 3 | Storefront settings: Make sure that the order history (My Account page) displays Global‑e’s international prices correctly to customers. See My Account. | Merchant |
Step 4 | Solve possible issues arising after installation. | Global‑e and Merchant |
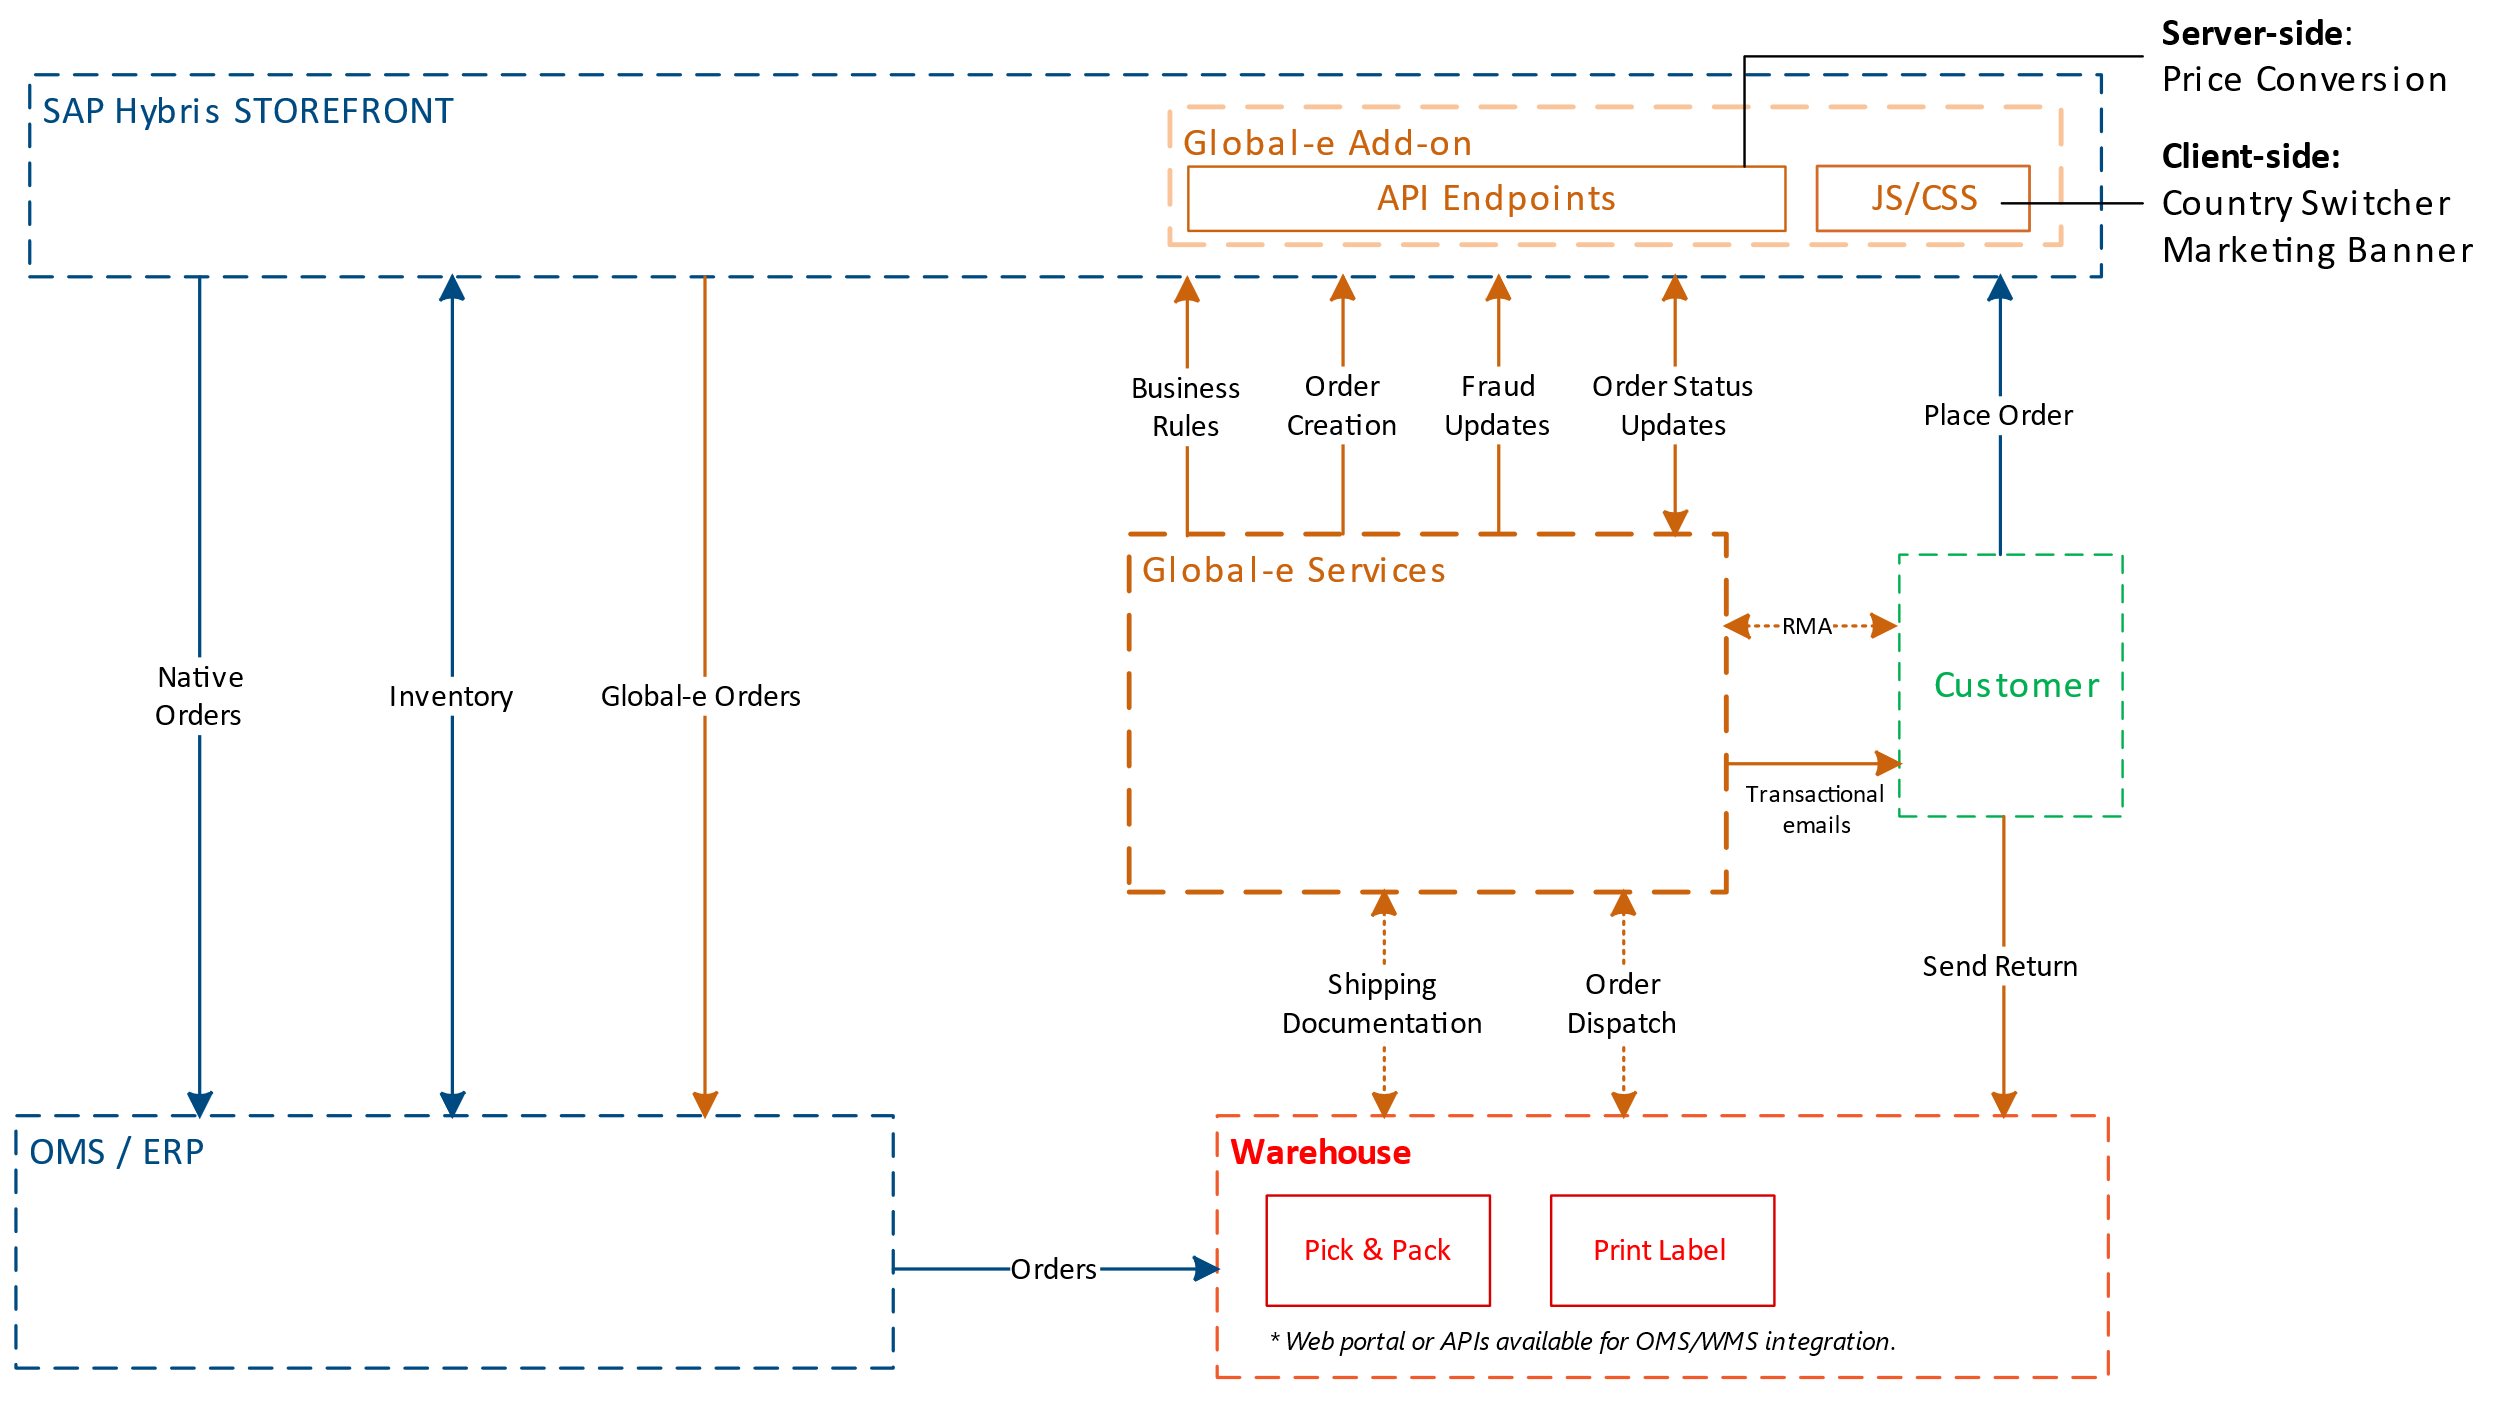
Step 5 | Global‑e enables and manages Global‑e countries, price conversion, and Global‑e checkout. The Add-on runs the following APIs automatically when the relevant action is triggered:
You can create listeners for these events. | Global‑e |
What's Next:
Discover the Bespoke Functionality.
Price Settings and Price Conversion
Merchandising: Promotions, Restricted and Forbidden Products.
Managing Orders
Cart and Checkout
In-Depth: Discover the Global‑e Add-on extensions and implement custom functionality
Known Limitations
Integration Flows
End-to-end Flows (High-Level)
 |
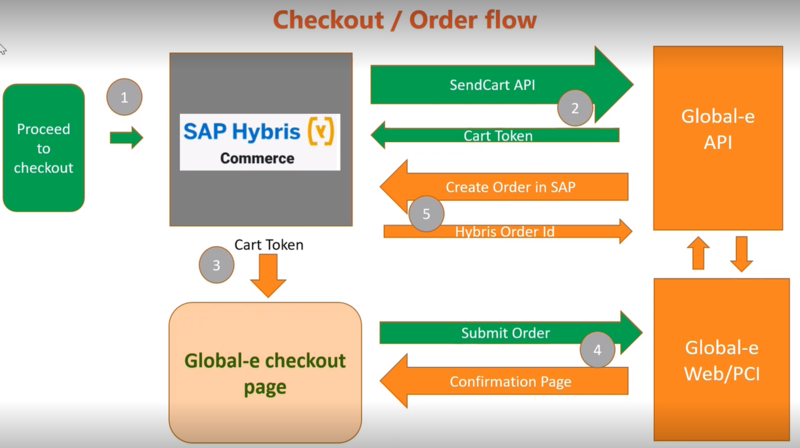
Global‑e Hybris Order and Checkout Flow
 |
When a customer proceeds to checkout (1), Global-e verifies if the selected shipping country is operated by Global-e.
If operated by Global‑e, the SentCart API is used to send all relevant information about the products and customer details to Global‑e (2).
Subsequently, Global‑e creates a cart on the Global‑e side and returns the cart token to SAP Commerce (Hybris).
Global‑e uses this cart token to initiate the checkout process (3).
Global‑e then makes a server-to-server API call to SAP, triggering the creation of an order on the SAP Ecommerce (Hybris) side (4,5).
Scripts
The following Global‑e scripts are installed.
Global‑e CSS
The JavaScript code is installed on all site pages and the Checkout Page.