Replacements
Processing Replacements
This section does not apply to Shopify. For information about Shopify, see The section on Replacements under Shopify. |
If you wish to replace an item, instead of refunding the customer, you can use the Global‑e replacement functionality. Prerequisites Before you can use the Replacement feature:
Contact your Success Manager if you need assistance in accessing the Global‑e Merchant Portal. | |
Criteria To perform a replacement the order must have the following status:
NoteA replacement request cannot be made for an order in "Pending" status. | |
Step 1. On the Global‑e Merchant Portal, create a replacement order.
Go to Orders > View Orders.
Find and select the order that contains the items to be replaced.
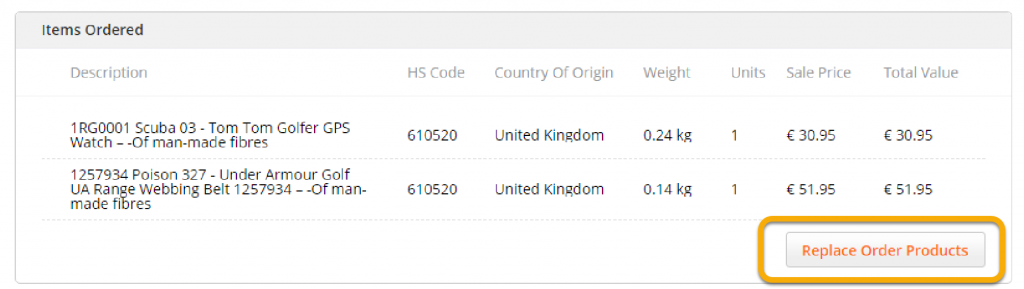
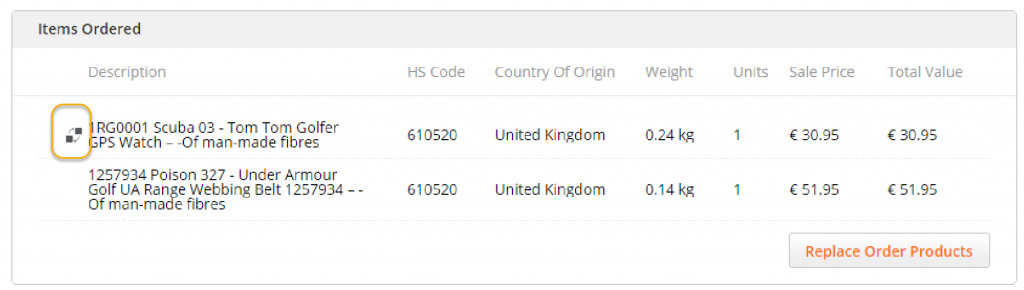
Scroll down to the bottom of the Order Details screen (General tab).
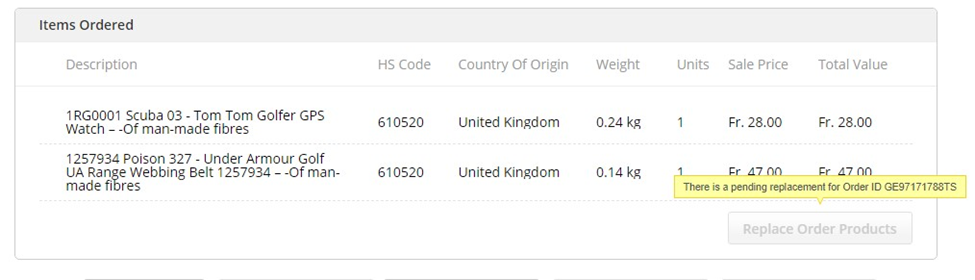
Under Items Ordered, click Replace Order Products.
Note that this button is only available if the order has one of the statuses listed in ???.
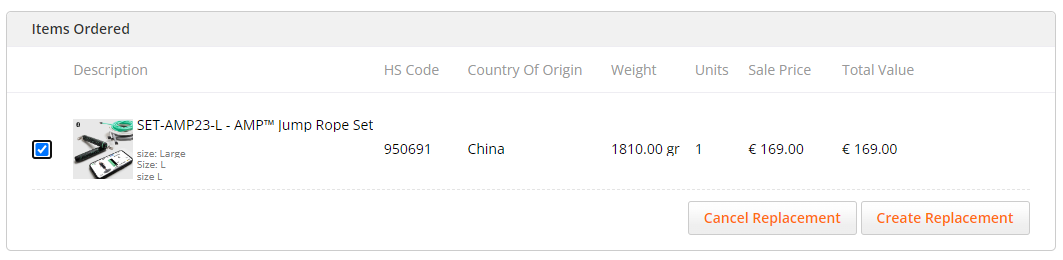
Select one or multiple items to replace.
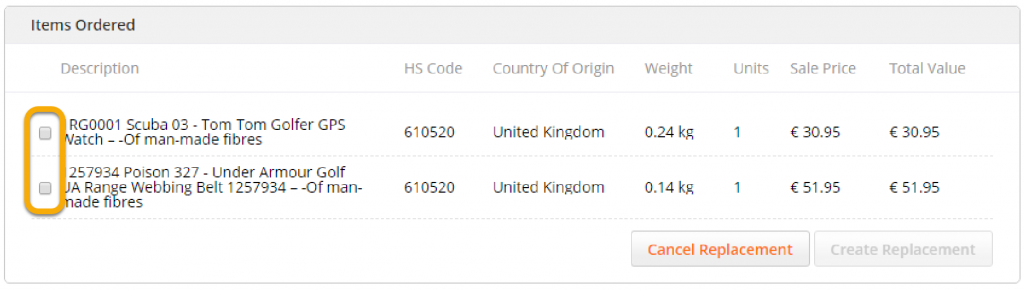
Click Create Replacement to create a new replacement order.
Your website opens.
Step 2. On your eCommerce website, replace the items.
When you click Create Replacement, your Merchant's website opens:
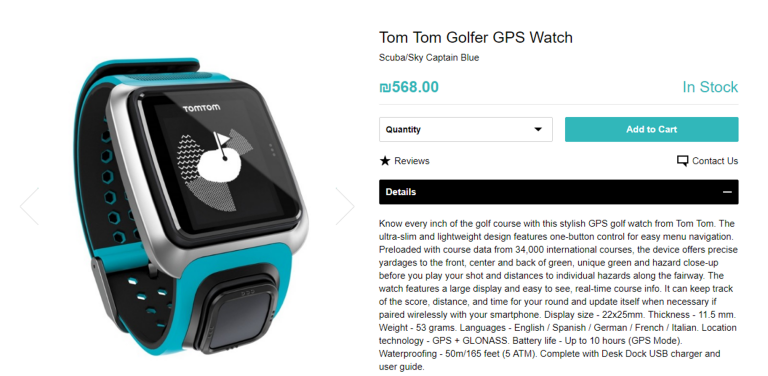
By default, your website shows the page of the product you wish to replace.
If the product URL is not configured correctly, the home page opens instead. Search for the item you want to send as a replacement.
To replace an item:
Replace the item in one of the following ways:
Modify the attributes of the current item
Modify the current item's attributes.
Select the relevant product attributes according to their exact specification (size, colour, and more).
Add the replacement item to the cart. You can add multiple items to the replacement order.
Replace the current item with another product
Manually search for the replacement item and select it.
Select the relevant product attributes according to their exact specification (size, colour, and more).
Add the replacement item to the cart. You can add multiple items to the replacement order.
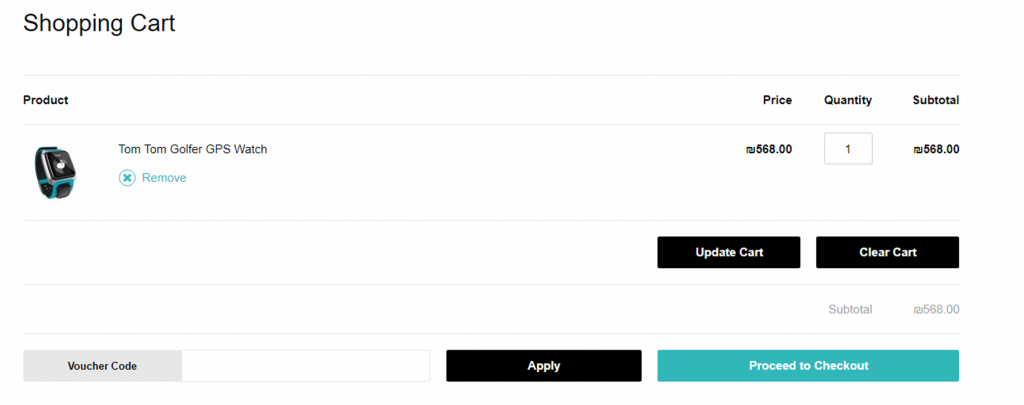
Click Checkout to proceed to your Ecommerce Platform Checkout page.
Click the Global‑e Replacement Order button to access the Global‑e Checkout.
Note
The Global‑e replacement order button name and location vary for each merchant.
The Global‑e Checkout page opens.
Step 3. Global‑e checkout (ecommerce platform).
Note
The Global‑e checkout page is similar to the checkout page of your ecommerce platform, with the following differences:
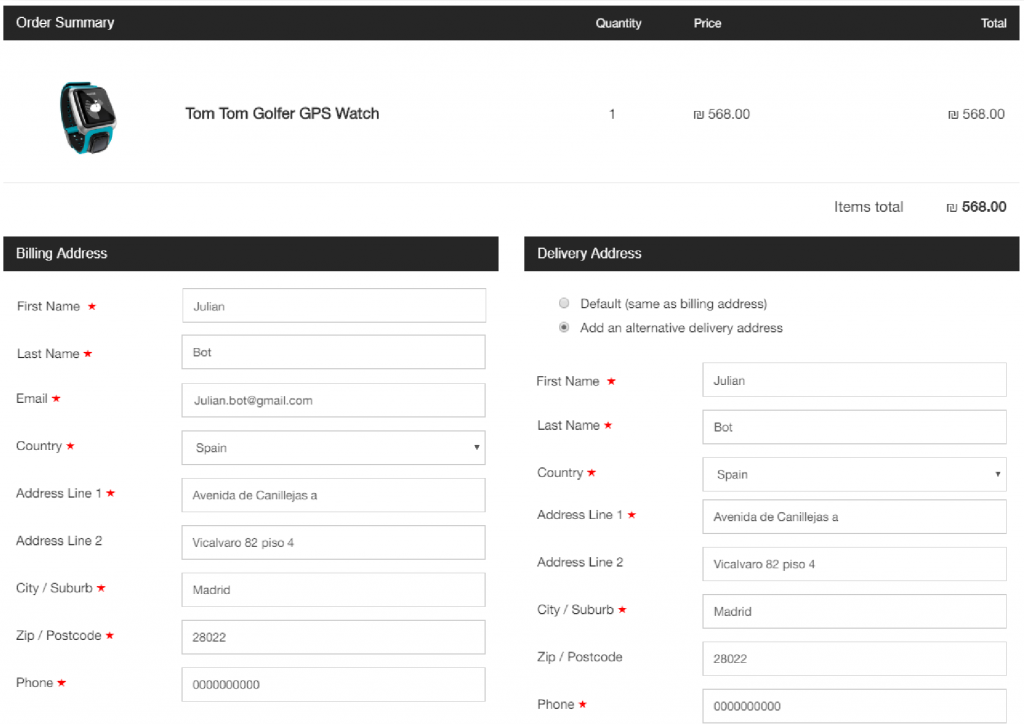
➽ The customer's personal and address details are prefilled according to the details in the original order. If required, you can modify these details.
➽ You do not need to enter payment information.
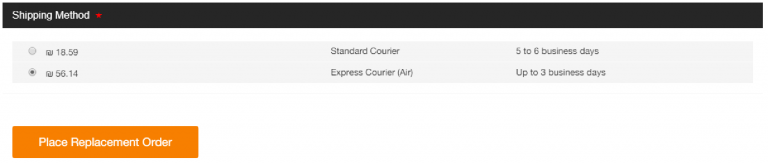
➽ The Global-e page includes a Place Replacement Order button instead of the ecommerce platform pay/submit button.
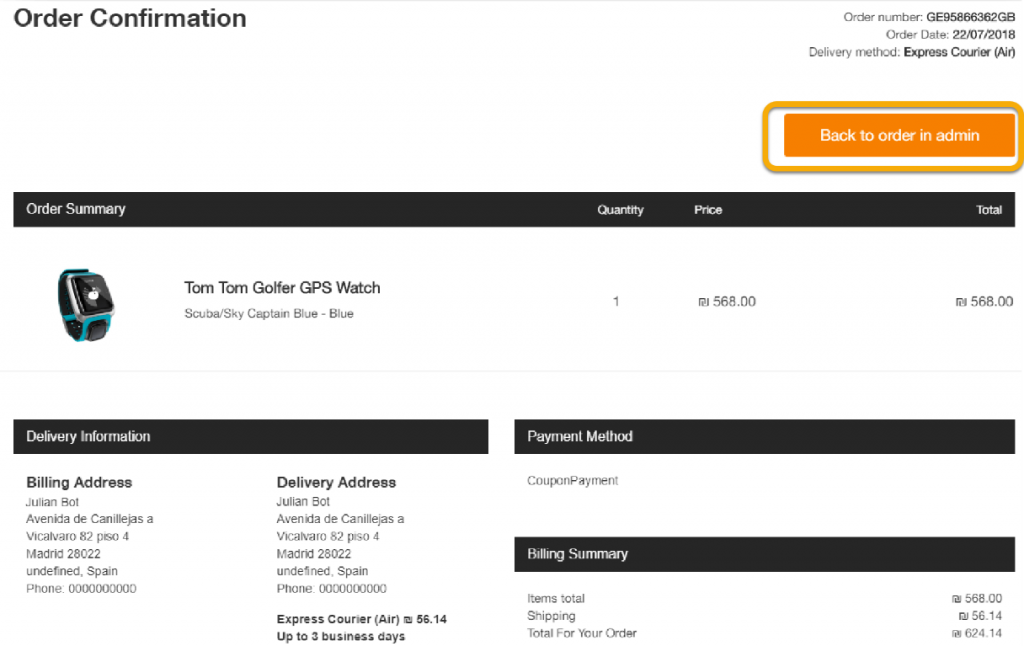
To complete the replacement order in the Global-e Checkout Page (example above):
Review the customer's personal details; modify them, if required.
Select the shipping method to send the replacement order (It can be different from that used to ship the original order).
Choose to prepay duties and taxes when applicable.
Note
DDU destinations can create expenses for customers and should be avoided if not intended. If Duties and Taxes are required and not prepaid, the customer may be requested to pay them to the shipper.
Click Place Replacement Order to create the replacement order.
The order confirmation page confirms the creation of the replacement order.
At this stage, the customer receives an email stating that the replacement order was created.
The order is added to your ecommerce platform as a new order, indicating that this is a replacement order and not a regular order.
If you do not wish to include replacement orders in your sales reports, you may need to perform modifications on your ecommerce platform to make sure that they are not included in the sales reports.
To view the original order or to cancel a replacement, click Back to order in admin to go back to the Global-e Merchant Portal.
Step 4. On the Global‑e Merchant Portal, view replaced items.
To view the original order and replaced items:
From the Global‑e Merchant Portal, go to Orders > View Orders
Open the original order.
Note that in the Items Ordered section, the replaced items are flagged and linked to the replacement order for this item.
Note that at the top of the order screen, the newly replaced order is flagged as a replacement order.

Step 5. On the Global‑e Merchant Portal, cancel the replacement (Optional).
To cancel the replacement:
Click Cancel Replacement.
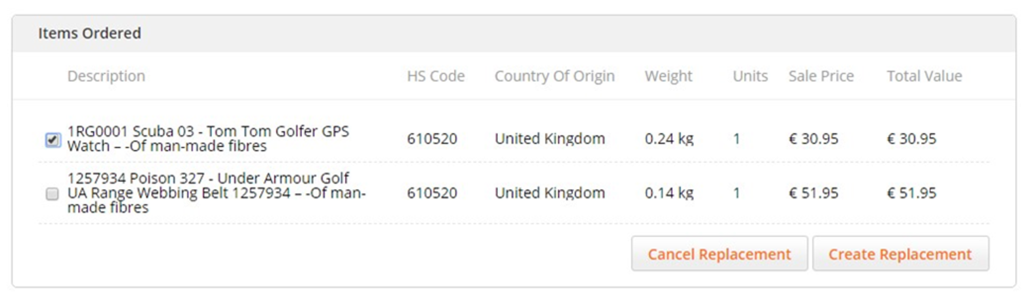
Note: If a replacement order is in progress or it has been cancelled, you cannot create additional replacements. Notice the replacement indication next to the replacement orders.