Returns Portal
Overview
If you support returns via Global‑e, the shopper can use the Returns Portal to return goods or a dedicated merchant role can use the Merchant Portal to support the shopper.
In this document, the dedicated role is called Admin. If you have a collection point, depending on your country's settings and rates, the shopper can return goods directly to the store.
Returns Portal
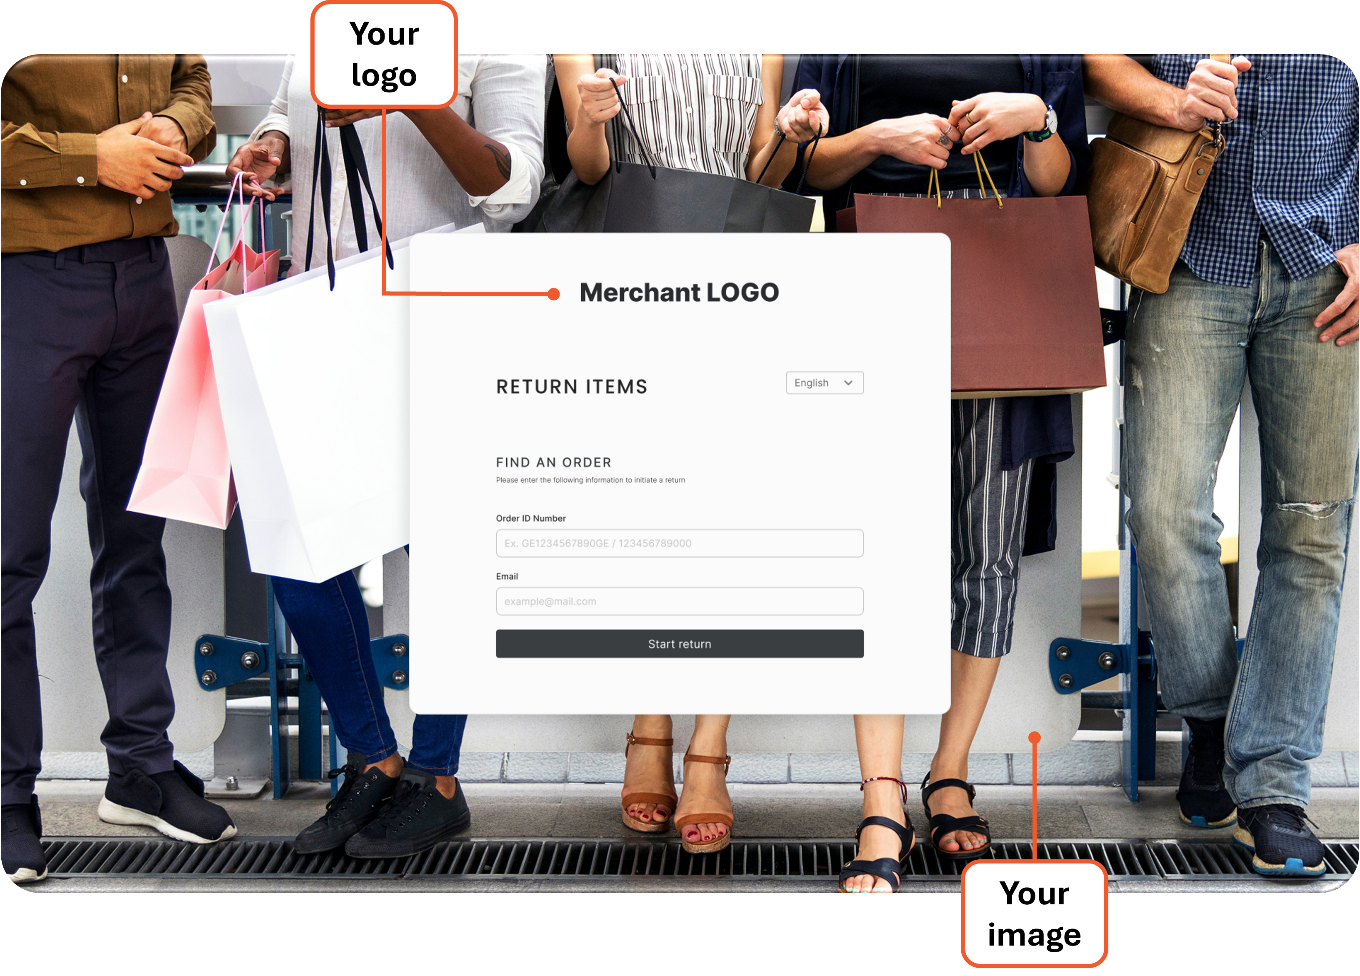
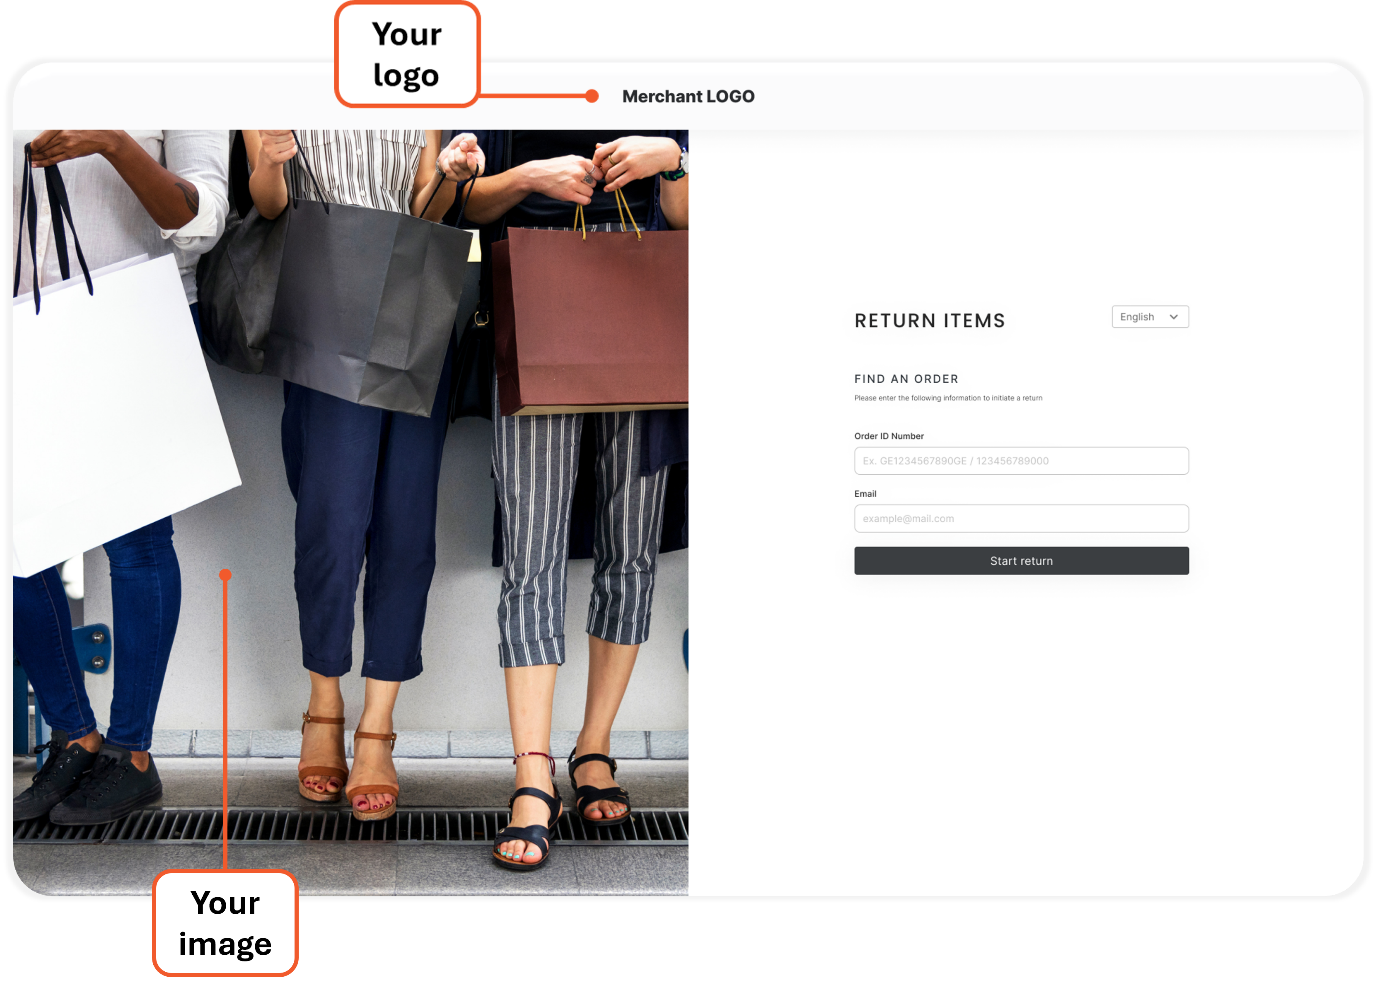
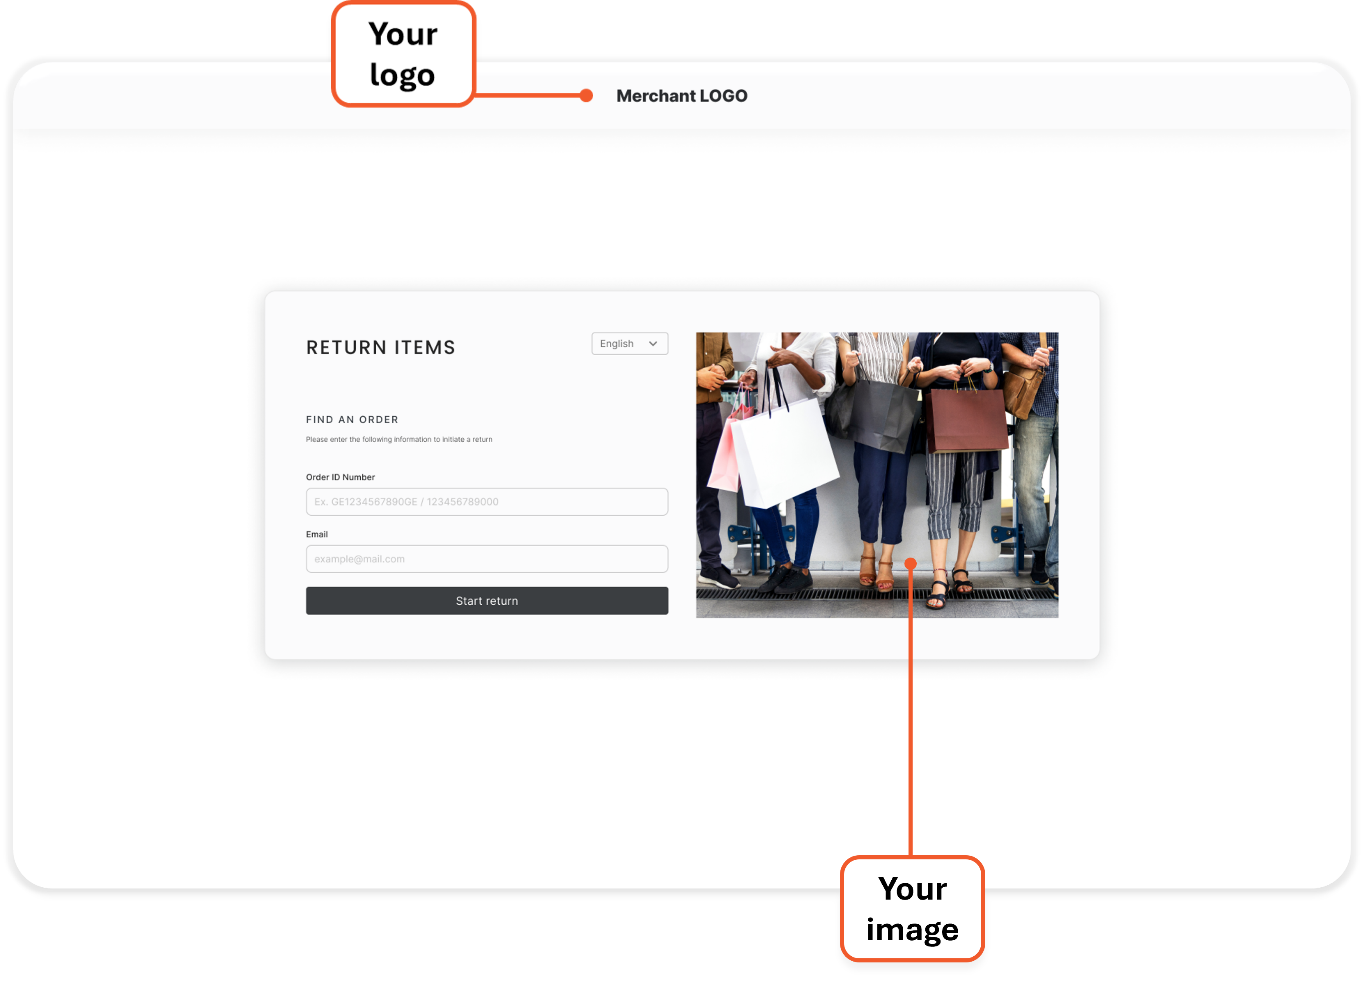
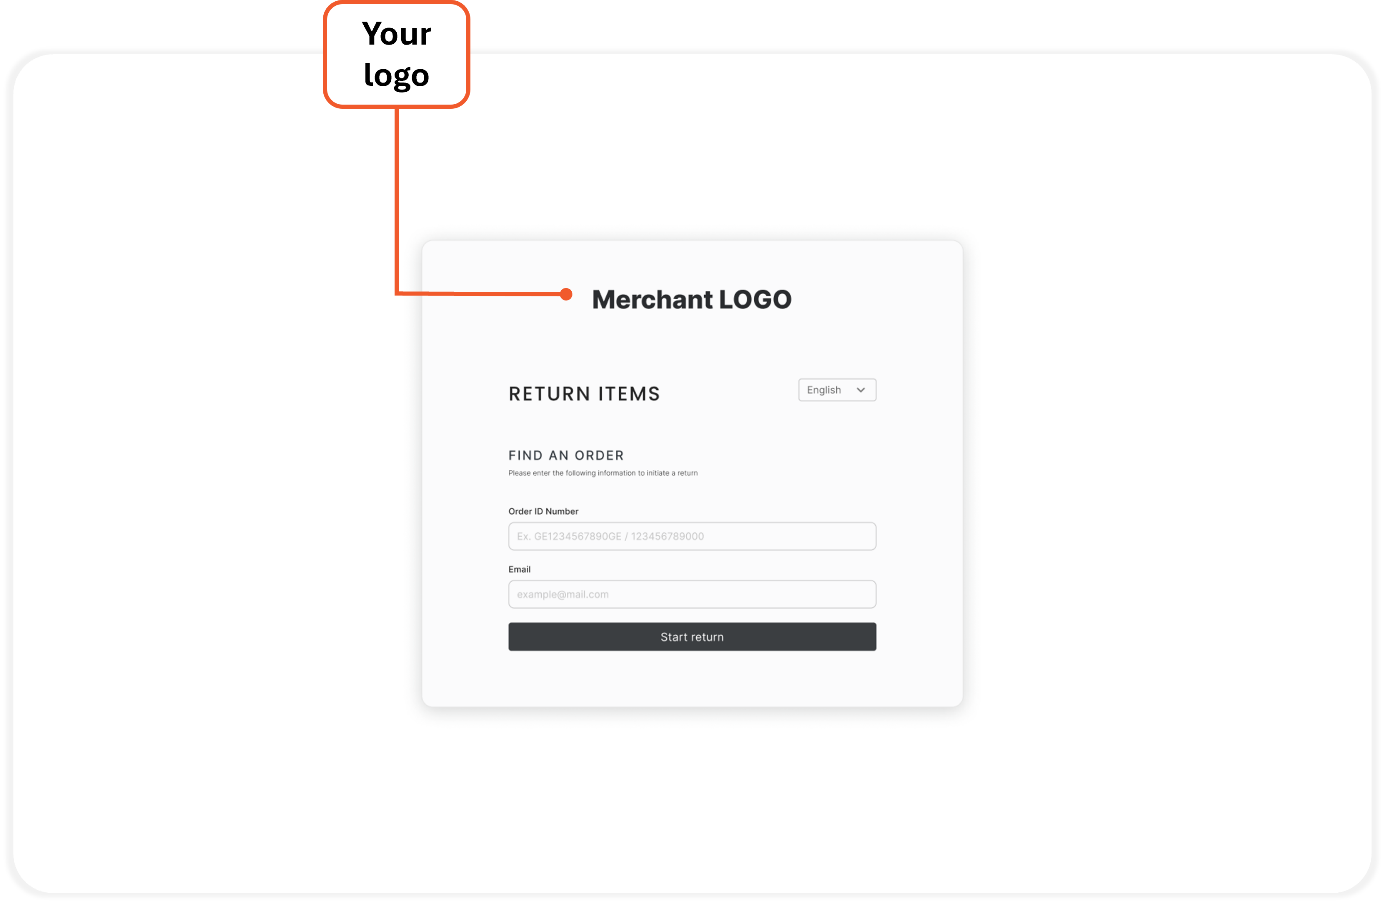
As part of the integration process, Global‑e delivers a Returns Portal branded with the merchant logo and theme as well as a unique URL to access your Returns Portal.
This document describes the Returns Portal options and Returns flows supported by Global-e.
Note
The basic return flow is the same for the shopper and for the Admin. The shopper uses the Returns Portal to perform the return. The Admin uses the Merchant Portal to perform the same procedure and configure the advanced options. The additional configuration options are highlighted in this document.
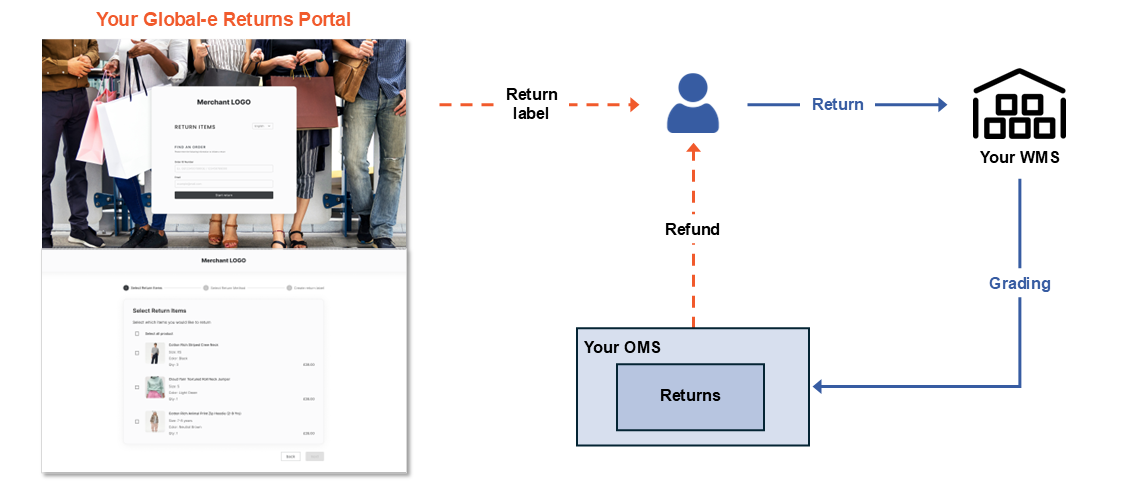
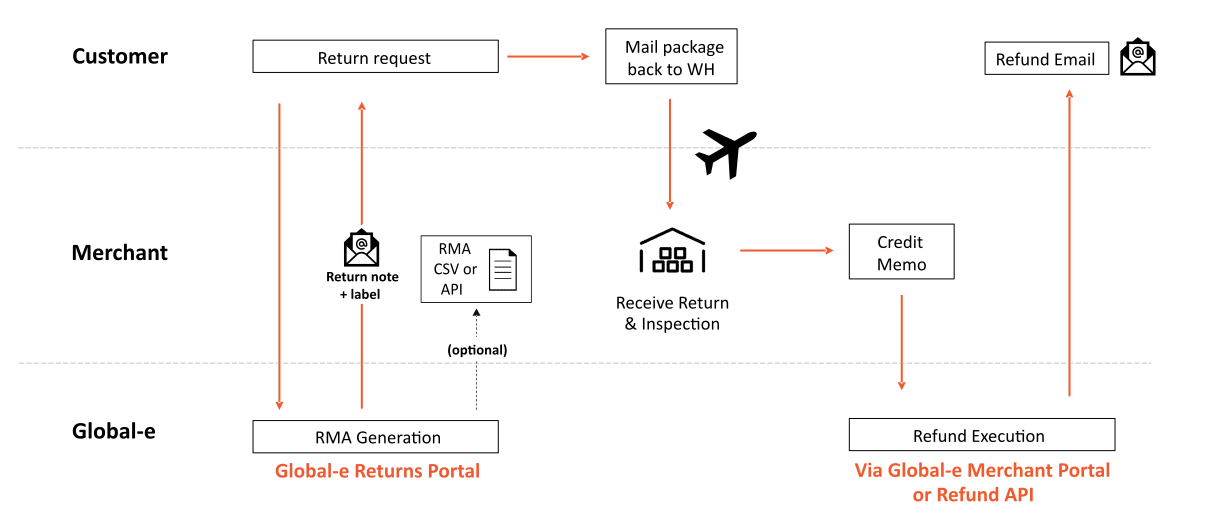
The following diagram provides a high-level return flow performed by the customer via the Returns Portal.
Return Flow |
As a Merchant, it is up to you to share the URL to the Returns Portal with shoppers.
If you share the URL to the Global‑e Returns Portal, shoppers can use it to create RMAs and generate the required labels.
Alternatively, your authorized personnel (Admin) can perform the return on behalf of the customer via the Global‑e Merchant Portal Returns screen. This could be applicable for instance, if you decide not to share the URL of the return site with the shopper.
Prerequisites
Before getting started, make sure that you meet the following requirements:
The Merchant must support returns via Global-e.
Global‑e Merchant roles to access the Global‑e Merchant Portal and handle or configure returns:
The Merchant Operator and/or the Merchant Admin (or dedicated role).
Before Performing a Return
Make sure to have the following information handy:
The Global‑e Order ID or the Merchant Order ID.
The email address that was used to place the order.
The order must comply with the Return Policy so that the goods can be returned.
The order must have one of the following statuses: Dispatched to Customer or Delivered to Customer.
Overview of the Return Process and Options
Global‑e offers several return options, each of which generates an RMA and a shipping label.
The user flows depend on the selected configuration (Self Postage Returns and Prepaid Returns) the Returns Portal shows either 3 or 4 steps.
Self-Postage
This option allows shoppers to generate a self-postage label that can be used with any shipper chosen by the customer. This is the most basic return option; It is always displayed in the Returns Portal.
Flow 1: Self-postage Return
Step 1 - Find the order: This step applies to both, self-postage and prepaid flows.
The shopper accesses the Returns Portal and enters the order ID and email address.
The Admin accesses the Merchant Portal > Orders and creates an order return.
Step 2 - Select the items to return:
This step applies to both, self-postage and prepaid flows.
The shopper or Admin chooses the products to return and the reason for the return.
Step 3 - Select the return method:
This step depends on the returns options configured for the relevant country.
If there are no prepaid returns, this is when the return labels are created and sent to the shopper by email and the flow ends here.
Prepaid
This option enables the shopper to generate a prepaid shipping label via DHL. The return is routed directly to your merchant returns facility.
The Returns Portal shows the cost of the return but the customer is not charged when the RMA is created.
The prepaid return cost is deducted at the time of the order refund from the refund amount.
Flow 2: Prepaid Courier Returns
Step 1 - Find the order • This step applies to both, self-postage and prepaid flows. The shopper accesses the Returns Portal and enters the order ID and email address. The Admin accesses the Merchant Portal > Orders and creates an order return.
Step 2 - Select the items to return This step applies to both, self-postage and prepaid flows. The shopper or Admin chooses the products to return and the reason for the return.
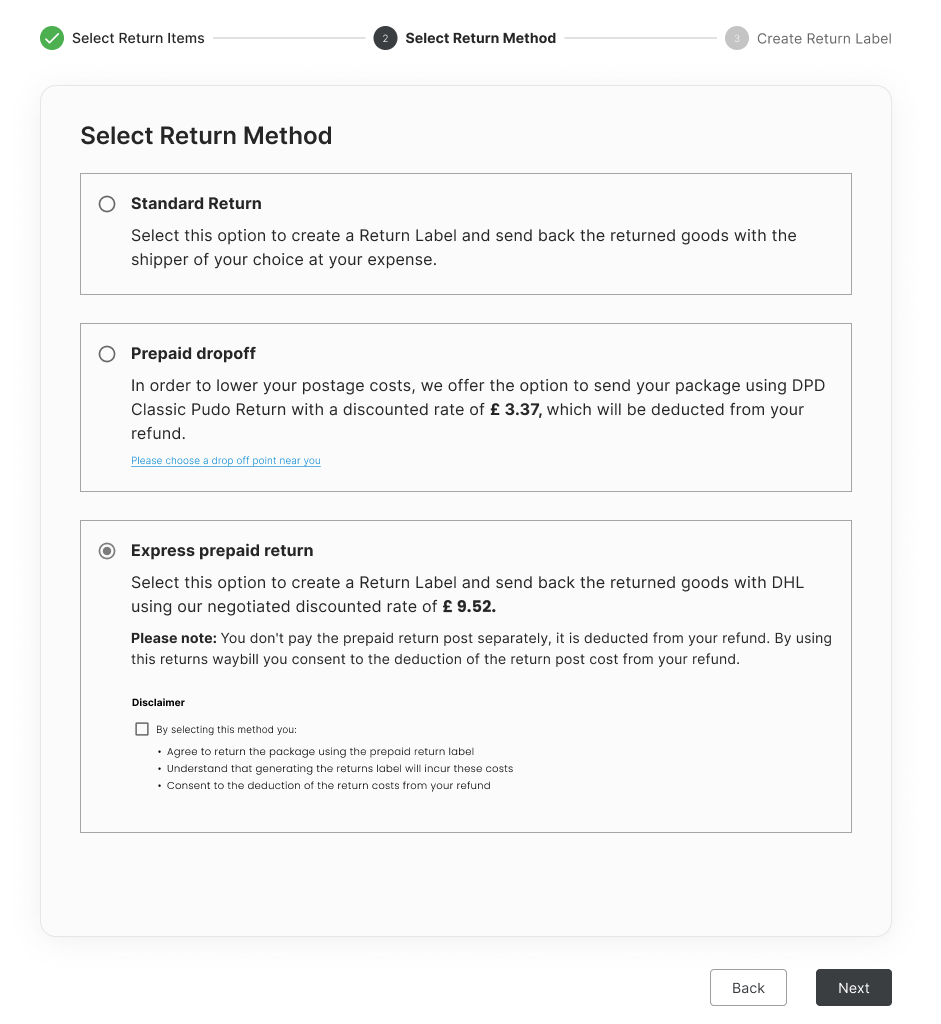
Step 3 - Select the return method:
This step depends on the returns options configured for the relevant country.
If prepaid options are configured per merchant or country, this step is when the shopper selects a return option; for example, self-postage or prepaid.
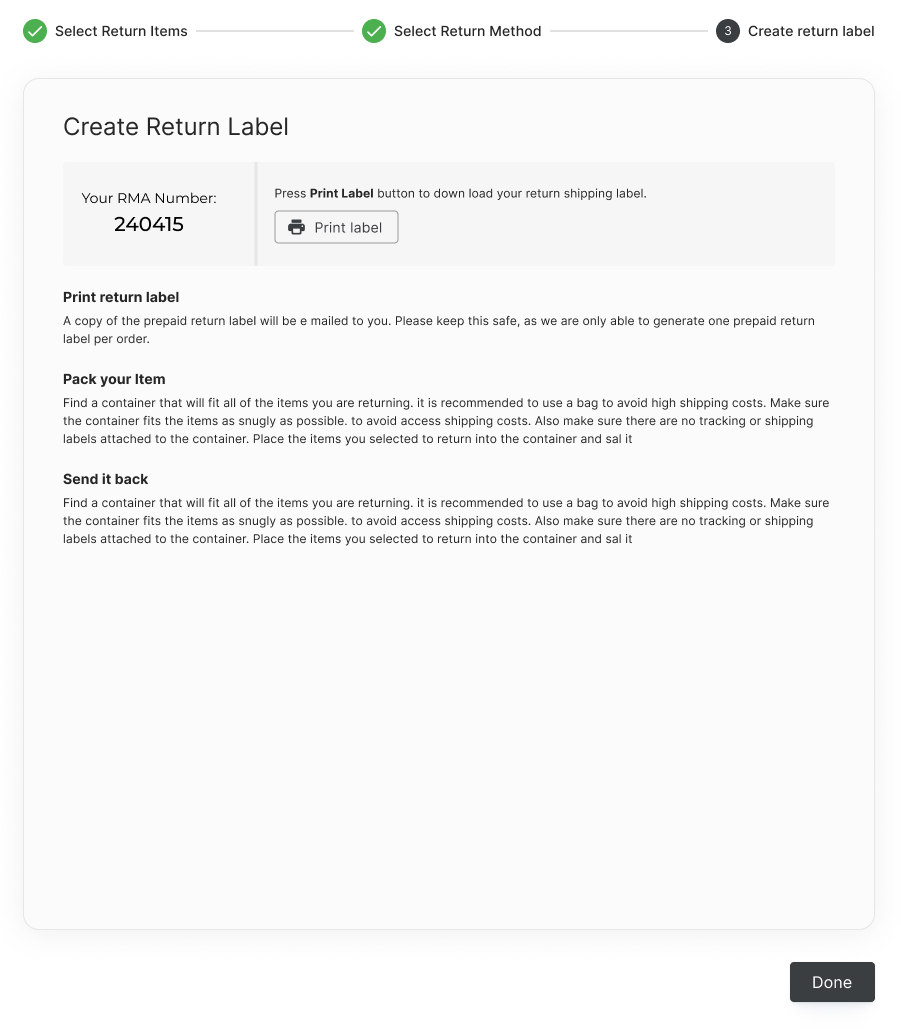
Step 4 - Create a return label:
If the shopper has selected the prepaid courier return option, this step is when labels are generated.
This step allows the shopper to generate the RMA and shipping label. (Get the required documents and follow the instructions to initiate the return).
Notes
Global‑e adds a branded merchant logo on the Returns Portal for the shopper per merchant request.
The Return Portal is fully translated and supports multiple languages.
Note
The Self-Postage Label supports English only.
The Return Note is partially translated.
The Return Instructions are translated.
Return Policy
The Return Policy is available on the checkout page.
The return journey is only available for orders that meet the Return Policy based on the following parameters and statuses.
Parameters
Return Policy Parameter | Description |
---|---|
Allowed return period | The allowed return period is determined per merchant, by the merchant app setting. |
AllowedReturnDays | The number of calendar days during which the RMA can be issued from the moment the order is in Dispatched status. |
Complete default value | Admin users can issue returns for an unlimited period (even if the return period has expired) if the merchant app setting IsAllowedReturnDaysAfterExpired. Default: false. Do not allow RMA creation if the return period expired. |
Statuses
Orders or parcels must have the following statuses to execute returns.
Non-split orders
Delivered to customer
Delivered to store
Dispatched to customer
Returned to store
Split orders - Order Status
Delivered to customer
Delivered to store
Dispatched to customer
Returned to store
Part dispatched (the rest to follow) and payment received
Part dispatched and part refunded
Parcel status
Delivered to customer
Delivered to store
Dispatched
Flow 1: Self-postage Returns
Step 1. Find an Order
Shopper Procedure
To access the Returns Portal and find the order:
Go to the Global‑e Support Portal: Tech Support Help Center.
Click Returns and Refunds.
Click How can I return an Item?
The Returns Portal (Wizard) is displayed.
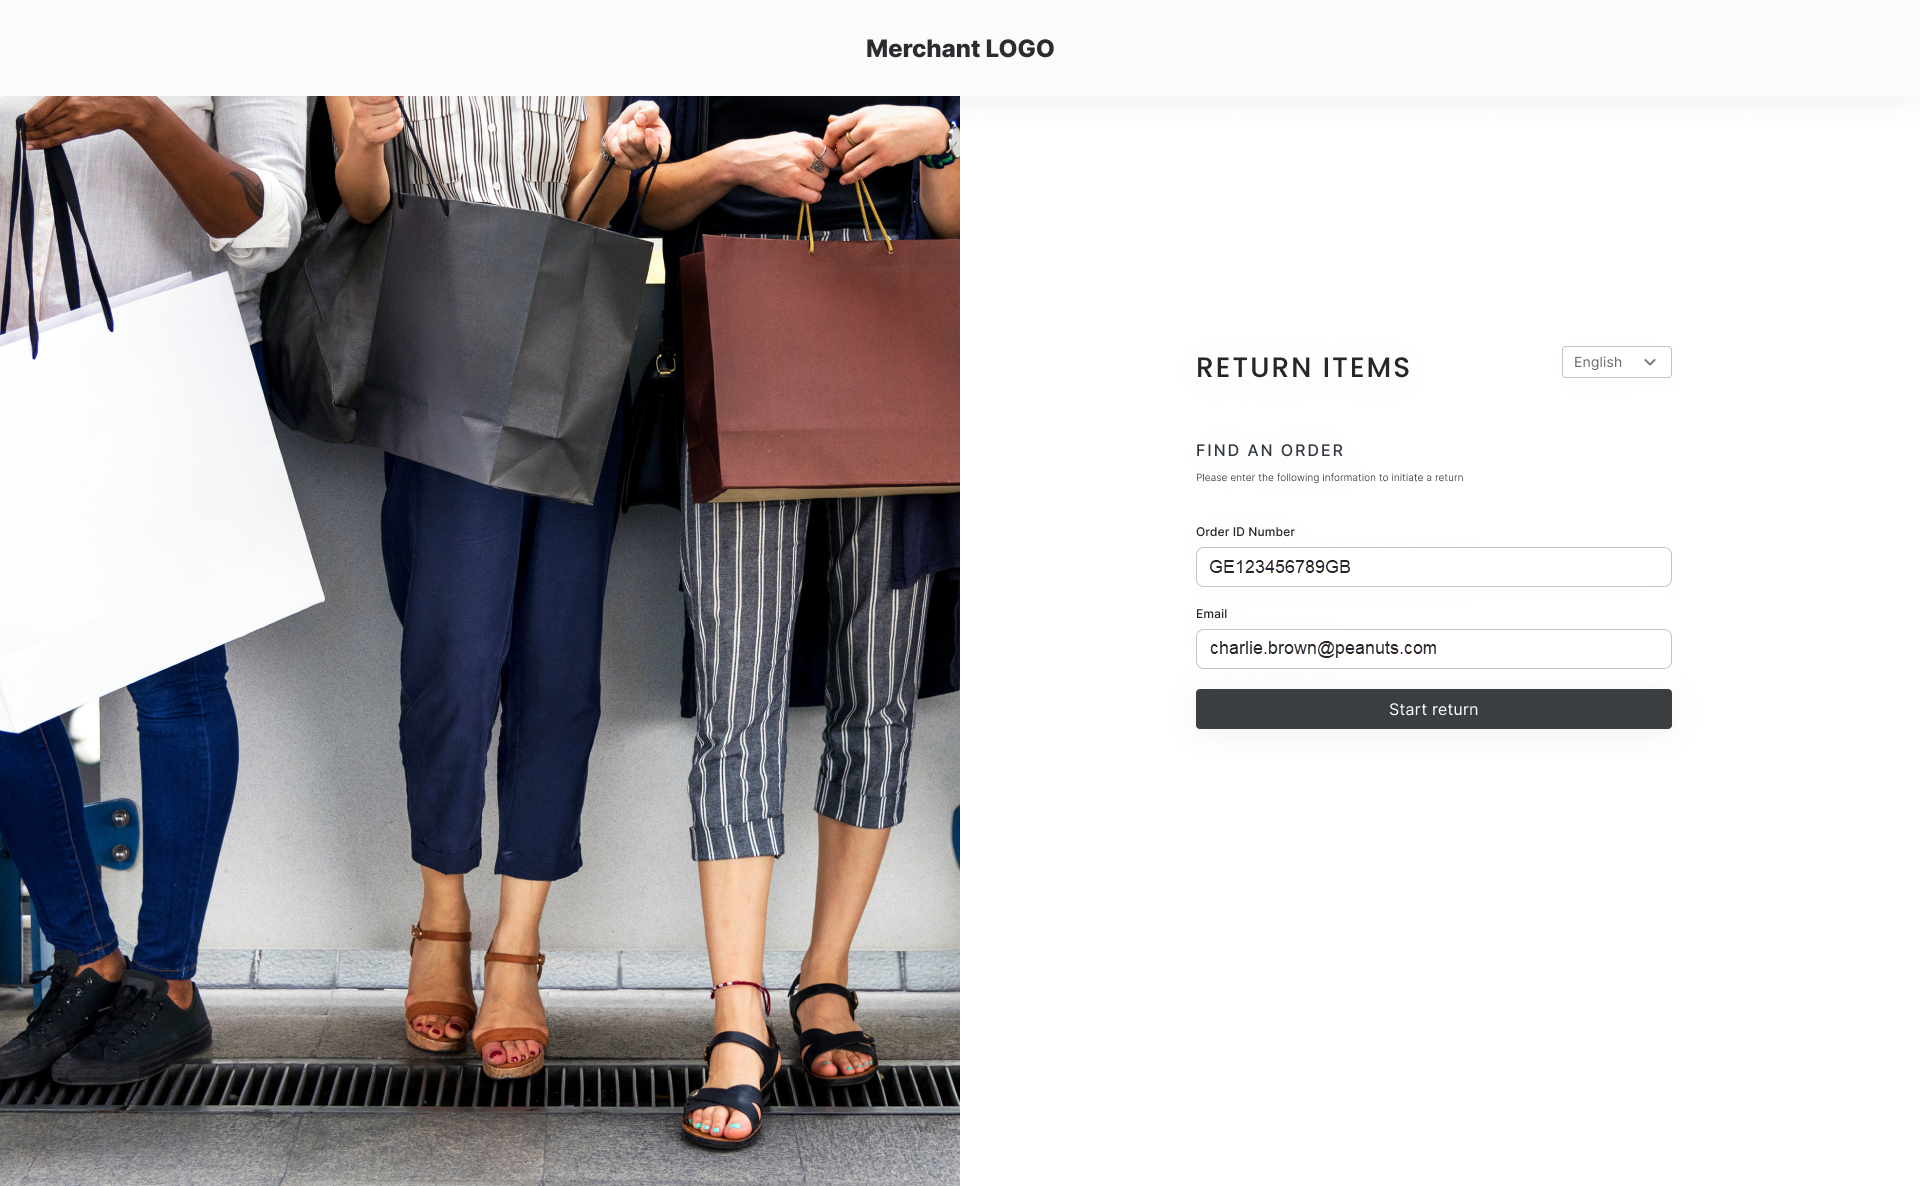
In the Find an Order section:
Enter the Global‑e Order ID or the Merchant Order ID.
Enter the email address that was used to place the order.
Example:
Optional: For a localized return journey, select the desired language from the Select Language menu. The default return journey is set to English, regardless of the language selected on the checkout page.
Click Next to proceed to Step 2. The relevant order ID and order details are displayed.
Admin Procedure
To access the Order Returns Screen and create a return:
From the Merchant Portal, go to Orders > View Orders ,
In the Merchant Orders screen, find and open the order to be returned. For example GE3604332434GB.
Note: The order (parcel status) must have one of the following statuses: Dispatched or Delivered to customer.
The Order details screen opens.
At the bottom of the Order Details screen, under Items Ordered, click Create Return.
Step 2 of the Returns Portal is displayed showing the relevant order ID and order details.
Step 2. Select the Items to Return
This step shows:
The Order ID or Merchant ID, as it was entered in the previous step.
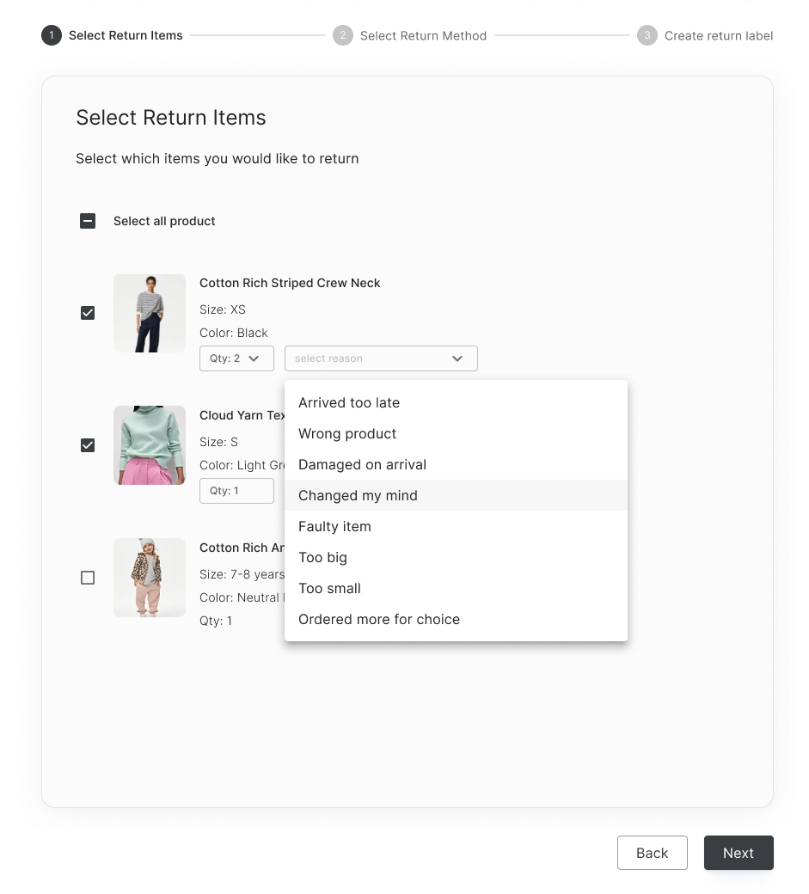
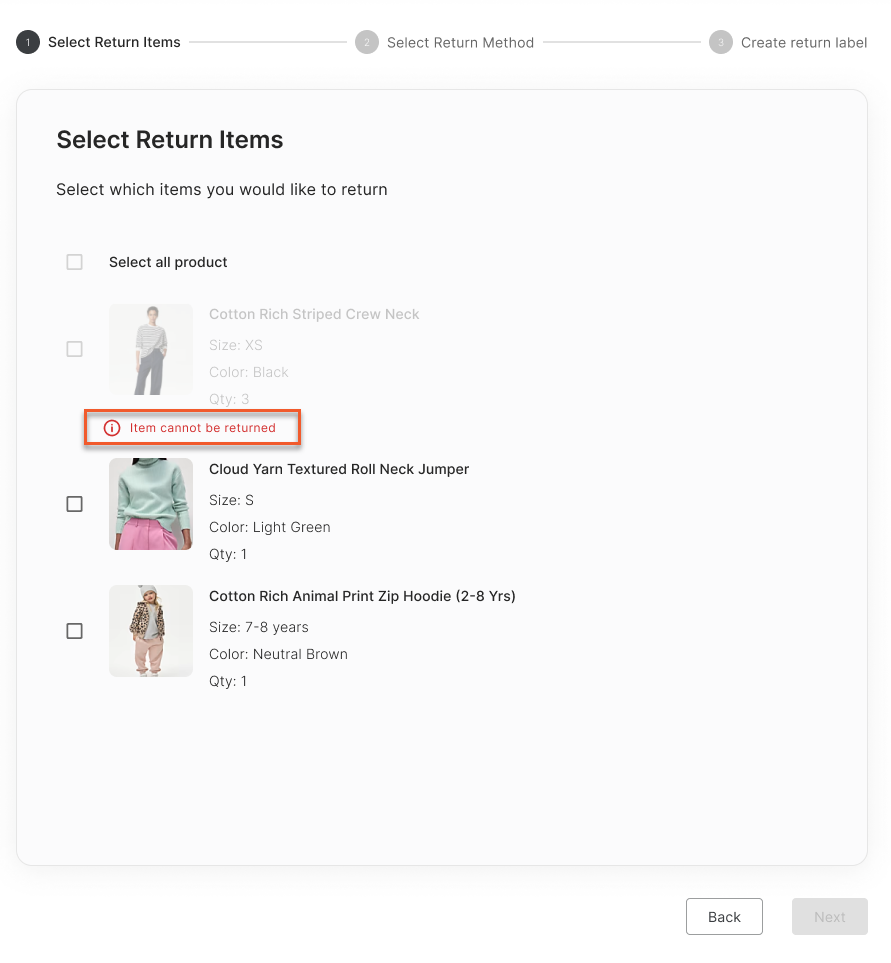
The product summary with the list of products that can be returned. This list includes the product image, product name, and product attributes (such as size and colour).
Note: Non-returnable products are displayed but the shopper cannot select them for return.
You can select one or multiple items to return.
For each item you wish to return:
Select the number of items to return. For example 1.
Select the reason for the return. For example "Too big".
Example:
See the list of Default Return Reasons.
Click Next.
Advanced Settings (Admin)
To grant a FREE prepaid return, select Make this return free shipping for the customer.
To return all products at once, next to Return all products, select a return reason.
Returnable vs. Non-returnable Products
By default, returnable items are displayed in the Returns Portal.
Some non-returnable products are displayed but the shopper cannot select them for return, others are not displayed, as detailed below.
Dangerous goods: The Returns Portal only shows dangerous goods if you request that Global‑e enables the specific merchant country parameter:
EnableDGProductVisibilityInReturnPortal
.Example of a product listed as dangerous (note the exclamation mark next to the product):
Price 0 (zero): Products with 0 price before discount are not returnable.
Non-returnable products: Products marked as non-returnable by the merchant (per provided product attribute or metadata) are disabled and a label is added, indicating that the product cannot be returned.
Example of a non-returnable product:
Virtual products : Virtual Products (Products.IsVirtual = 1) cannot be returned.
Virtual products are products that are delivered electronically, without the need for physical shipping. Examples of virtual products supported by Global-e can include gift cards and vouchers: These are typically sent via email or other electronic means and can be used to make purchases on a website or in-store.
Recycled goods: Recycled goods are generally non-returnable unless the merchant allows the products to be returned after a number of days (configurable) based on the return reason. For example, a product can be returned after 100 days because it was “worn enough“. The merchant can compensate customers for recycling, for instance, in the form of a membership reward (10% coupon or Loyalty Points).
To support recycling, request that Global-e sets the
SendCart
Product Attribute as recyclable.If allowed by the merchant, the shopper can return the item with the “recycle” reason (the name is configurable) as long as the feature is enabled and the return date is within the date range.
On the Merchant Portal, when viewing the details of an order, the MinimumRecycledPerial appears under the product name (in the items ordered section). Global‑e can change this text as required.
Example of recyclable products:
Default Return Reasons
Note
Global‑e can customize the following list per merchant.
In addition, Global‑e can control the order display by configuring MapMerchantReturnReasons.DisplaySortOrder
. This requires that Global‑e pre-maps this in the database.
Default Return Reasons
Arrived too late
Wrong Product
Damaged on arrival
Changed my mind
Faulty item
Too big
Too small
Ordered more for choice
Not as photo
Not as described
Replacement
Step 3 – Create Return label
An RMA is created. The RMA and the return instructions are sent directly to the shopper's email address used when placing the order.
To download the RMA, click Print return label.
The self-postage flow ends here.
Flow 2: Prepaid Courier Returns
Step 1 and Step 2
Repeat steps 1 and 2 as detailed in Flow 1: Self-Postage Returns.
Step 3. Select the Return Method
Return Options
Return options are available according to the merchant return offering. Each return option is linked with the return address.
Select a return option:
Standard Returns: This is the self-postage option (default). This option lets shoppers create a return label and ship the returned products with the shipper of their choice at their expense.
Note
To remove this option, you can request that Global-e sets the merchant country parameter:
HideStandardShippingMethod = true
Prepaid Returns: This option lets shoppers create a prepaid return label and download it from the Returns Portal.
The return cost is deducted from the customer's refund.
Express prepaid: This option lets shoppers return goods with a courier such as DHL.
Review the disclaimer and click the box next to it to confirm that you have read it.
Click Next to proceed to the next step.
Step 4. Create a Return Label
The user selected prepaid returns.
An RMA is created.
To return the goods:
Click Print return label to download the RMA.
Print the return label and affix it securely to the package.
Send the package (together with the return documentation) to DHL.
Note that the prepaid label price will be deducted from your refund.
Searching for Returns (Admin)
To search for returns:
From the Merchant Portal, go to Orders > Returns.
You can search returns by setting the following filters.
Select an option:
RMA Number (selected by default)
Tracking Number (shipper’s tracking number)
Order Number (Global‑e order ID - beginning with GE)
Delivery Reference Number
You can also set additional search filters (see details in the Additional Search Filters section further below).
To search for a specific return, enter the relevant return number in the search field, then click Find and View.
To list all returns based on the default RMA selection or on your selection, click Filter Returns.
The search results are displayed in the lower section of the screen, under Return Requests.
Additional Search Filters
You can perform an advanced search by setting additional filters detailed in the following table.
Search by | Description |
---|---|
Shipping Service | Search by shipping service. |
Return Status | Search by return status: Approved Arrived at Destination Authorized Closed Dispatched by customer Dispatch by Returns operator Dispatched from hub to merchant Received by Global‑e Received by Returns operator Received in Hub Refused Requested |
Customer name | Search by the name of the customer who performed the return. |
Return creator | Search by the person who created the return: Customer Global‑e Representative Merchant Representative |
Merchant | Search by merchant name (only relevant for merchants with multiple brands managed by the same user). |
Search by customer email. | |
From Date / To Date | Search for returns within a date range: Select the From Date and To Date from the calendars. |
Shipping Countries | Search by shipping country. |
Return Type | Search by return type: Consolidated return Local Prepaid Local Prepaid Courier Prepaid Standard Undefined |
Shipping Documents
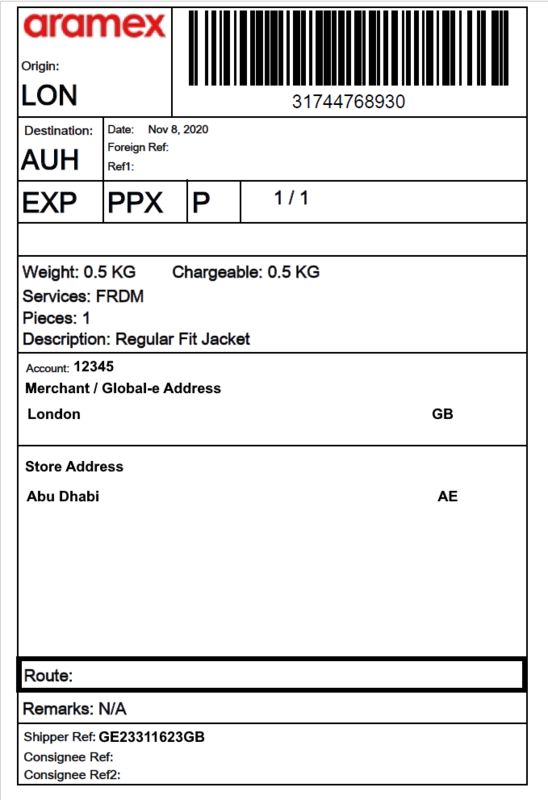
Shipping Label
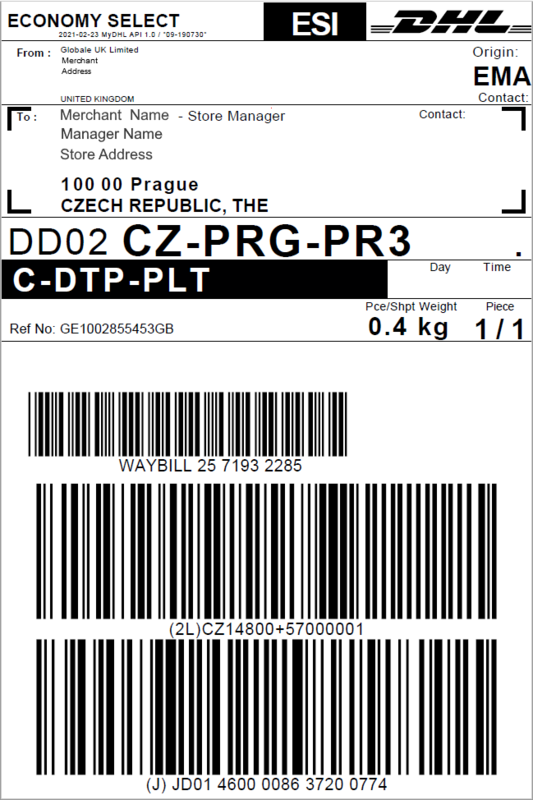
The shipping label is mandatory on all parcels.
The shipping label includes a bar code and underneath (generally), the tracking number.
The following figure shows examples of shipping labels.
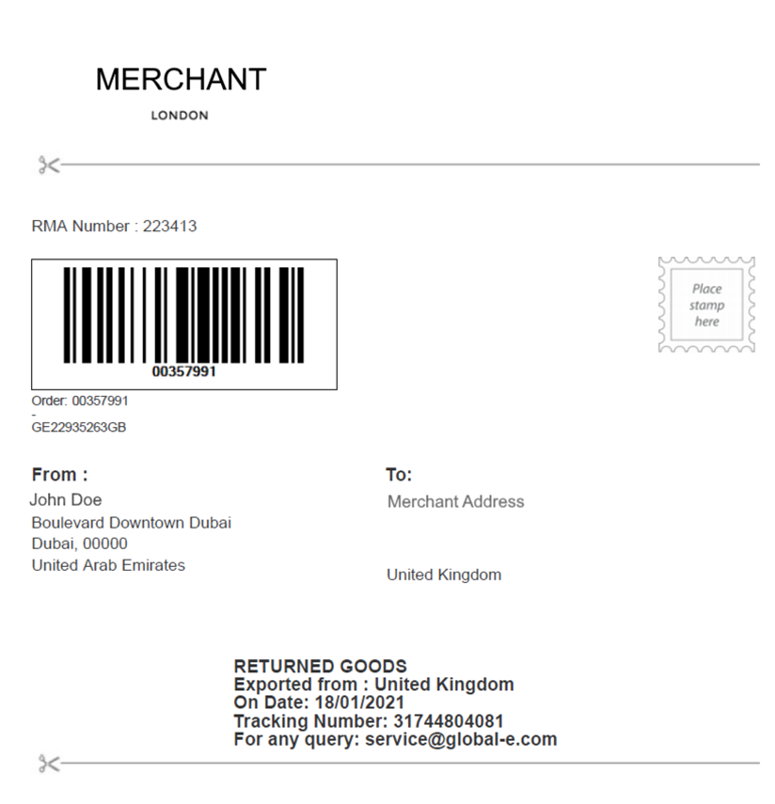
Example of an RMA
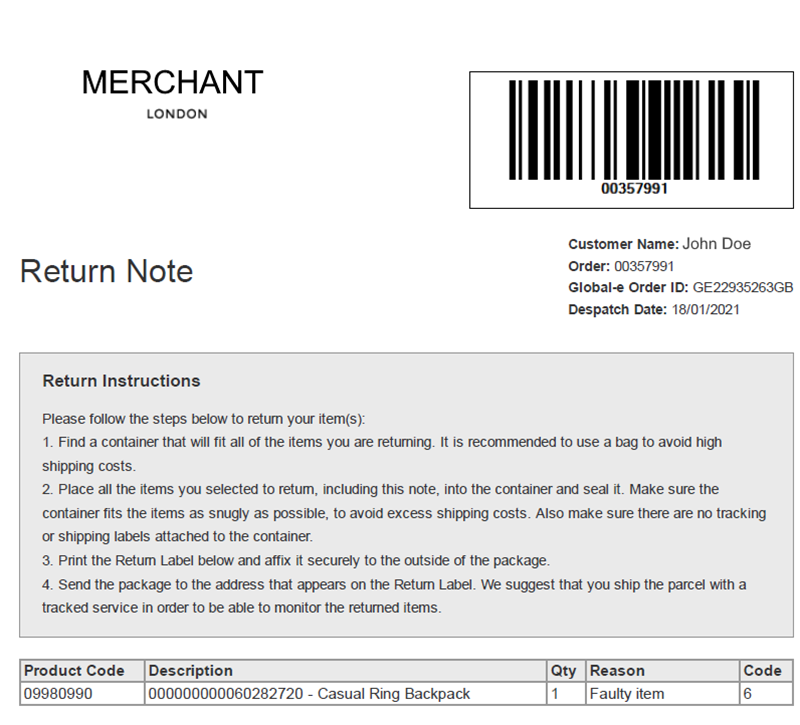
This section shows an example of an RMA for goods returned to the store. The RMA consists of an RMA Label and RMA Note.
Return Note
The Return Note shows the items that the buyer selected on the Returns Portal (in this example, one casual Ring Backpack).
Return Label
Note the RMA Number on the Return Label.
Return Note and Label Sent by Email
Returned Items
Item | Description | Qty | Reason |
---|---|---|---|
111200012001 | Summer straight-fit shorts | 1 | Wrong size |
RETURN LABEL
RMA Number
Order: 00007110 GE118714TS
DELIVERY REFERENCE: 45678221
From {FirstName LastName} {Address 1} {Address 2} {City}, {Zip} {State} {Country} | To {Merchant Return Name} {Merchant Return Address 1} { Merchant Return Address 2} { Merchant Return City}, { Merchant Return Zip} { Merchant Return State} { Merchant Return Country} |