Manage your Emails
This procedure assumes that you have already created your HTML template and Text Resources.
To manage your emails:
Log in to the Global‑e Merchant Portal.
Go to Configuration > Email Management.
The Email Management screen opens.
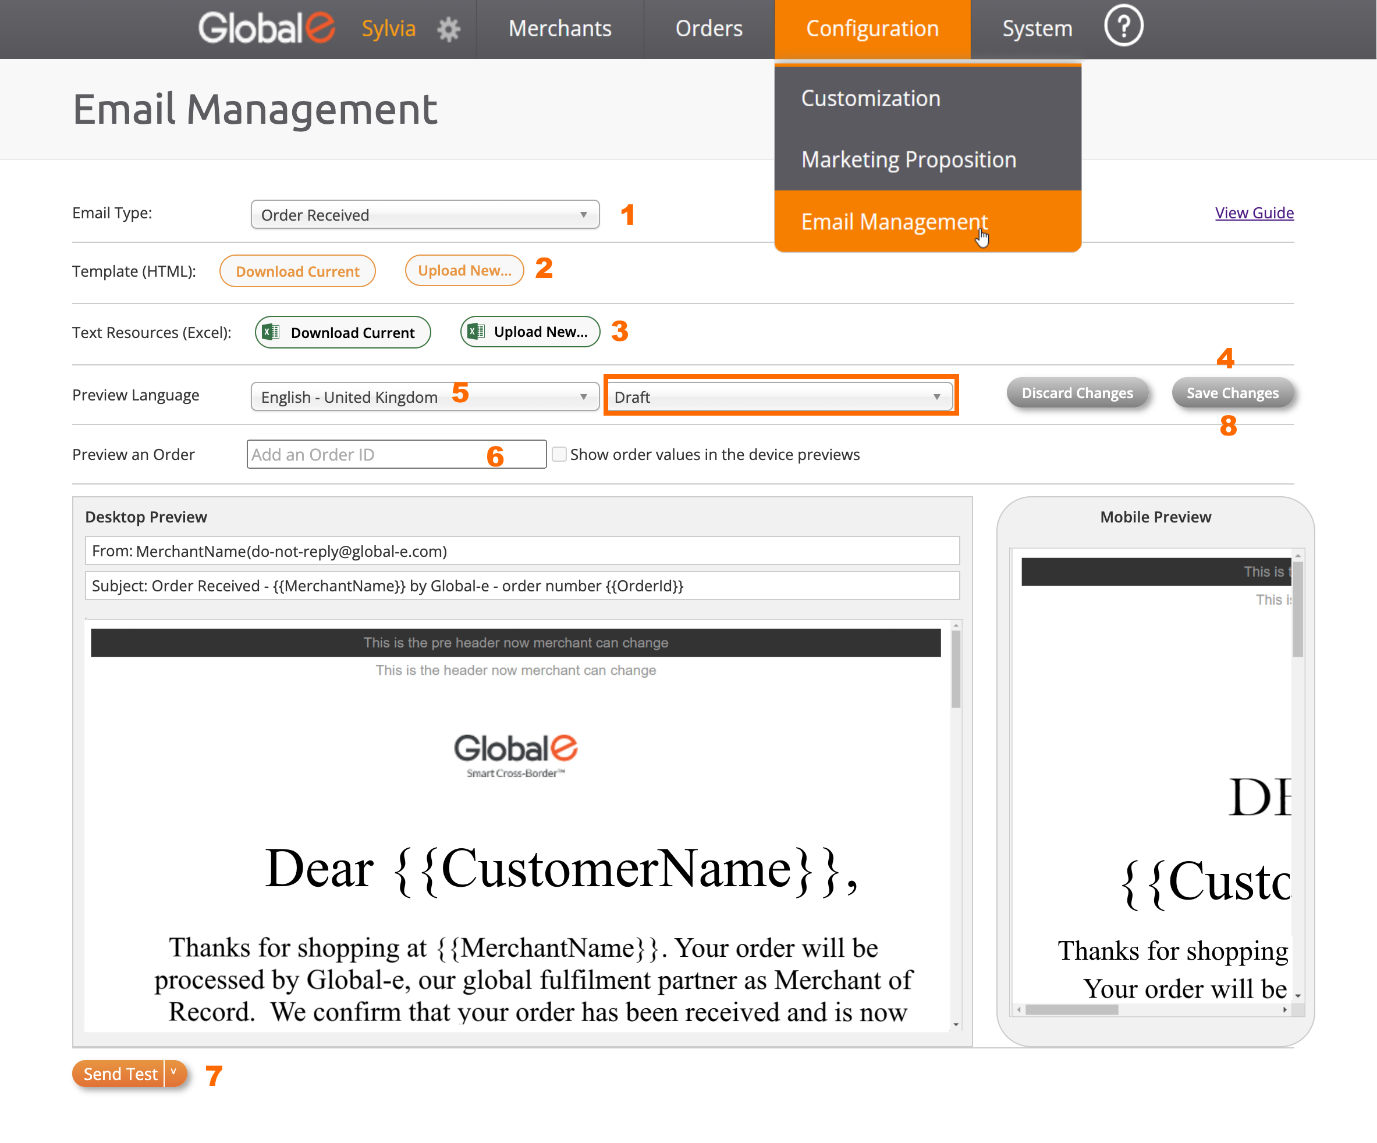
Set up and manage your email template, as detailed in the screen capture above and in the following table.
Step | For more information | |
|---|---|---|
Step 1 | Select the Email Type you wish to customize from the drop-down menu. | |
Step 2 | Upload the HTML template you have created: Click Upload New and select your HTML file. | |
Step 3 | Upload the new Text Resources: Click Upload New and select your Text Resources file (Excel). | |
Step 4 | Preview your draft template in the preview area: Click Save Changes. (Make sure you are in draft mode). Note that, when switching from Draft mode to Publish mode, the Save Changes button switches to a Publish button [8]. | |
Step 5 | Preview your email language: Select the desired language from the drop-down menu. | |
Step 6 | Preview an order as part of your email template: Enter the order ID | |
Step 7 | Test your Draft or Publish template before publishing it to Global‑e: Click Send Test and fill out the Send Test email form. - OR – Select Send for a quick send (if you have already filled out the form). | |
Step 8 | Publish your changes: Select the Publish mode and click Publish Changes. | |
Optional | Unpublish your changes |
[1] Email Type
Select the Email Type you wish to customize from the drop-down menu.
See the list of email types here, Global‑e Default HTML Template.
All email transactions are supported.
[2] HTML Template
This section provides instructions on how to create or modify your HTML template.
Create your HTML Template
To create your HTML template:
Write the content and design your HTML template using a tool of your choice.
Add all the mandatory text resources at the correct location, as defined in the TextResources file.
When done, click Upload New to upload your HTML template.
Click Upload New to upload the text resources file have created (see Create your Text Resources File
Click Save Changes and preview your draft.
Example:

Modify your HTML Template
To modify your HTML Template:
Click Download Current HTML template.
Modify the HTML text using a tool of your choice.
Note that if you modify the HTML text and you do not include that new text with its translation in the text resources file, the text will not be translated.
Make sure you have included all the mandatory text resources at the correct location, as defined in the TextResources file.
Save your file as HTML.
When done, click Upload New to upload your HTML template.
[3] Text Resources
TextResources are the strings that are included in the placeholders within your email template. They are displayed in curly brackets.
When you create or modify text resources in your email template, make sure that all mandatory text resources are included in your email and formatted correctly.
Create your Text Resources File
To create your Text Resources file:
Create your text resources file by using the format and example TextResources file.
Make sure to add all the mandatory text resources as defined in the TextResources file.
Important
By default, you must define the language of all text resources in English.
In the text resources file, the column "English - United Kingdom" must always contain text in English. This text is used as a basis for the translation to other languages.
Save your file as Excel.
When done, click Upload New to upload your TextResources file.
Click Save Changes.
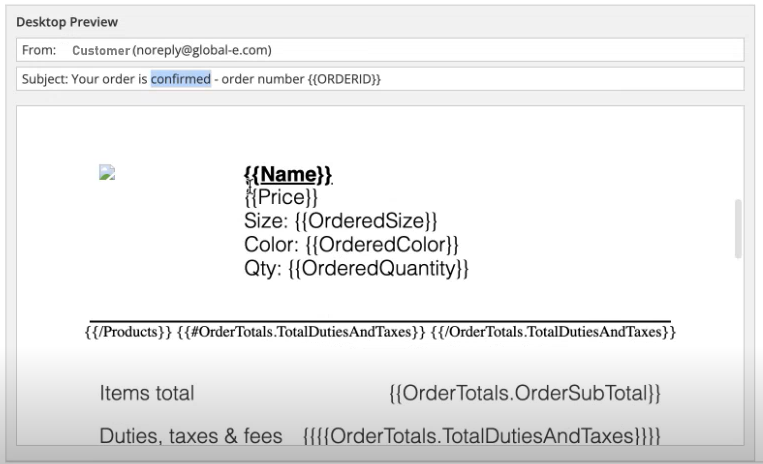
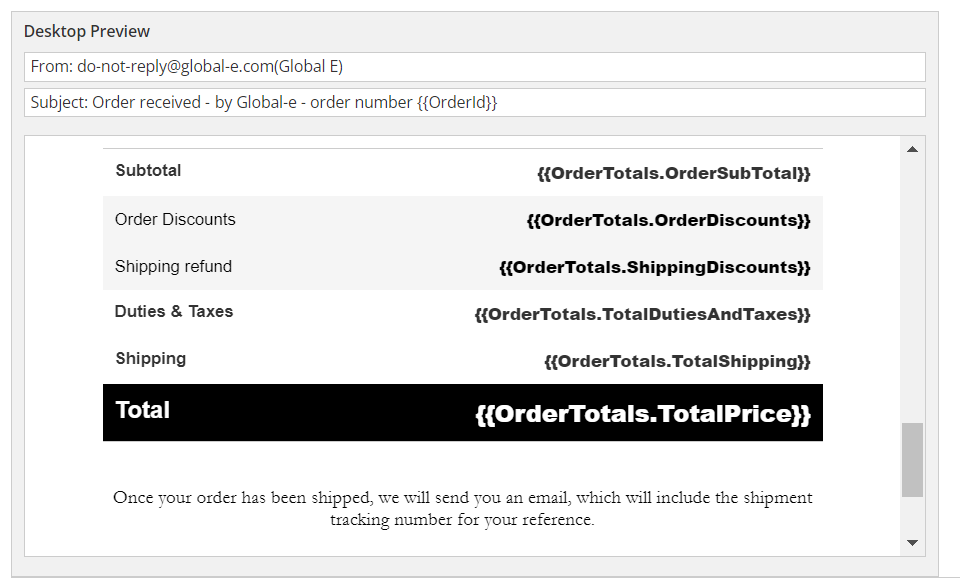
After uploading your text resources, if you have included the text resources in your HTML Template (see [2] HTML Template,) you can preview your email with the placeholders of the text resources.
Example:
See:
Placeholders for the list of supported placeholders.
Preview an Order to view how the template with the placeholders converts to actual data.
Modify Text Resources
This section assumes that you have previously uploaded your text resources file. See Create your Email Template and Text Resources.
Important
By default, the language of all text resources is set to English United Kingdom. In the text resources file, the column English - United Kingdom must always contain text in English. This text is used as a basis for the translation to other languages.
To modify a Text Resource:
Click Download Current text resources file.
To modify English Text Resources, modify the text in the column English – United Kingdom.
To modify Text Resources in Other Languages:
Translate the TextResource you have modified under the column English - United Kingdom to the target language.
Add the translation of each text resource in the corresponding language column and row (cell).
Click Upload New to upload your file.
Add a New Text Resource
Important
By default, the language of all text resources is set to English United Kingdom. In the text resources file, the column English - United Kingdom must always contain text in English. This text is used as a basis for the translation to other languages.
To add new Text Resources:
In your HTML template, add the new text resource at the correct location. For example:
{{TR_NewSaltutation}}In your TextResources Excel:
Add a new row for the new text resource.
Mandatory: Add a description in the column English – United Kingdom.
Note: English UK must be filled as it is used as the basis for translations.
To add Other Languages:
Make sure you have added a column for the target language.
Translate the text you have added under the English - United Kingdom column to the target language.
Add the translation of each text resource in the corresponding language column and row (cell).
When done, click Upload New to upload your TextResources file.
HTML template:
Make sure you have added all the required TextResources in your HTML template.
When done, click Upload New to upload your HTML template.
Remove a Text Resource
To remove a text resource, you must remove the resource from both:
The HTML template
The TextResource Excel
[4] Save your Template and Preview your Changes
To save your template and preview your changes:
Select Draft or Publish mode, as required.
When you are satisfied with your modifications, click Save Changes. and preview your changes.
If you are in draft mode, you can edit the draft at a later stage.
Optional: Click Discard Changes if you do not wish to save your changes.
Example:
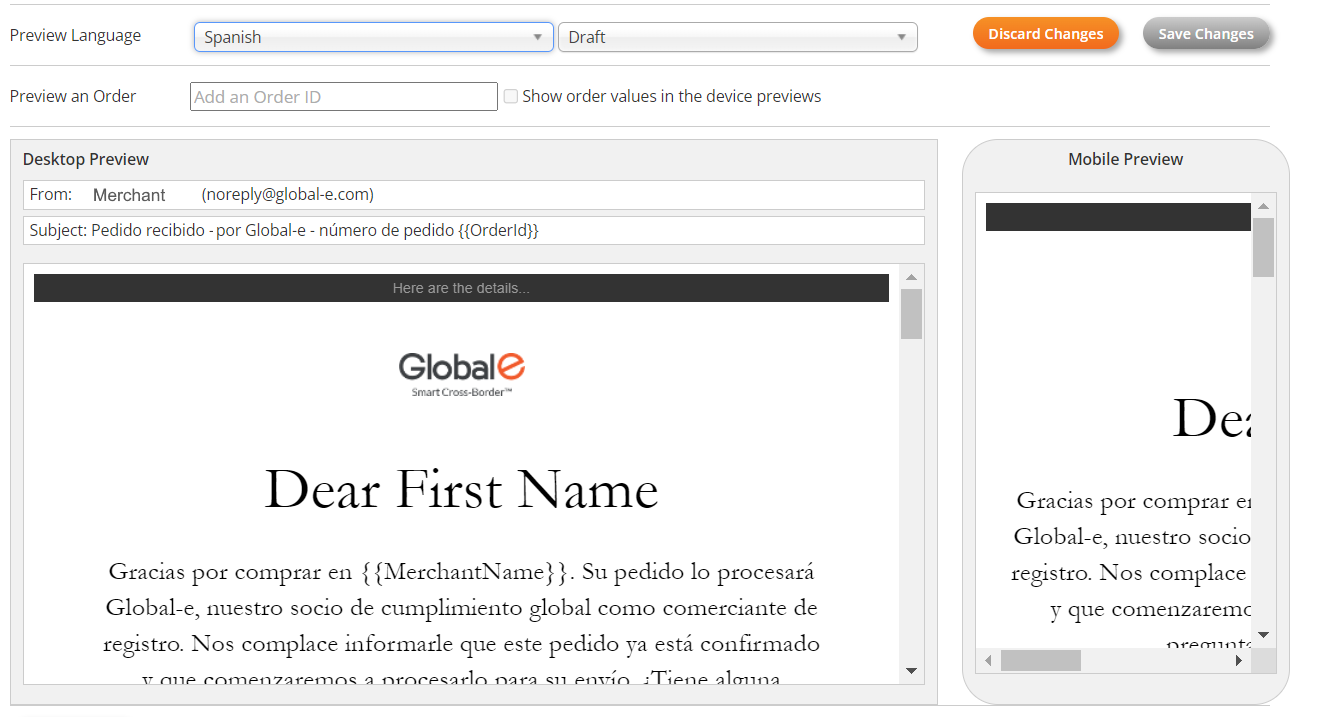
[5] Preview the Language
To preview the language:
Select Draft or Publish mode, as required.
Select the language you wish to preview.
Notes:
You must have translated the text in the TextResources Excel file for the text to be displayed in the selected language.
Static text is text that has not been defined as a Text Resource. Static text is not translated or modified. If you have included static text in your HTML template and you wish to translate it, you must first define it as a text resource in the TextResources (Excel), provide the translation, and upload your modified text resource.
You can modify the Sender and the Subject line in the text resources.
Example:
In this example, the email was translated into Spanish, but "Dear First Name" has not been translated since it is static text, and the translation was not defined in the TextResources file.
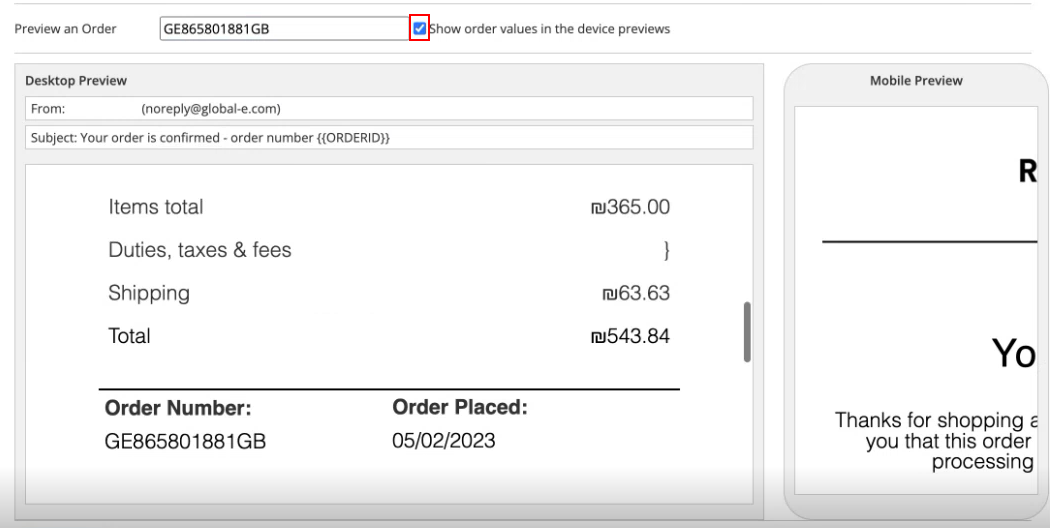
[6] Preview an Order
To preview an order:
Select Draft or Publish mode, as required.
In Preview an Order, enter the order ID or the Merchant ID.
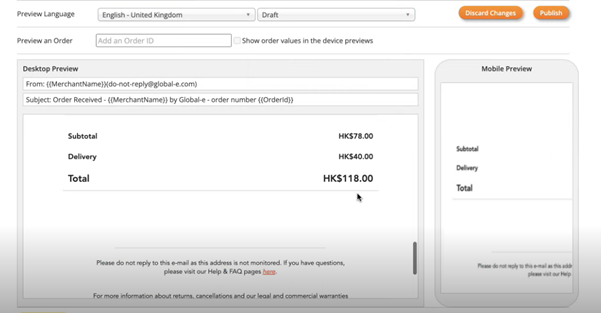
Select Show Order Values in the device previews.
This option toggles the preview between the placeholders and the real data.
When selecting this option, the preview area shows the template with the data taken from the real order. The placeholders in the template are converted to actual data.
Example:
[7] Test your Setup - Send a Test Email
To test your setup:
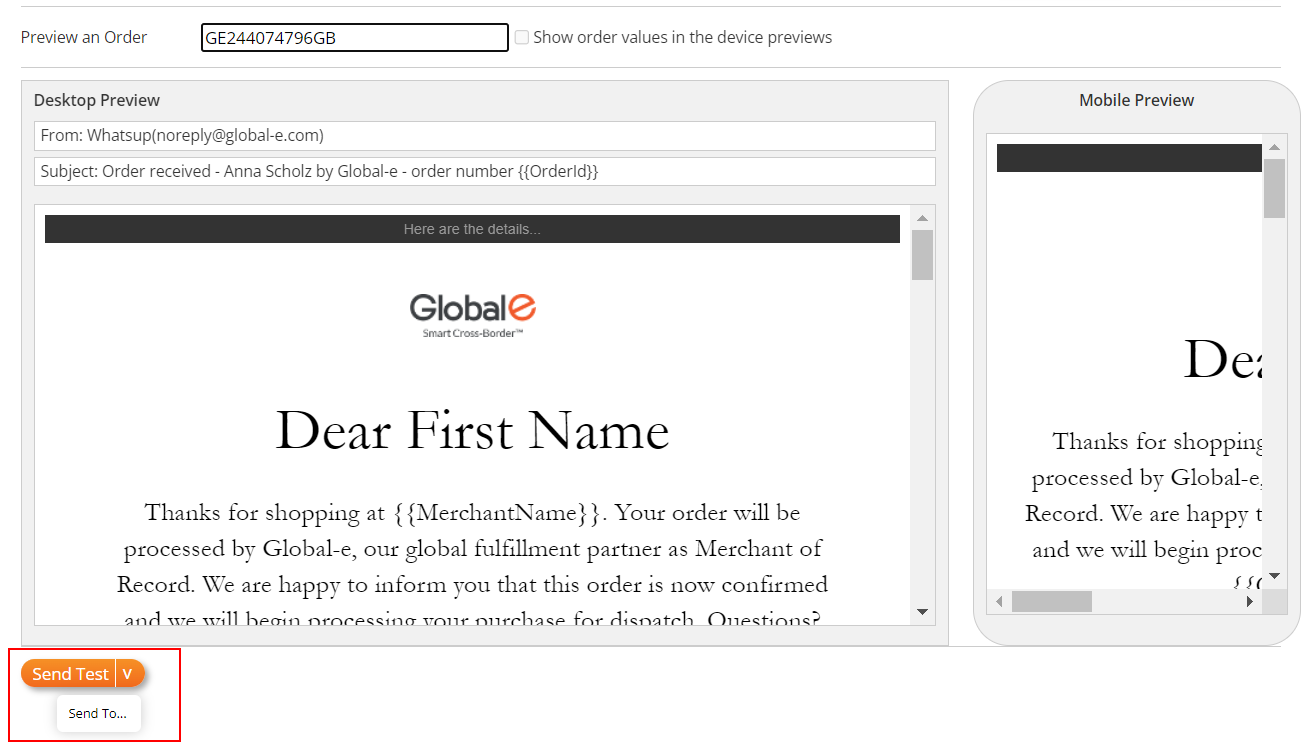
Click Send Test.
The Send test email box opens.
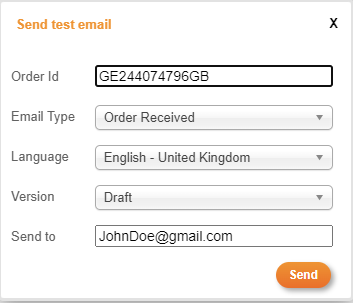
In the Send test email box:
Enter the Order ID.
Select the Email Type.
Select the language.
Select the Version: Draft or Publish
Enter the email address to which the test should be sent.
Click Send.
A confirmation message is displayed.
Open the email and review it.
To perform a "quick send":
If your email management screen already contains the above information, click the down arrow and select Send To.
A confirmation message is displayed and by default, the email test is sent to you (the logged-in user's email address).
[8] Publish your Changes
When you are satisfied with the results, you can publish your changes.
Click Publish to submit your final changes to Global‑e.
A confirmation message is displayed.
Your published template is uploaded to the Global-e system. This is the email template that Global-e will be using for your email templates from now on.
Note
Clicking Publish uploads the final email template (HTML) to the Global‑e Production whereas Save Changes saves your draft for further editing.
Revert your Published Changes (Optional)
After publishing, you can click Unpublish to revert to the default Global‑e template.