Check In Incoming Orders
| (Duration: 3:04) |
Check In Parcels Using the Parcel Code (Standard Process)
When receiving an order, perform the following procedure for each parcel.
For each parcel in the order, repeat the following procedure.
To check in a parcel with the parcel code:
From the Store Orders menu, select Check in.
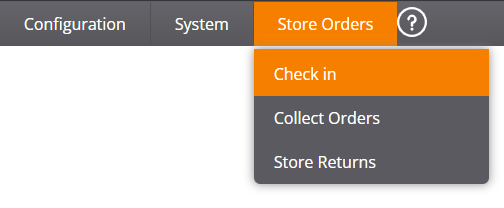
Navigating to the Check-in Orders Screen
The Check-in Orders screen opens.

Check-in Orders Screen
On the store label, locate the parcel code.
The parcel code consists of a bar code and a number (generally under the bar code).
See the example in Figure: Check-in Orders Screen (above) and details in the Store Label.
Scan the bar code – or –
Copy the parcel code number (from under the bar code) and type it in the field Enter parcel code.

Enter the Parcel Code
Before checking in, inspect the parcel.
If the parcel is damaged, see Recording a Damaged Parcel.
If the parcel is intact, click Check in Parcel.
The confirmation message Parcel [Parcel Code] added successfully appears at the bottom of the screen.
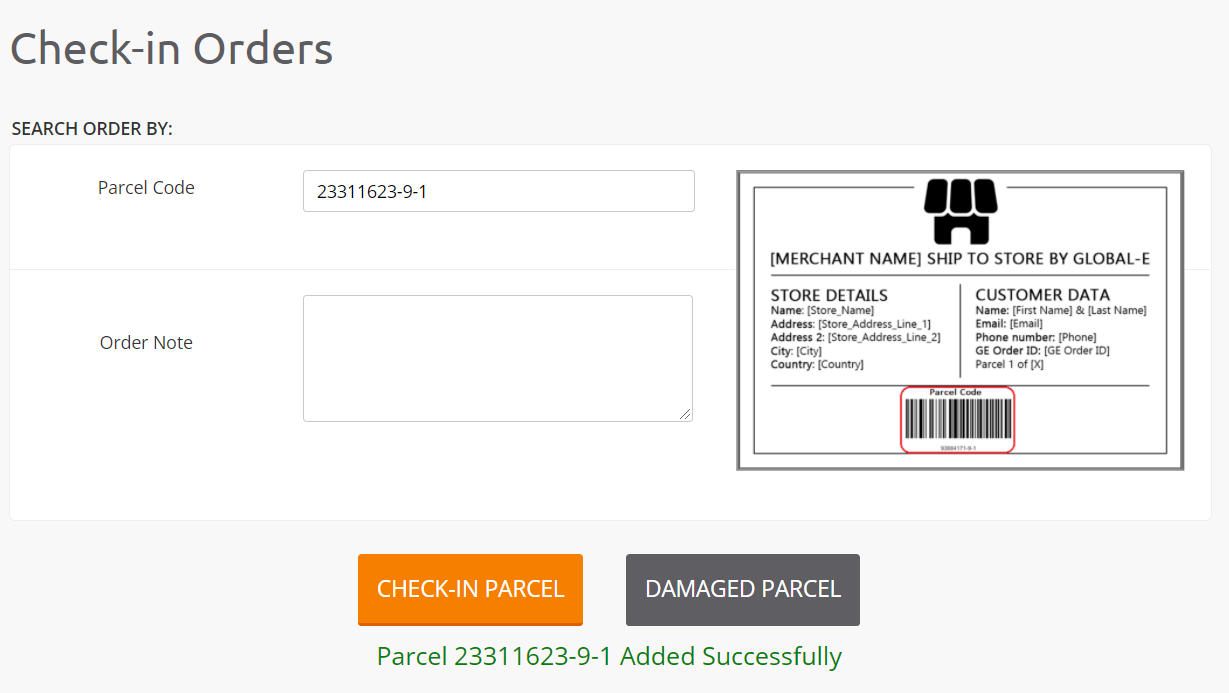
Check-in Screen – Parcel Added Successfully
The parcel has now been checked into the Global-e system; it is used to recognize the order’s specific parcel.
The customer has been notified.
Note
If the parcel check-in fails (for example, the parcel ID was not found) contact Global‑e’s customer support. See Contact Details and Escalation Process.
In the Global‑e system, the status for this order is set to Delivered to Store.
Check In Parcels Using the Tracking Number
If this configuration is set up, instead of using the parcel number, you can check in orders to the Global‑e Merchant Portal by using the tracking number displayed on the parcel’s Shipping Label.
For each parcel in the order, repeat the following procedure.
To check in a parcel using the Tracking Number:
From the Store Orders menu, select Check-in (see Figure: Navigating to the Check-in Orders Screen).
The Check-in Orders screen opens.
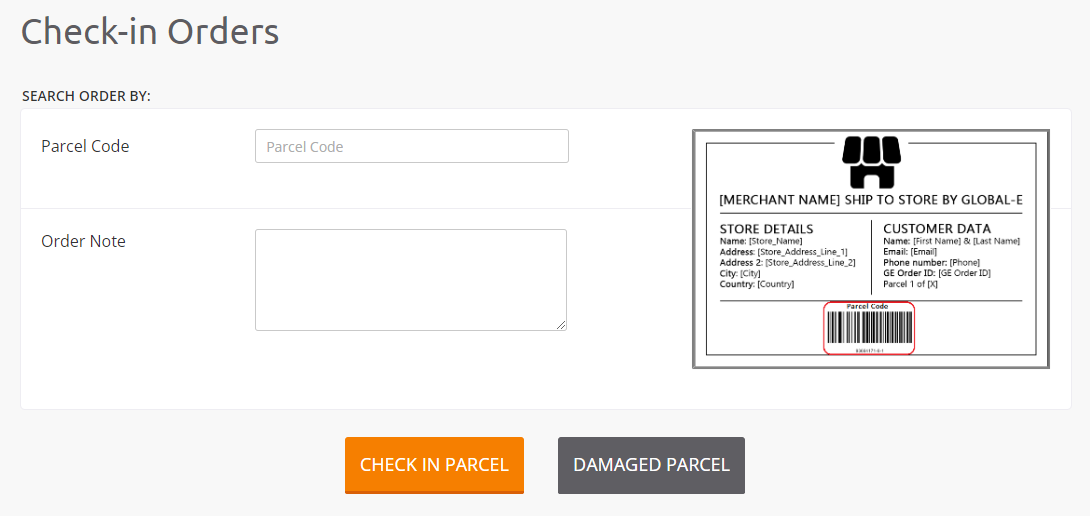
Check-in Orders Screen with Tracking Number
On the shipping label, locate the tracking number (generally under the bar code). See Shipping Label.
On your screen, enter (type) the Parcel’s Tracking Number.

Enter the Parcel Tracking Number
Before checking in the parcel, inspect it:
If the parcel is damaged, proceed with Recording a Damaged Parcel.
If the parcel is intact, click Check in Parcel.
The parcel has now been checked into the Global-e Merchant Portal.
Make sure to repeat this procedure for each parcel.
Note
If the parcel check-in fails (for example, if the parcel ID was not found), contact Global‑e’s customer support.
Once all parcels have been checked into the system:
The Global‑e Merchant Portal sends (automatically) an email to the customer stating that their order is ready for pick-up.
The Global‑e Portal status for this order is set to Delivered to Store.
Record a Damaged Parcel
If the parcel is visibly damaged, open, or otherwise unfit to present to the customer, perform the following procedure.
To record a damaged parcel:
In the Check in Orders Screen, enter the parcel code.
In the field Add Order Annotation, add a description of the issue.
Click DAMAGED PARCEL.
The entire order is recorded as damaged.
Prepare the parcel to be returned to the Merchant. See Preparing the Parcels for Return Shipment to the Merchant.
Note
Note: Make sure to include this parcel in the next consignment box to be returned to the Merchant.
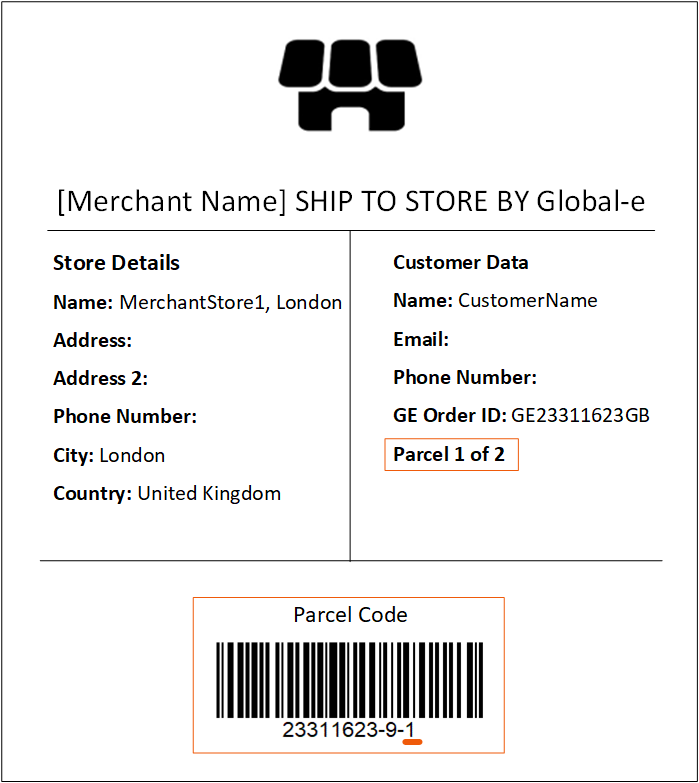
Examples of Documents: Parcels Shipped to Store
The Store Label and Shipping label are applied to each parcel that arrives at the store. This section details the information on these labels to check-in orders so that you can perform the check-in accurately into the Global-e Merchant Portal.
Store Label
A store label is mandatory on each parcel that implements the standard process. See Checking in Parcels Using the Parcel Code (Standard Process).
The store label includes:
The name of the sender (Merchant)
The store’s details
The customer details
The Global‑e Order ID
A bar code consisting of the parcel code and underneath, the parcel code number.
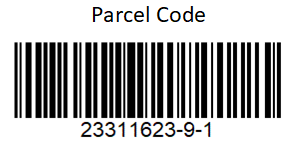 |
Parcel Code
Note that the presentation of the Store label varies according to the Merchant template.
Example:
In the following example, order GE23311623GB contains two parcels. Each parcel bears a store label with a unique code number identifying the parcel
 |
Label and Parcel Code
 |
Label and Parcel Code
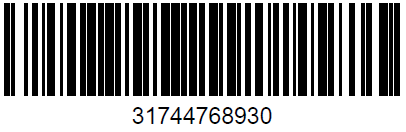
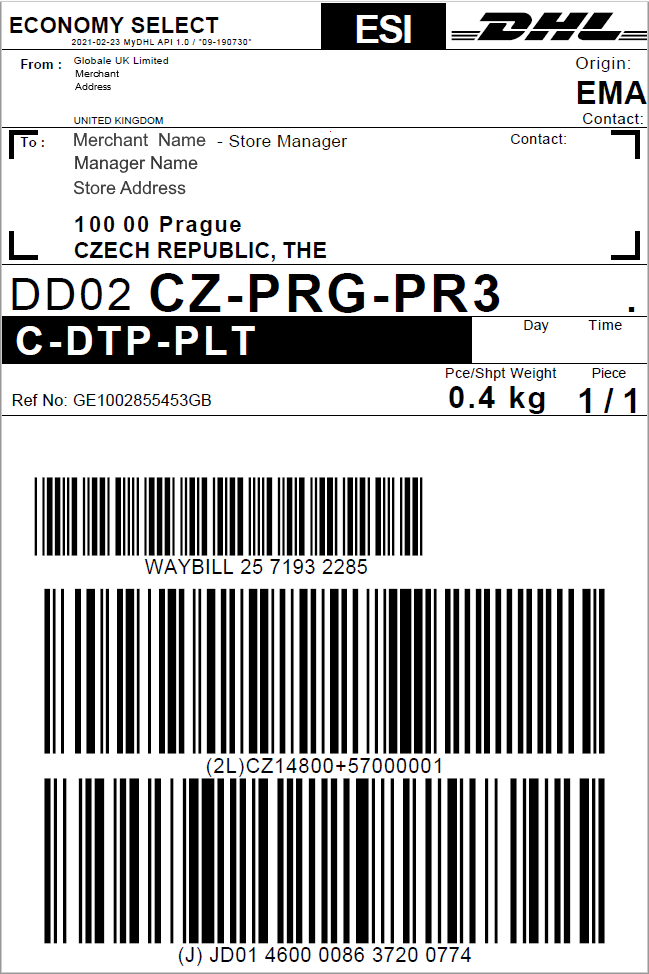
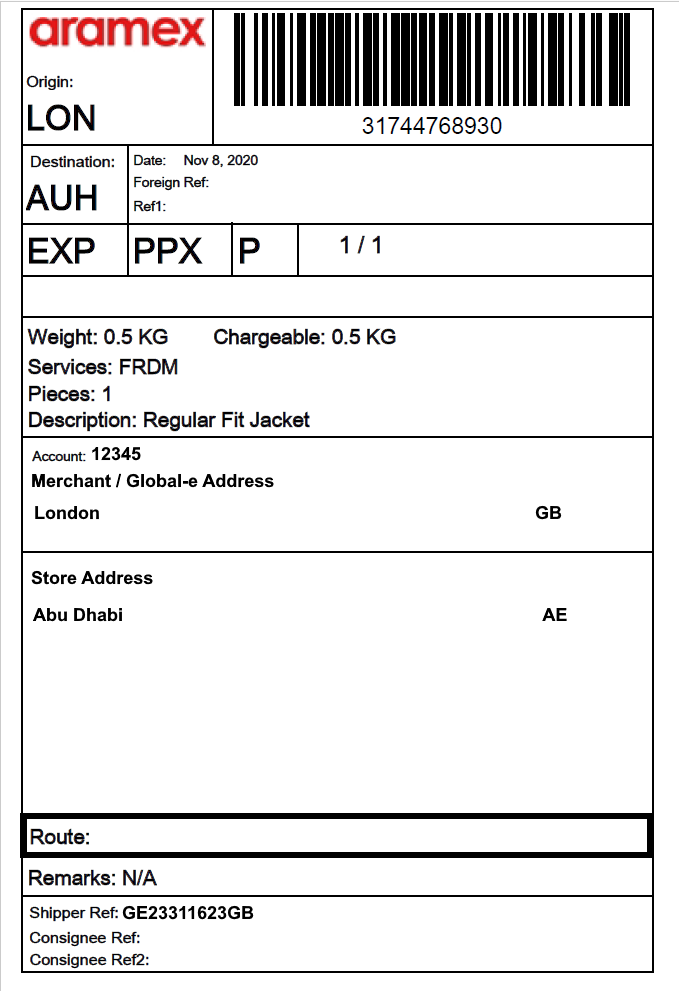
Shipping Label
The shipping label is mandatory on all parcels.
The shipping label includes a bar code and underneath (generally), the tracking number.
 |
Tracking Number
The following figure shows examples of shipping labels.
 |
Examples of Shipping Labels and Tracking Numbers