Process a Return to the Store
Processing a return to the store consists of preparing and printing the RMA documents. A customer can return products with or without an RMA.
If a customer returns items without RMA documents or if in the Store Returns Screen the Returns button is not displayed, you (the store user) must create the RMA. See Processing a Standard (Non-RMA) Return.
If a customer presents pre-printed RMA documents, they have already initiated the returns process at home. See Processing an RMA Return.
Process a Standard (Non-RMA) Return
To process a standard return, you must create an RMA:
On the Order line, in the Actions column, click RMA

The Returns Portal screen proceeds to step 2. Select items to return, the current step in the Returns process.
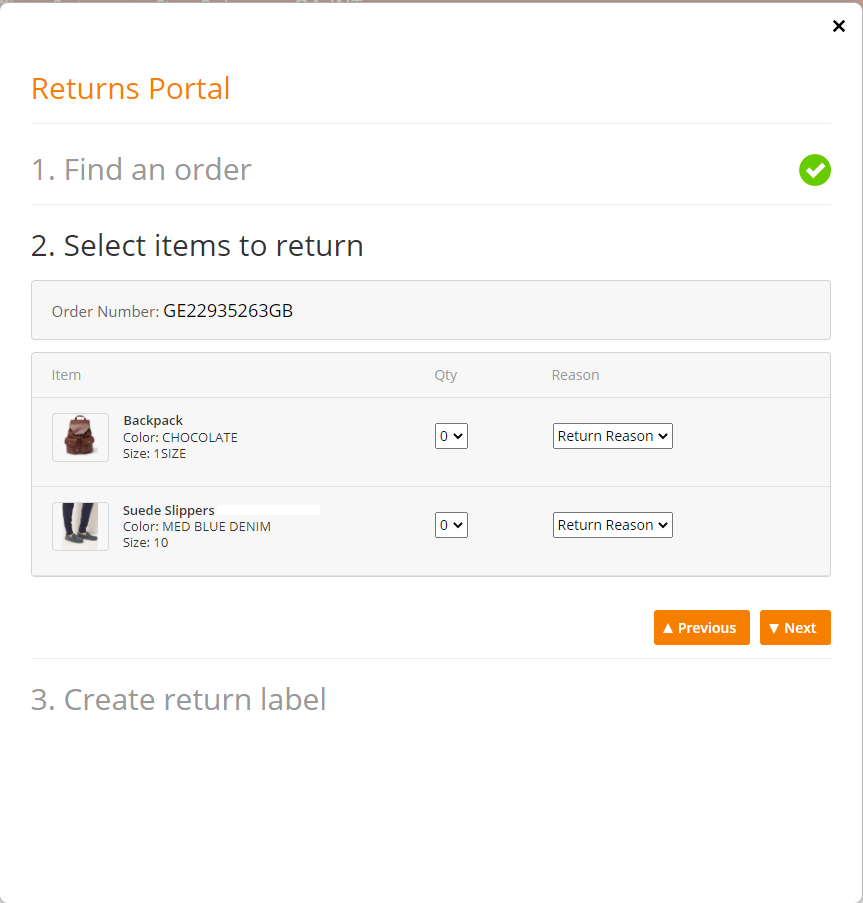
Select the item quantity (Qty) returned by the customer.
Ask the customer the reason for the return.
From the drop-down menu, select the reason for returning the items.
Click Next.
The Returns Portal proceeds to step 3. Create return label.
This area shows the RMA number and provides packing, shipping, and refund information.
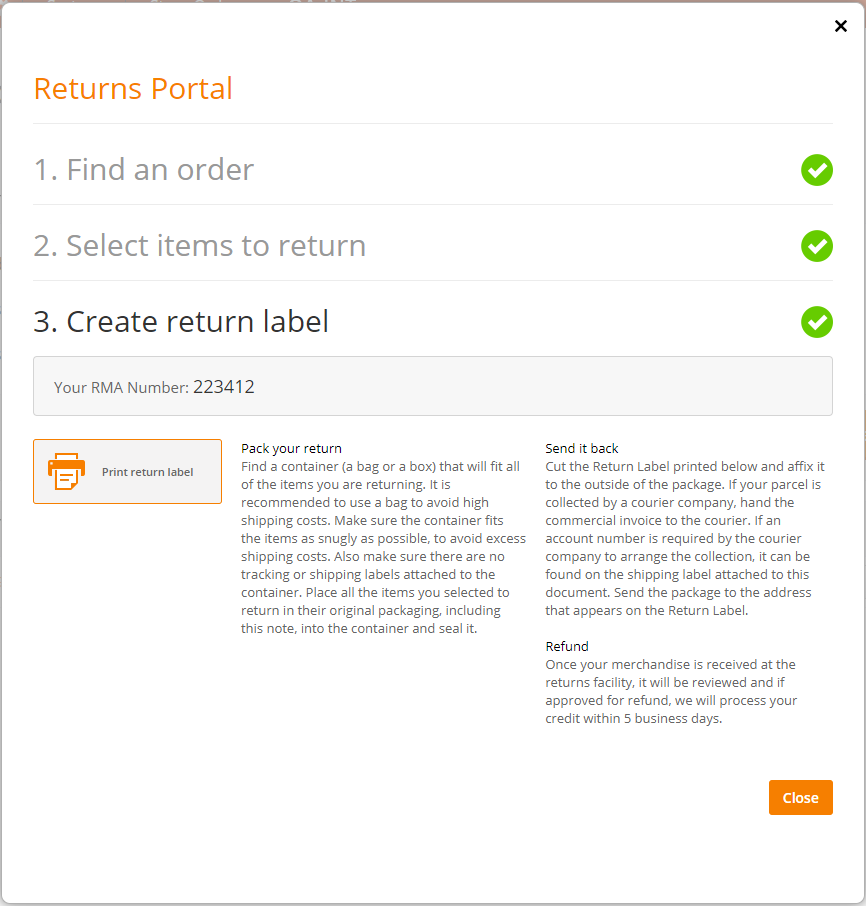
Click Print return label.
The RMA consisting of the Return Label and the Return Note is downloaded in PDF format to your computer.
Send the RMA to the printer.
Prepare the parcel for return to the Merchant:
Pack the items in a parcel together with the printed Return Note and seal it.
Attach the printed Return Label to the parcel.
Place the parcel in the consignment box.
For more information, see Preparing the Parcels for Return Shipment to the Merchant (including the EOD procedure).
Process an RMA Return
If a customer presents the items with a pre-printed RMA, they have already initiated the returns process at home and the RMA is registered in the Global‑e system.
To process a return with an RMA:
In the Store Returns Screen, on the Order row, in the Actions column, click Returns.

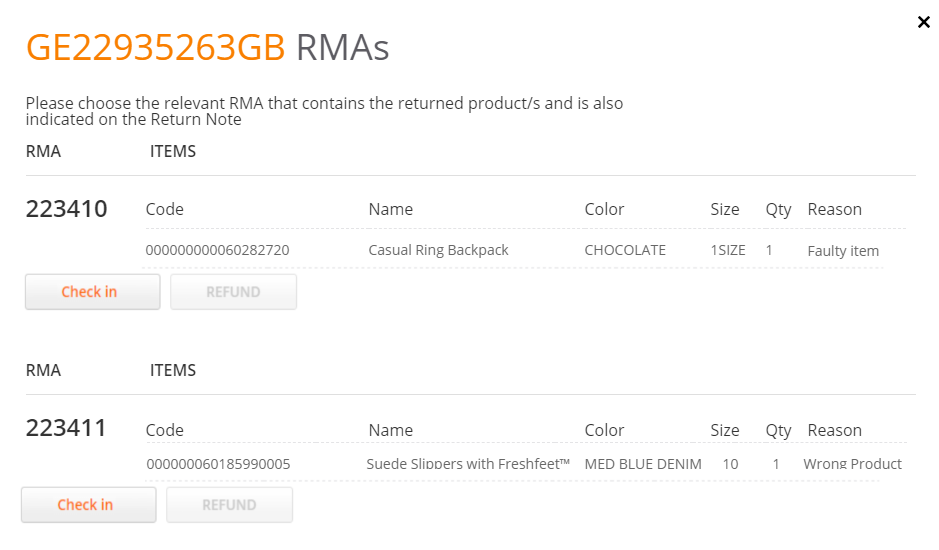
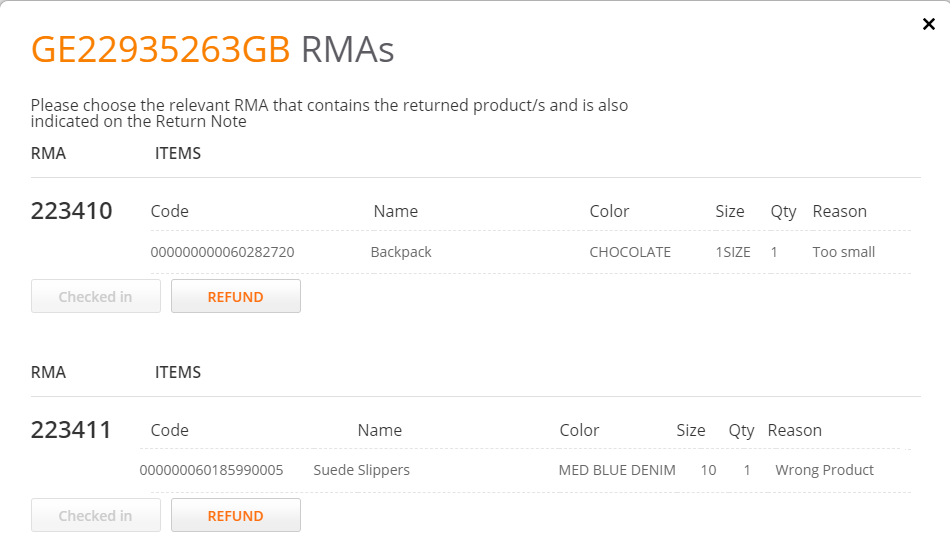
An RMA pop-up associated with the customer opens; this pop-up shows all RMAs that the customer has created at home (after clicking Returns).
Note
Before checking in the return, verify that there is a match between the returned items listed on the Return Note and the RMA screen. See Return Note.
If there is a match, on your screen under the relevant RMA, click Check in.
The items are checked in as a returned item.
Once you checked in, a Refund option is displayed.
Note
The refund option is enabled by default. This option can be disabled upon Merchant's request.
Note
Repeat this procedure for each item that the customer returns.
Prepare the parcel for return to the Merchant:
Pack the items in a parcel together with the printed Return Note and seal it.
Attach the printed Return Label to the parcel.
Place the parcel in the consignment box.
For more information, see Preparing the Parcels for Return Shipment to the Merchant and with the EOD procedure.
Example of an RMA
This section shows an example of an RMA for goods returned to the store. The RMA consists of an RMA Label and RMA Note.
Return Label
Note the RMA Number on the Return Label.
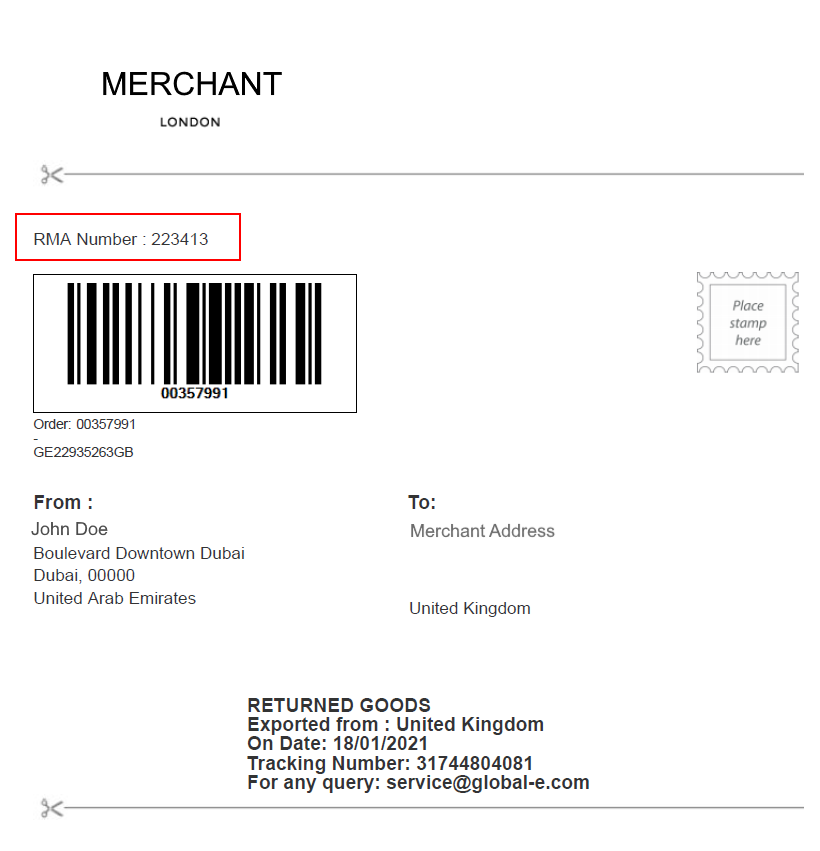
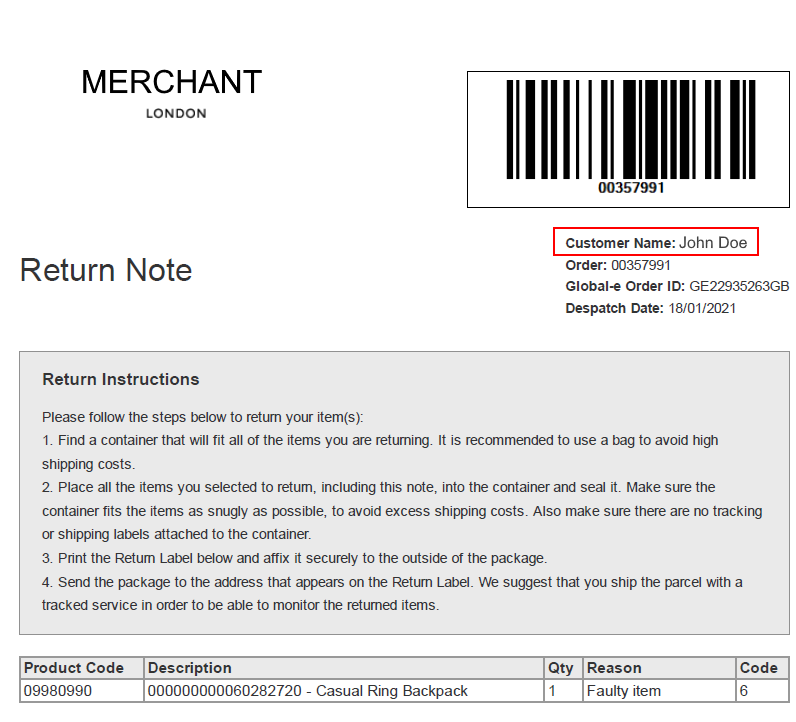
Return Note
The Return Note shows the items that the buyer selected on the Returns Portal (in this example, one casual Ring Backpack).